Introduction
I saw a video on an Amstrad CPC facebook group that I thought was rather amazing, in it was an Amstrad CPC 464 with cards connected to the expansion slot and playing back MIDI music brilliantly, it sounded so cool, I knew I had to try one.
This card is the work of Michael Wessel, who truly loves anything MIDI and is a keen fan of the Amstrad CPC. He started out using an Amiga 500 but later progressed to an Amstrad CPC and was disappointed that there weren’t any decent MIDI alternatives for the CPC, so he created one, the Ultimate CPC MIDI card !
 To follow his GitHub project see here.
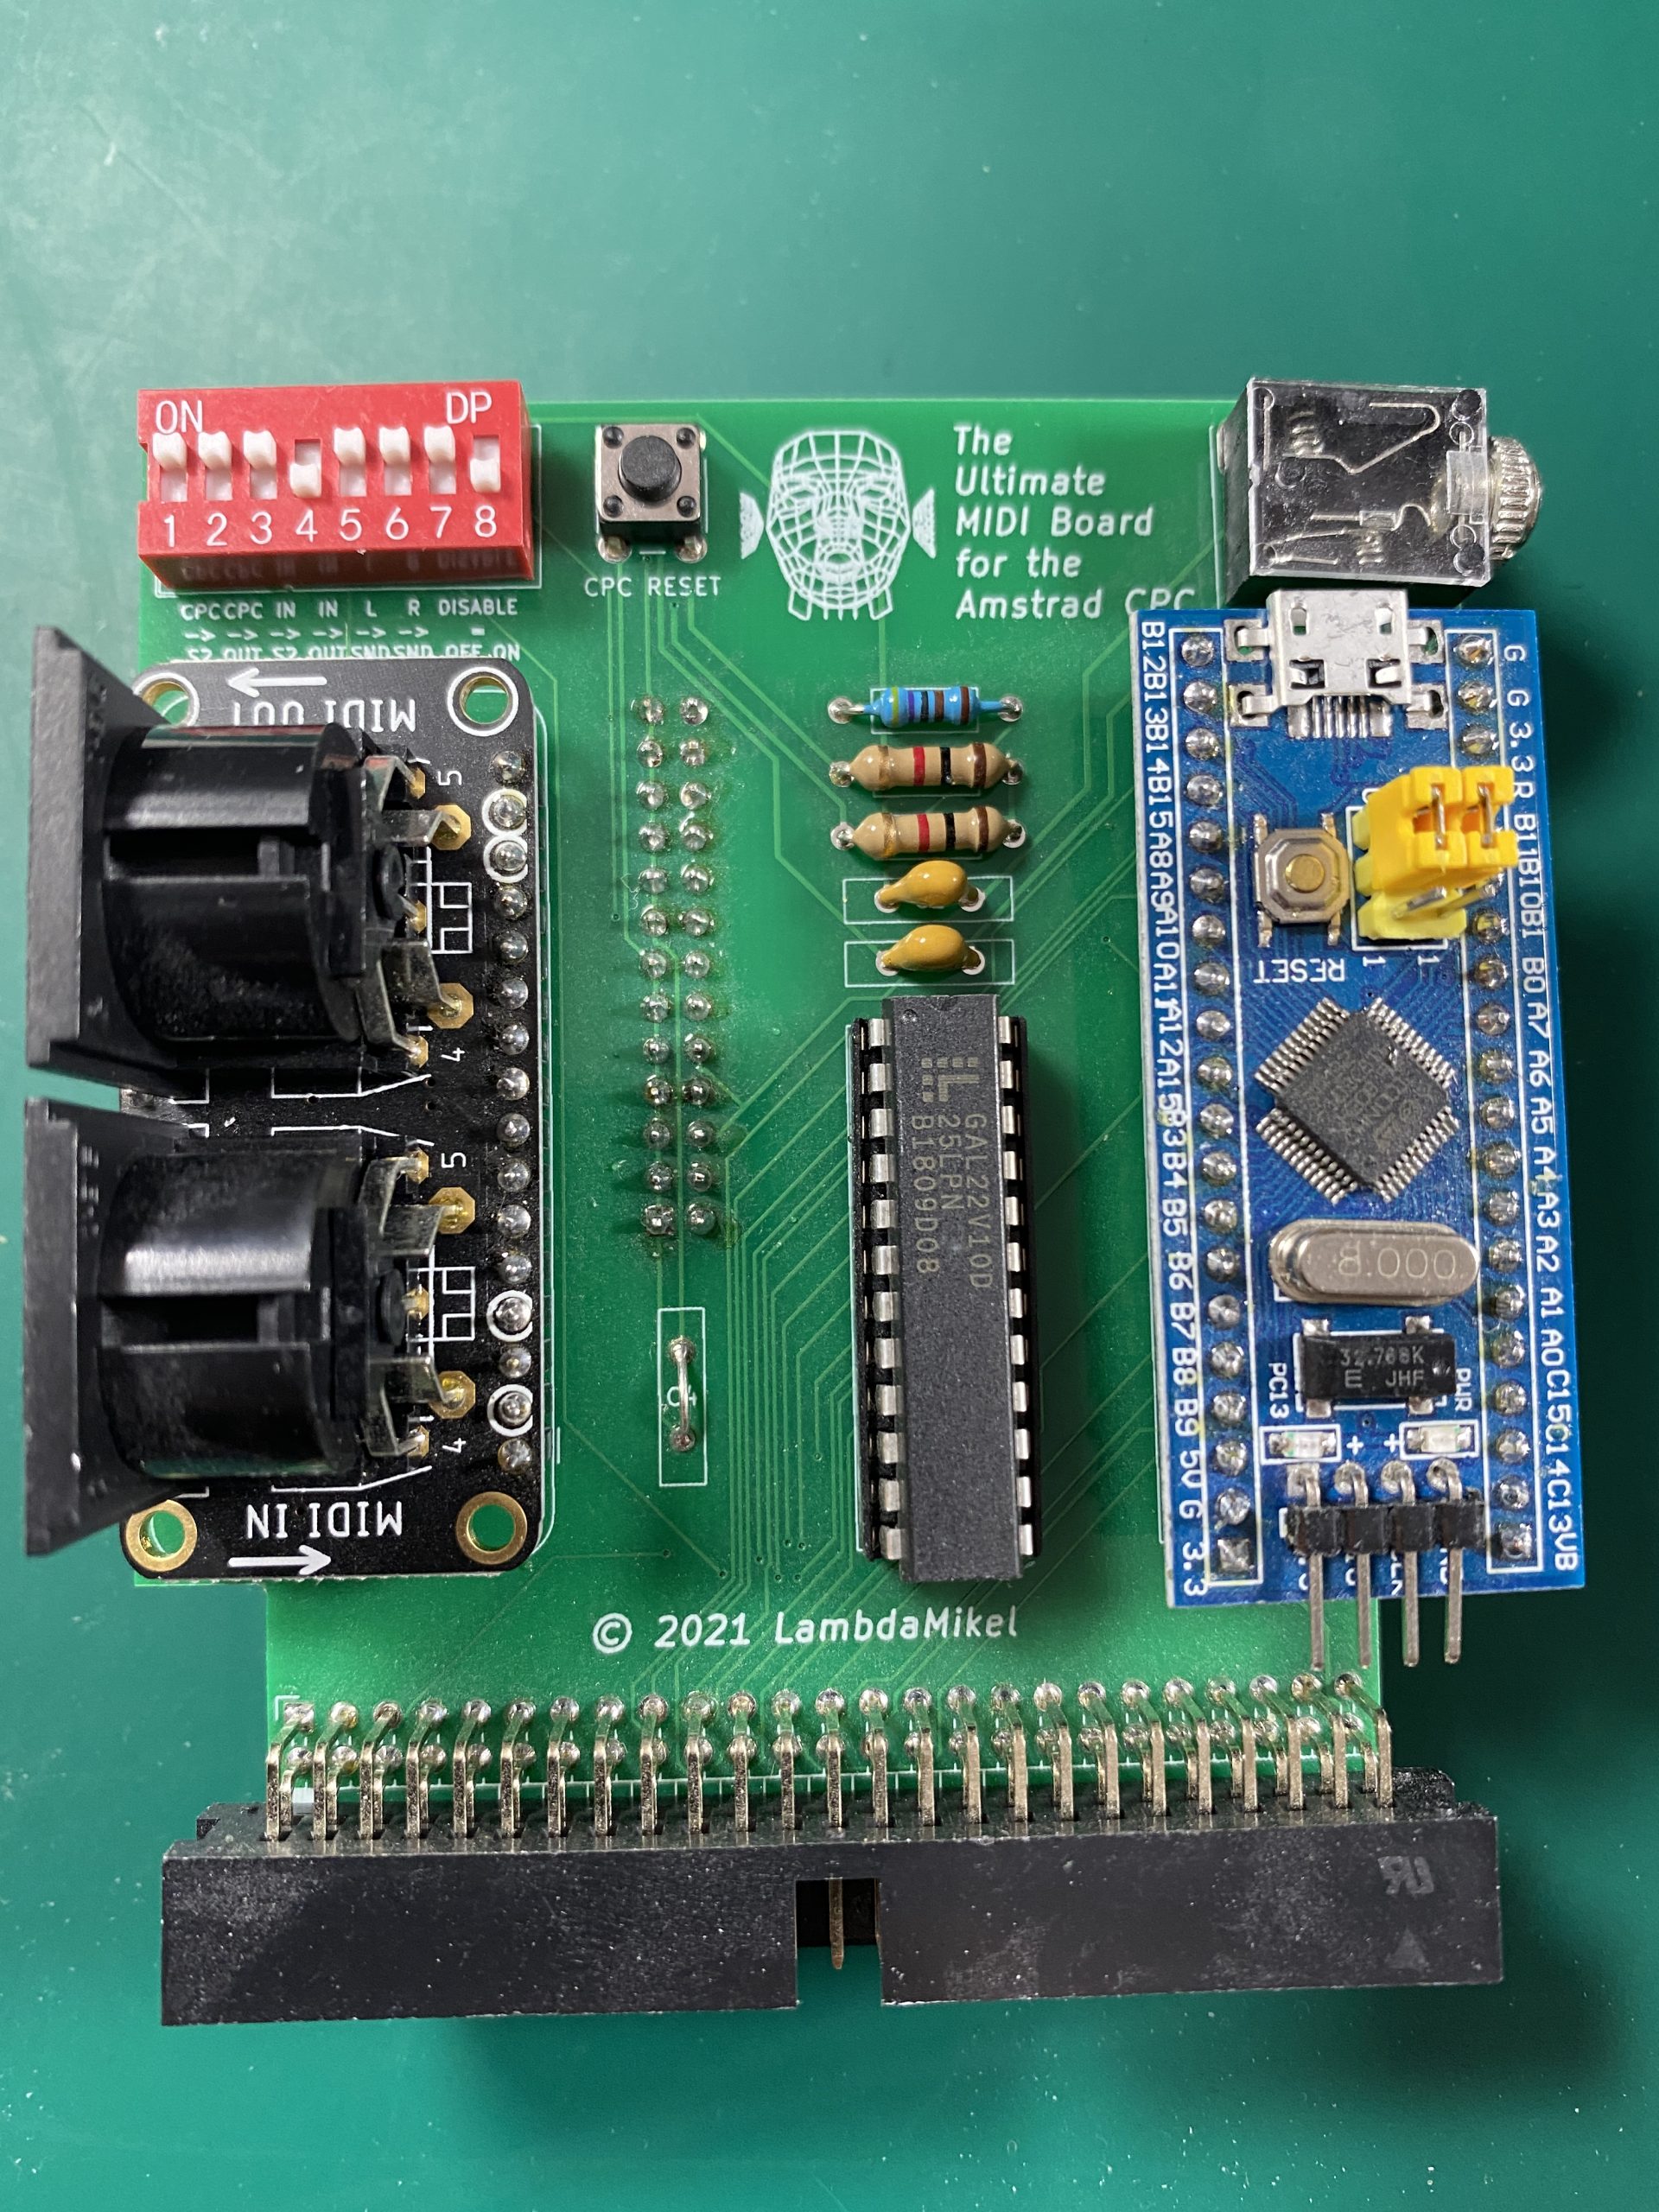
The card is loaded with features and they are listed below.
- CPC MIDI Soundcard using the S2 GM MIDI Module from Serdashop
- CPC can send MIDI data over output port
&FBEEto the S2 - MIDI IN and MIDI OUT via Adadfruit Midifeather (standard MIDI DIN sockets)
- MIDI IN to the CPC: check for new MIDI byte on input port
&FBFEand fetch pending byte from buffer via&FBEE - MIDI soft through: all incoming MIDI data (from CPC or MIDI IN) can be forwarded / relayed to the MIDI OUT socket (“MIDI SOFT THRU”)
- CPC MIDI Synthesizer software in machine code (MIDI INPUT demo)
- CPC GM Drumcomputer software in BASIC (MIDI OUTPUT demo)
- “Lazy engineering”: MX4 compatible CPC extension board using three sockets, one for the Blue Pill, one for the S2, one for the optional Midifeather.
- Only one additional chip required – a GAL22V10 programmed as an address decoder. The Blue Bill does not have enough 5V-compatible GPIO ports to do the decoding fully in sofware
- Everything else is done purely in software – unlike LampdaSpeak, no additional glue logic is required to manage the databus (e.g., no flip flop to latch the databus upon IOWRITE requests, or busdriver to tristate the microcontroller output to the bus upon IOREAD requests). The 72 MHz Blue Pill is fast enough to respond to and manage IO requests and the databus via ISRs (Interupt Service Routines). It was tedious to get the timing of the ISRs right (done by inserting
__asm__("nop")at the right spots), but it works flawlessly by now. - No extra circuitry for Z80 /WAIT management
- Low cost – final PCB will be in the 50 to 60 EUR range
- Very DIY friendly (no SMD, plug and play of standard modules)
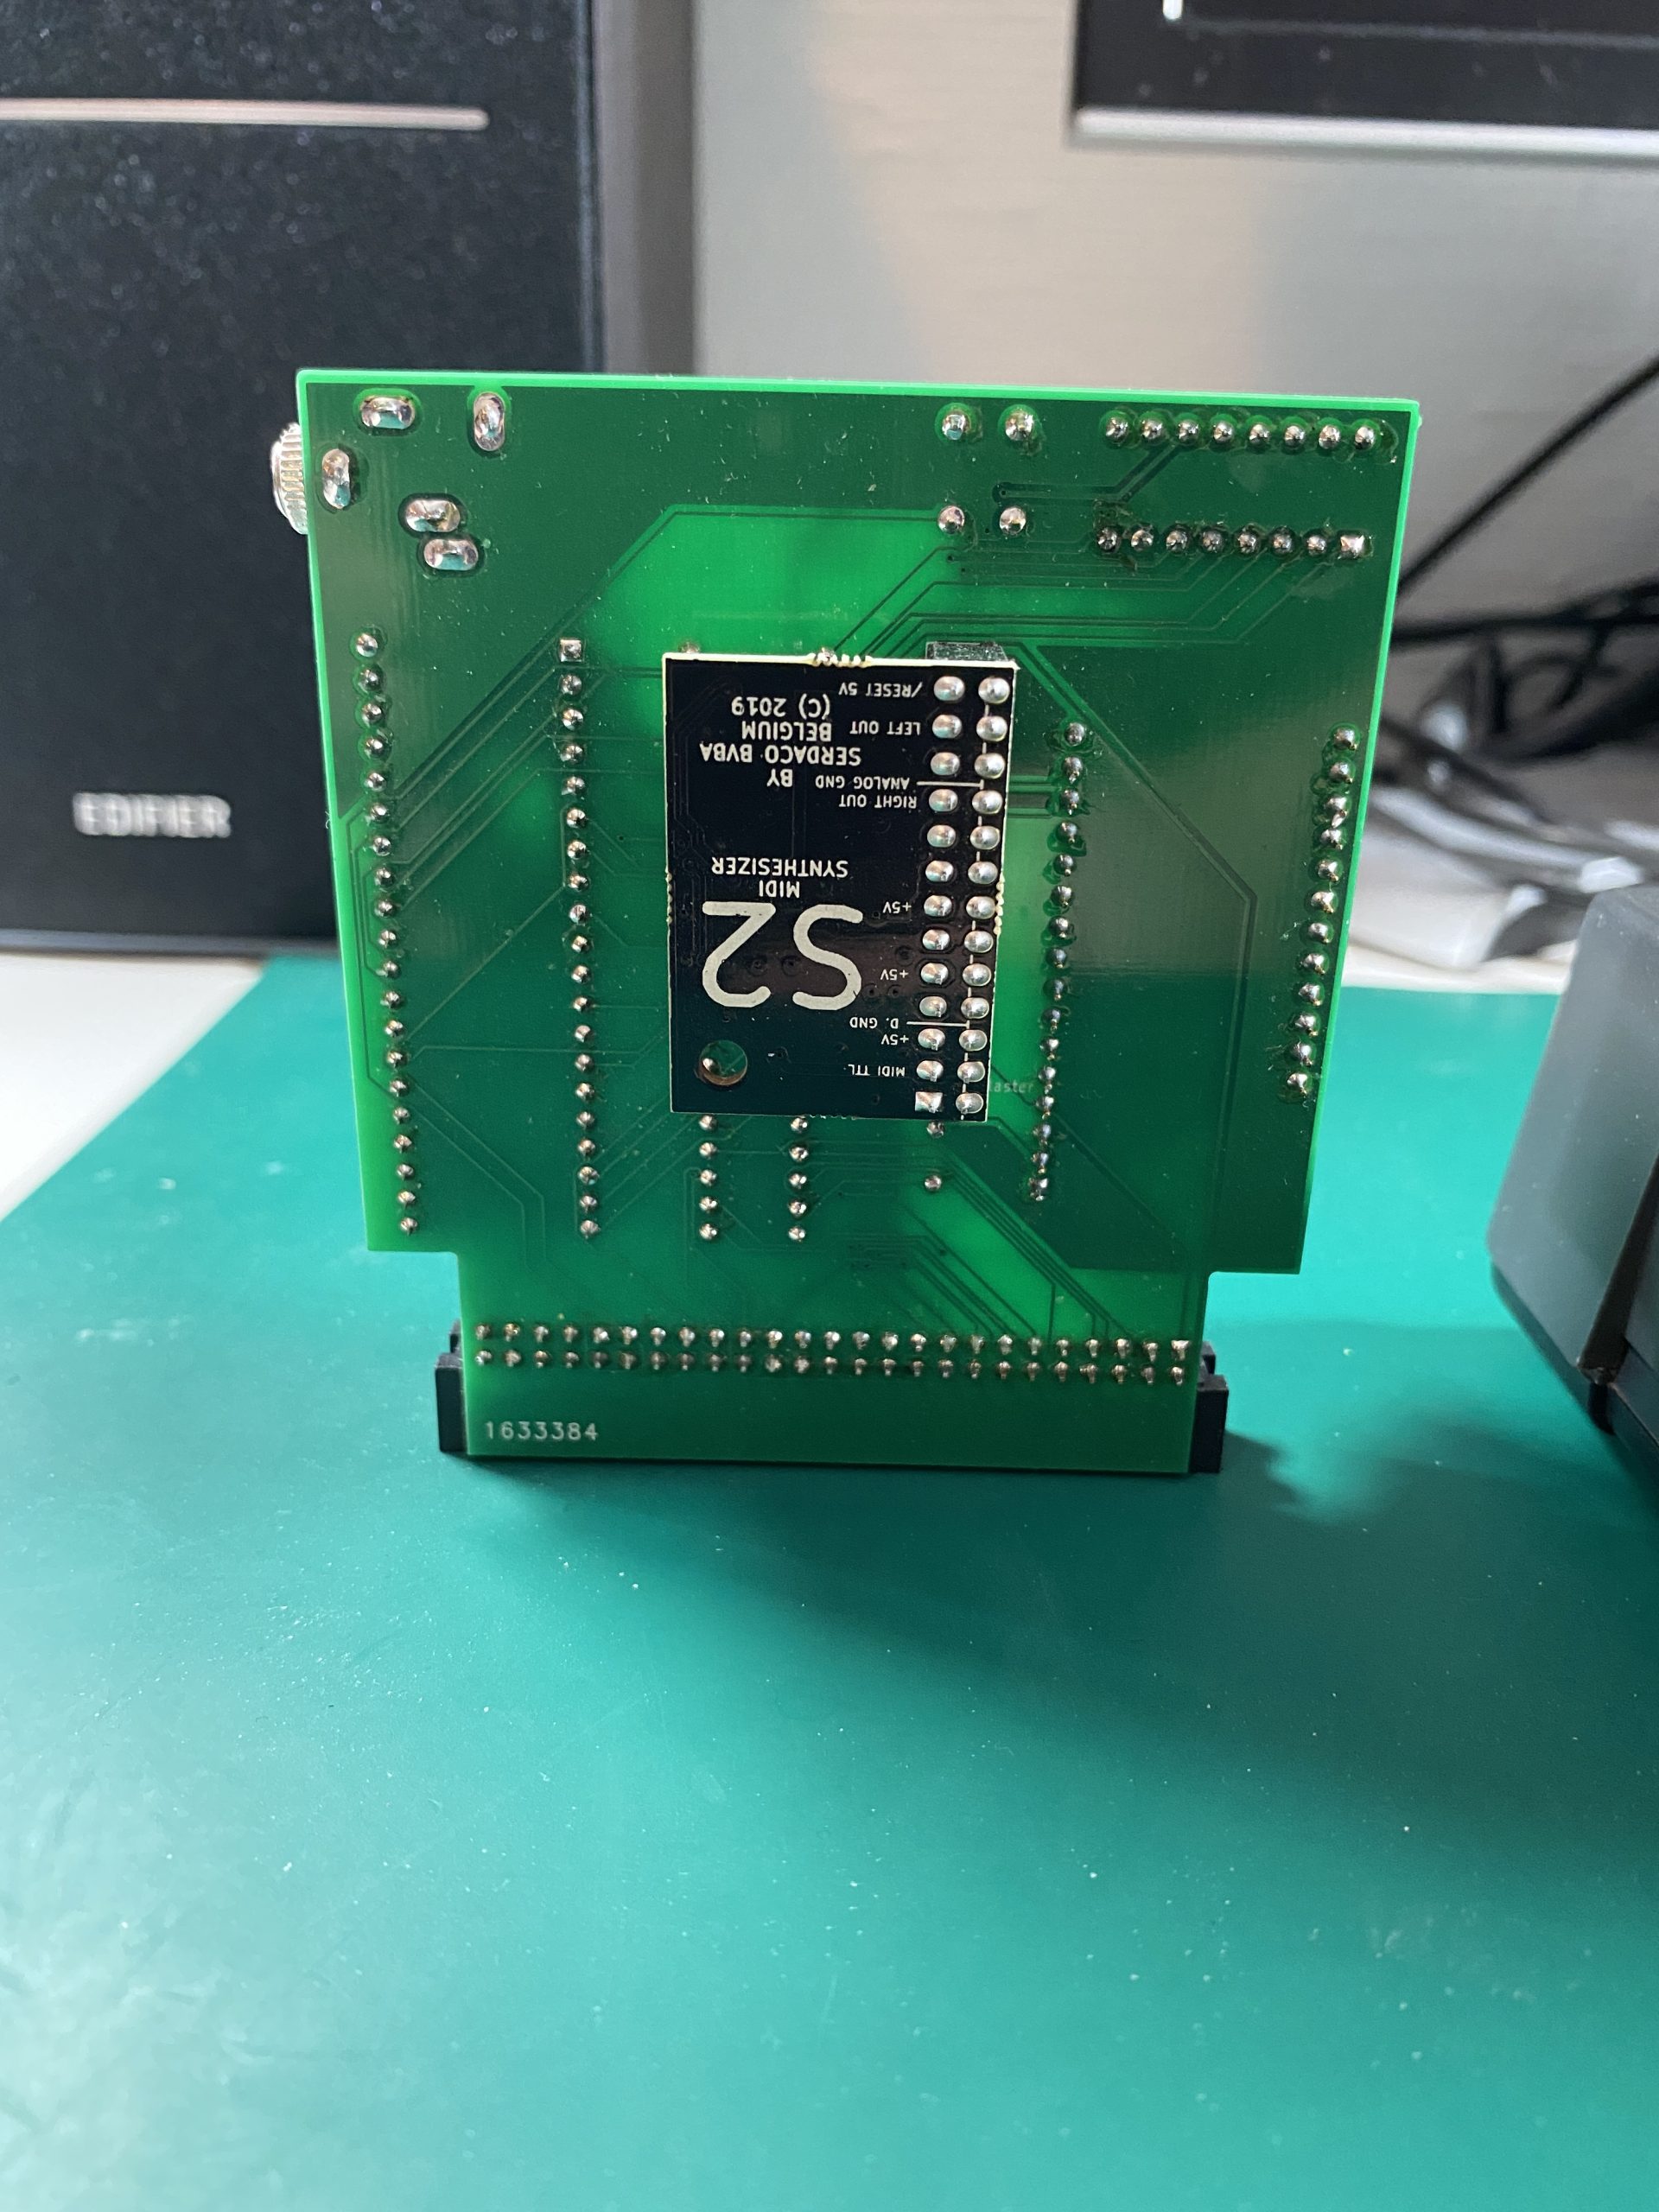
The brains in the card which handles MIDI, is the Blue Pill card (plugged into the front of the card, on the right side facing you). On the rear of the card is an S2 sound card which gives great audio output, you can also upgrade to an even better Roland compatible X2 GS sound card but it’s not cheap.
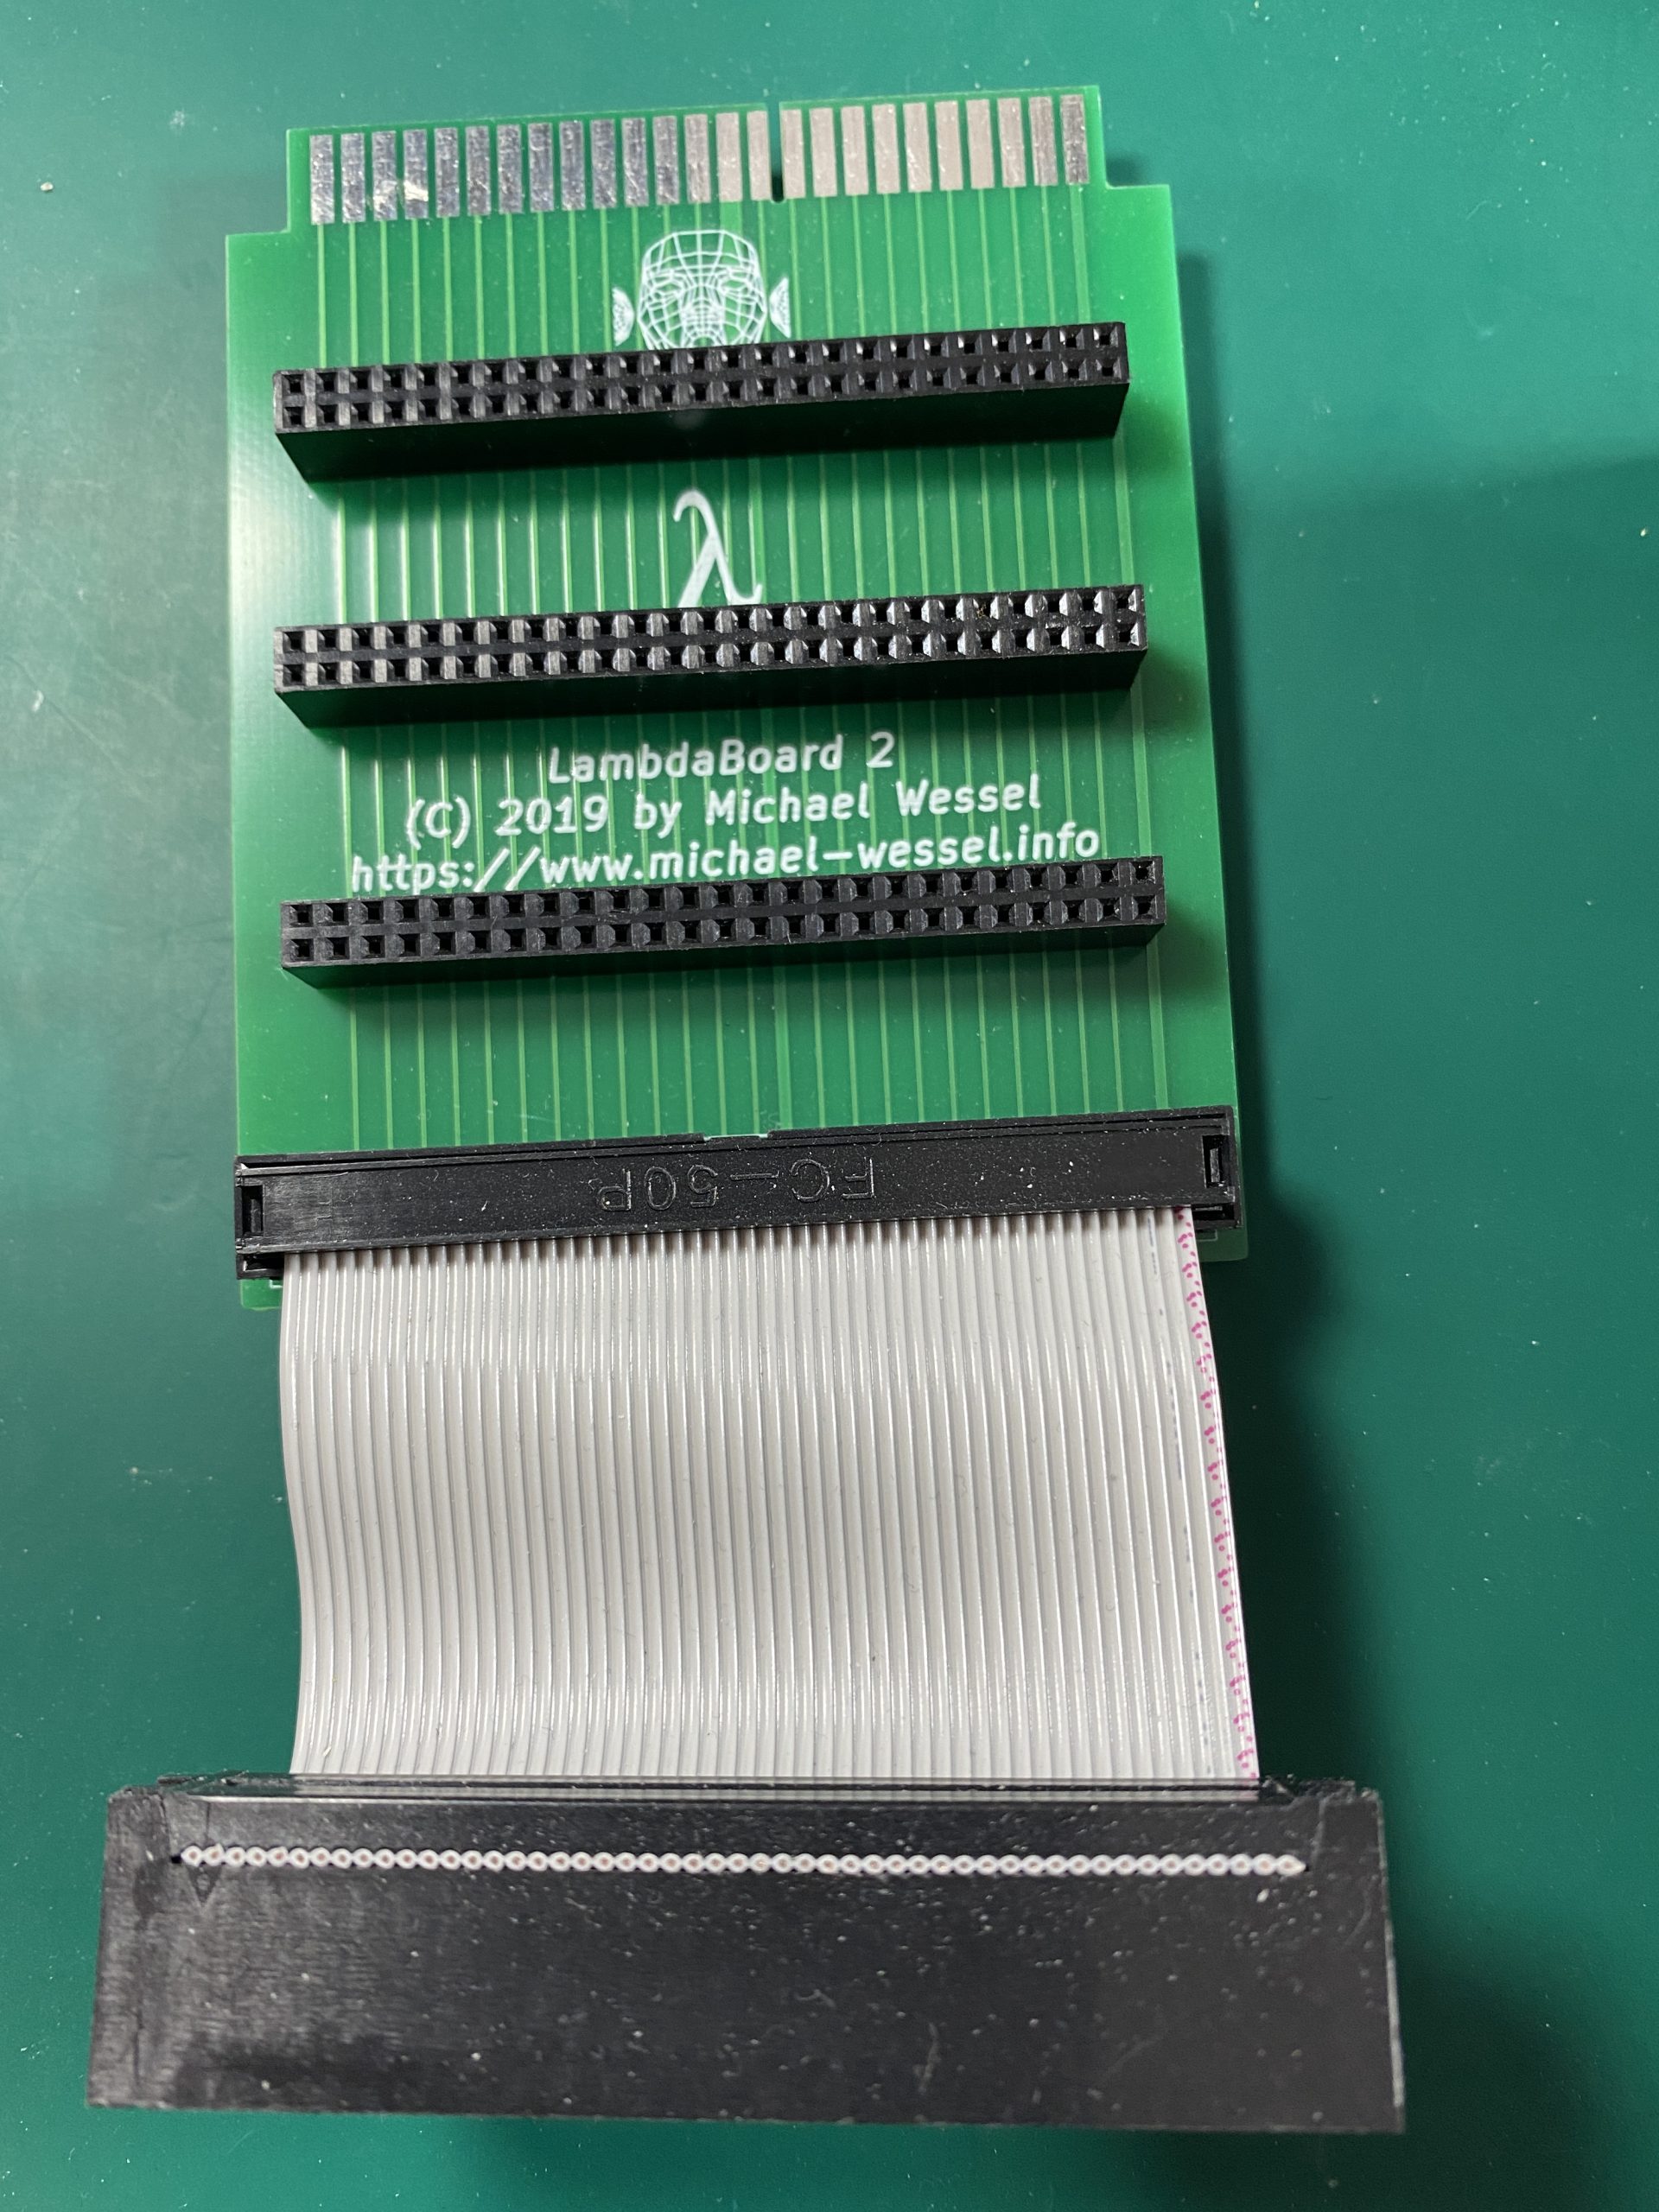
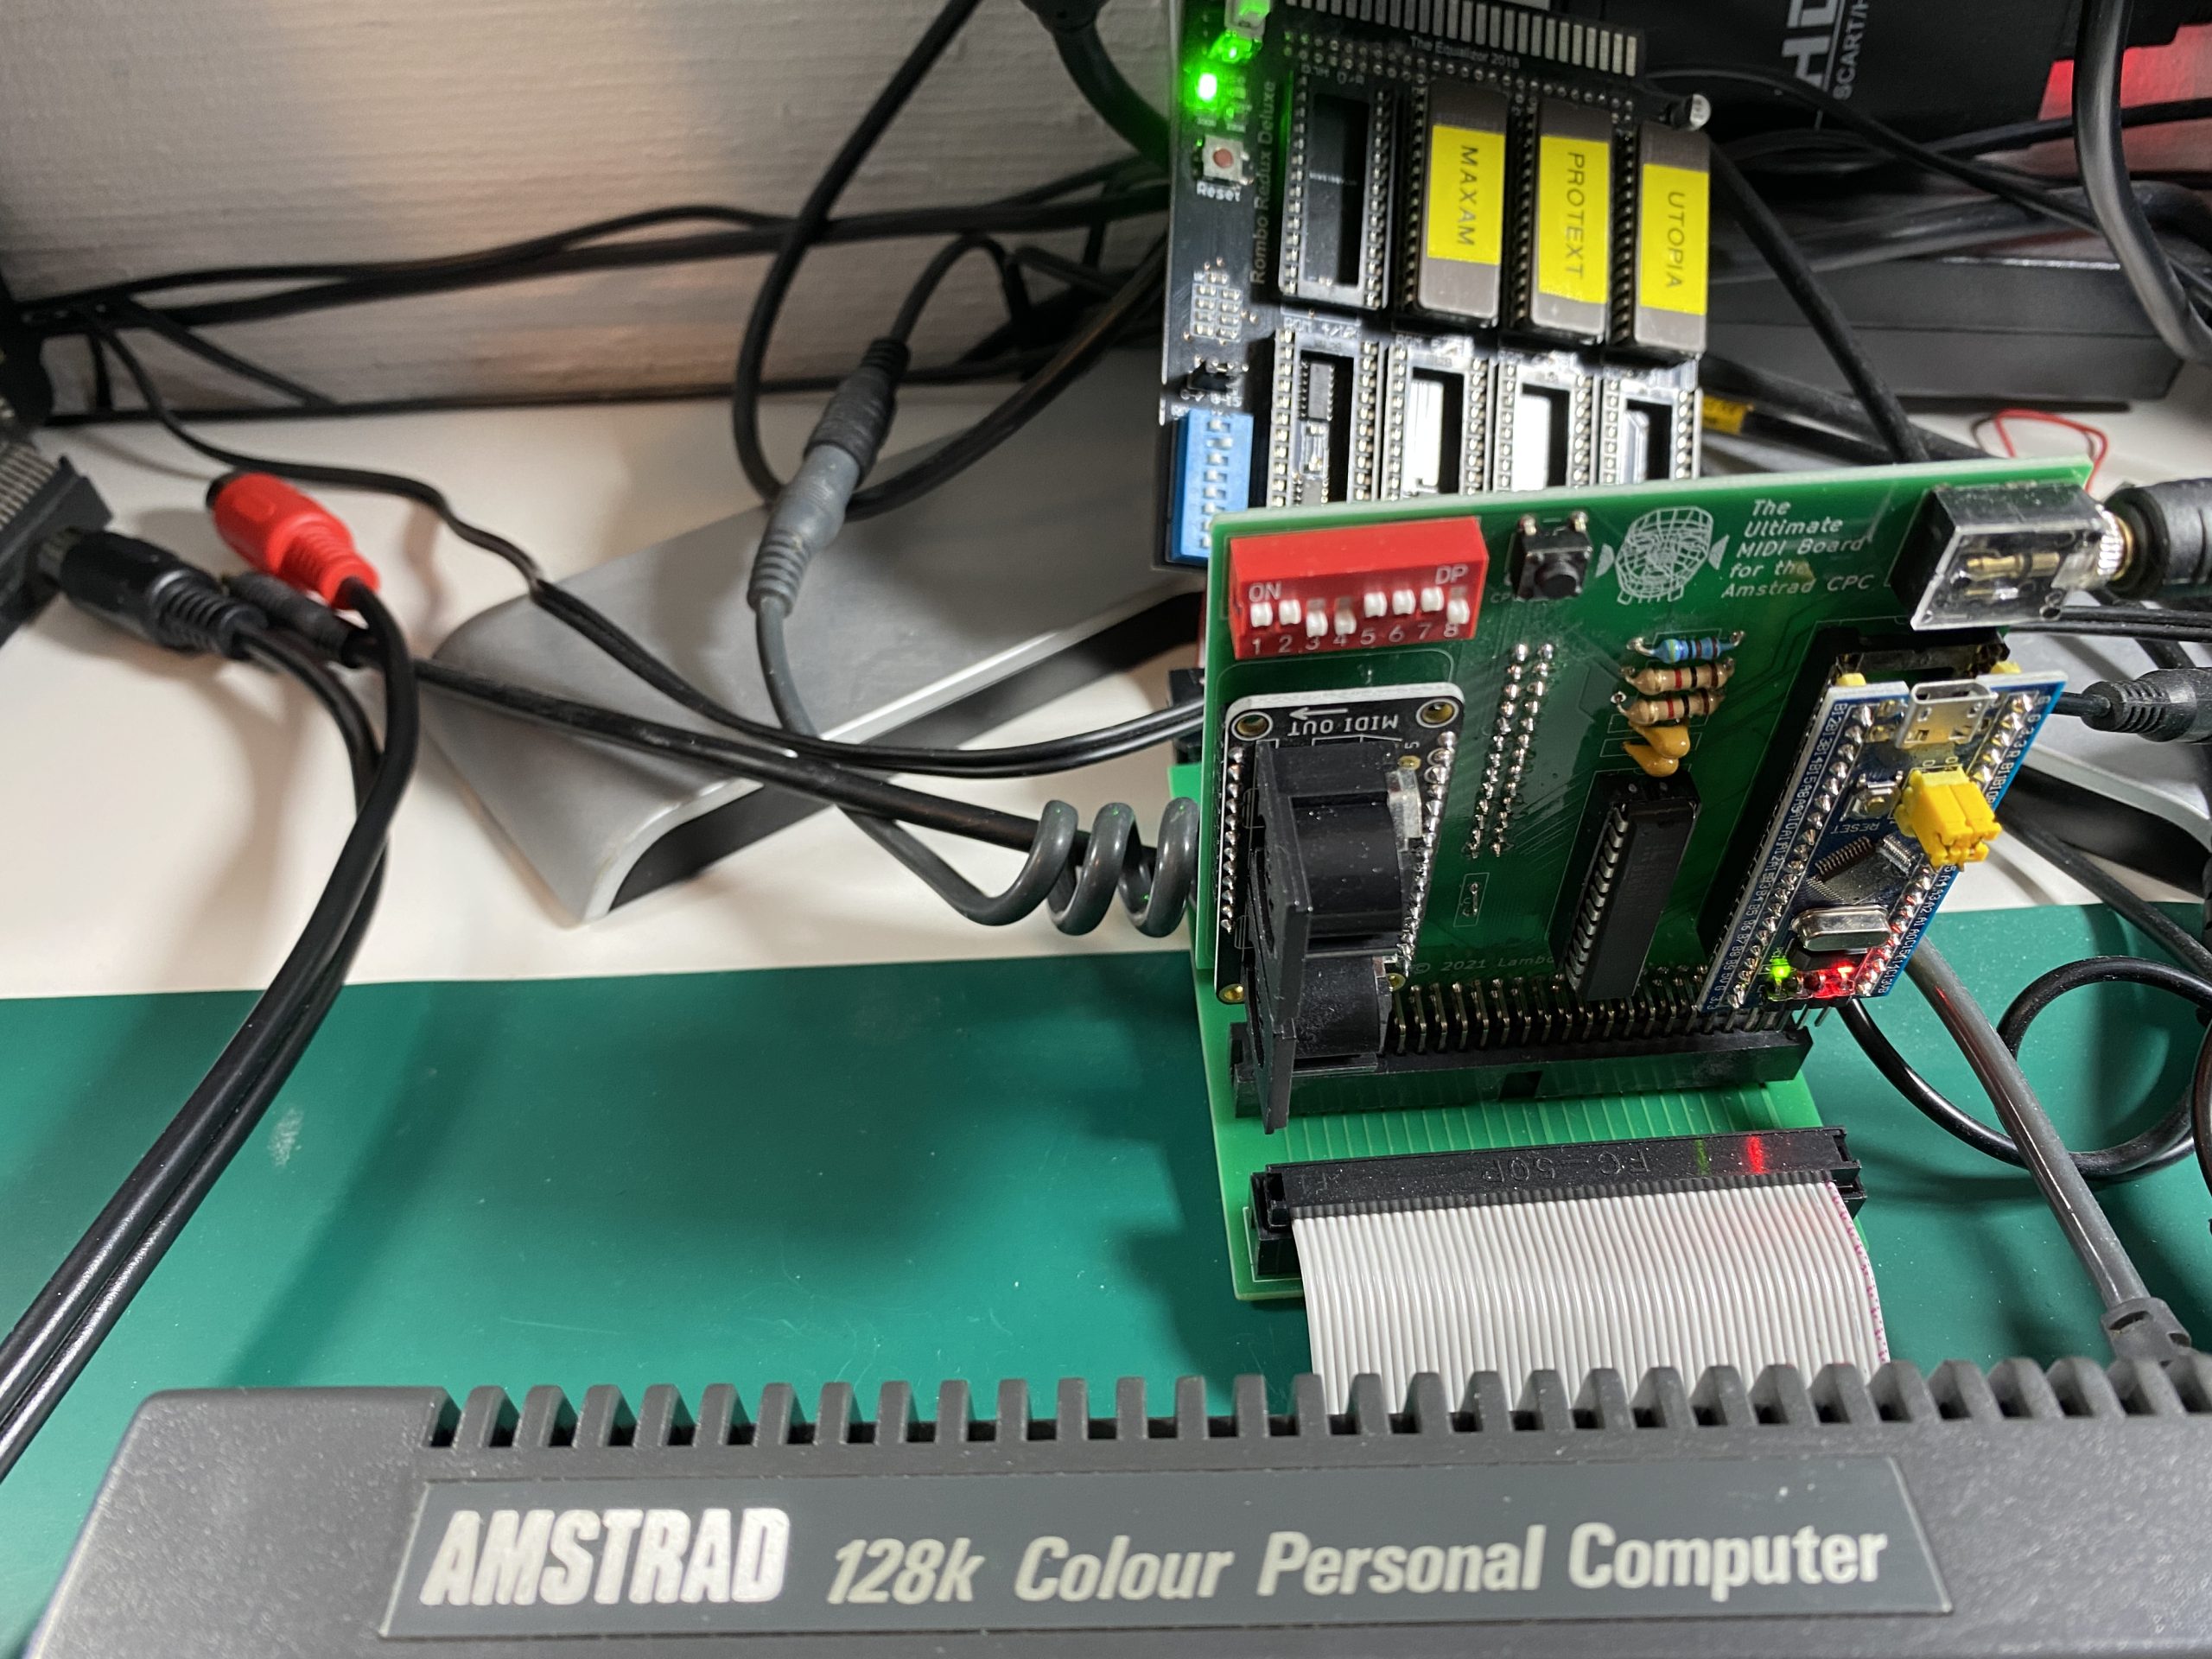
 But let’s start getting to know the card and to do that we’ll first test get it plugged into the CPC. For that you’ll need a connector board as it won’t plug in directly to the CPC. You also optionally need a MAXAM rom board to handle the assembly files, more of that later.
Below is the connector board I purchased from Michael, you can find similar ones on ebay.
 And here’s my ROM board, complete with a few ROMS including MAXAM 1.5.
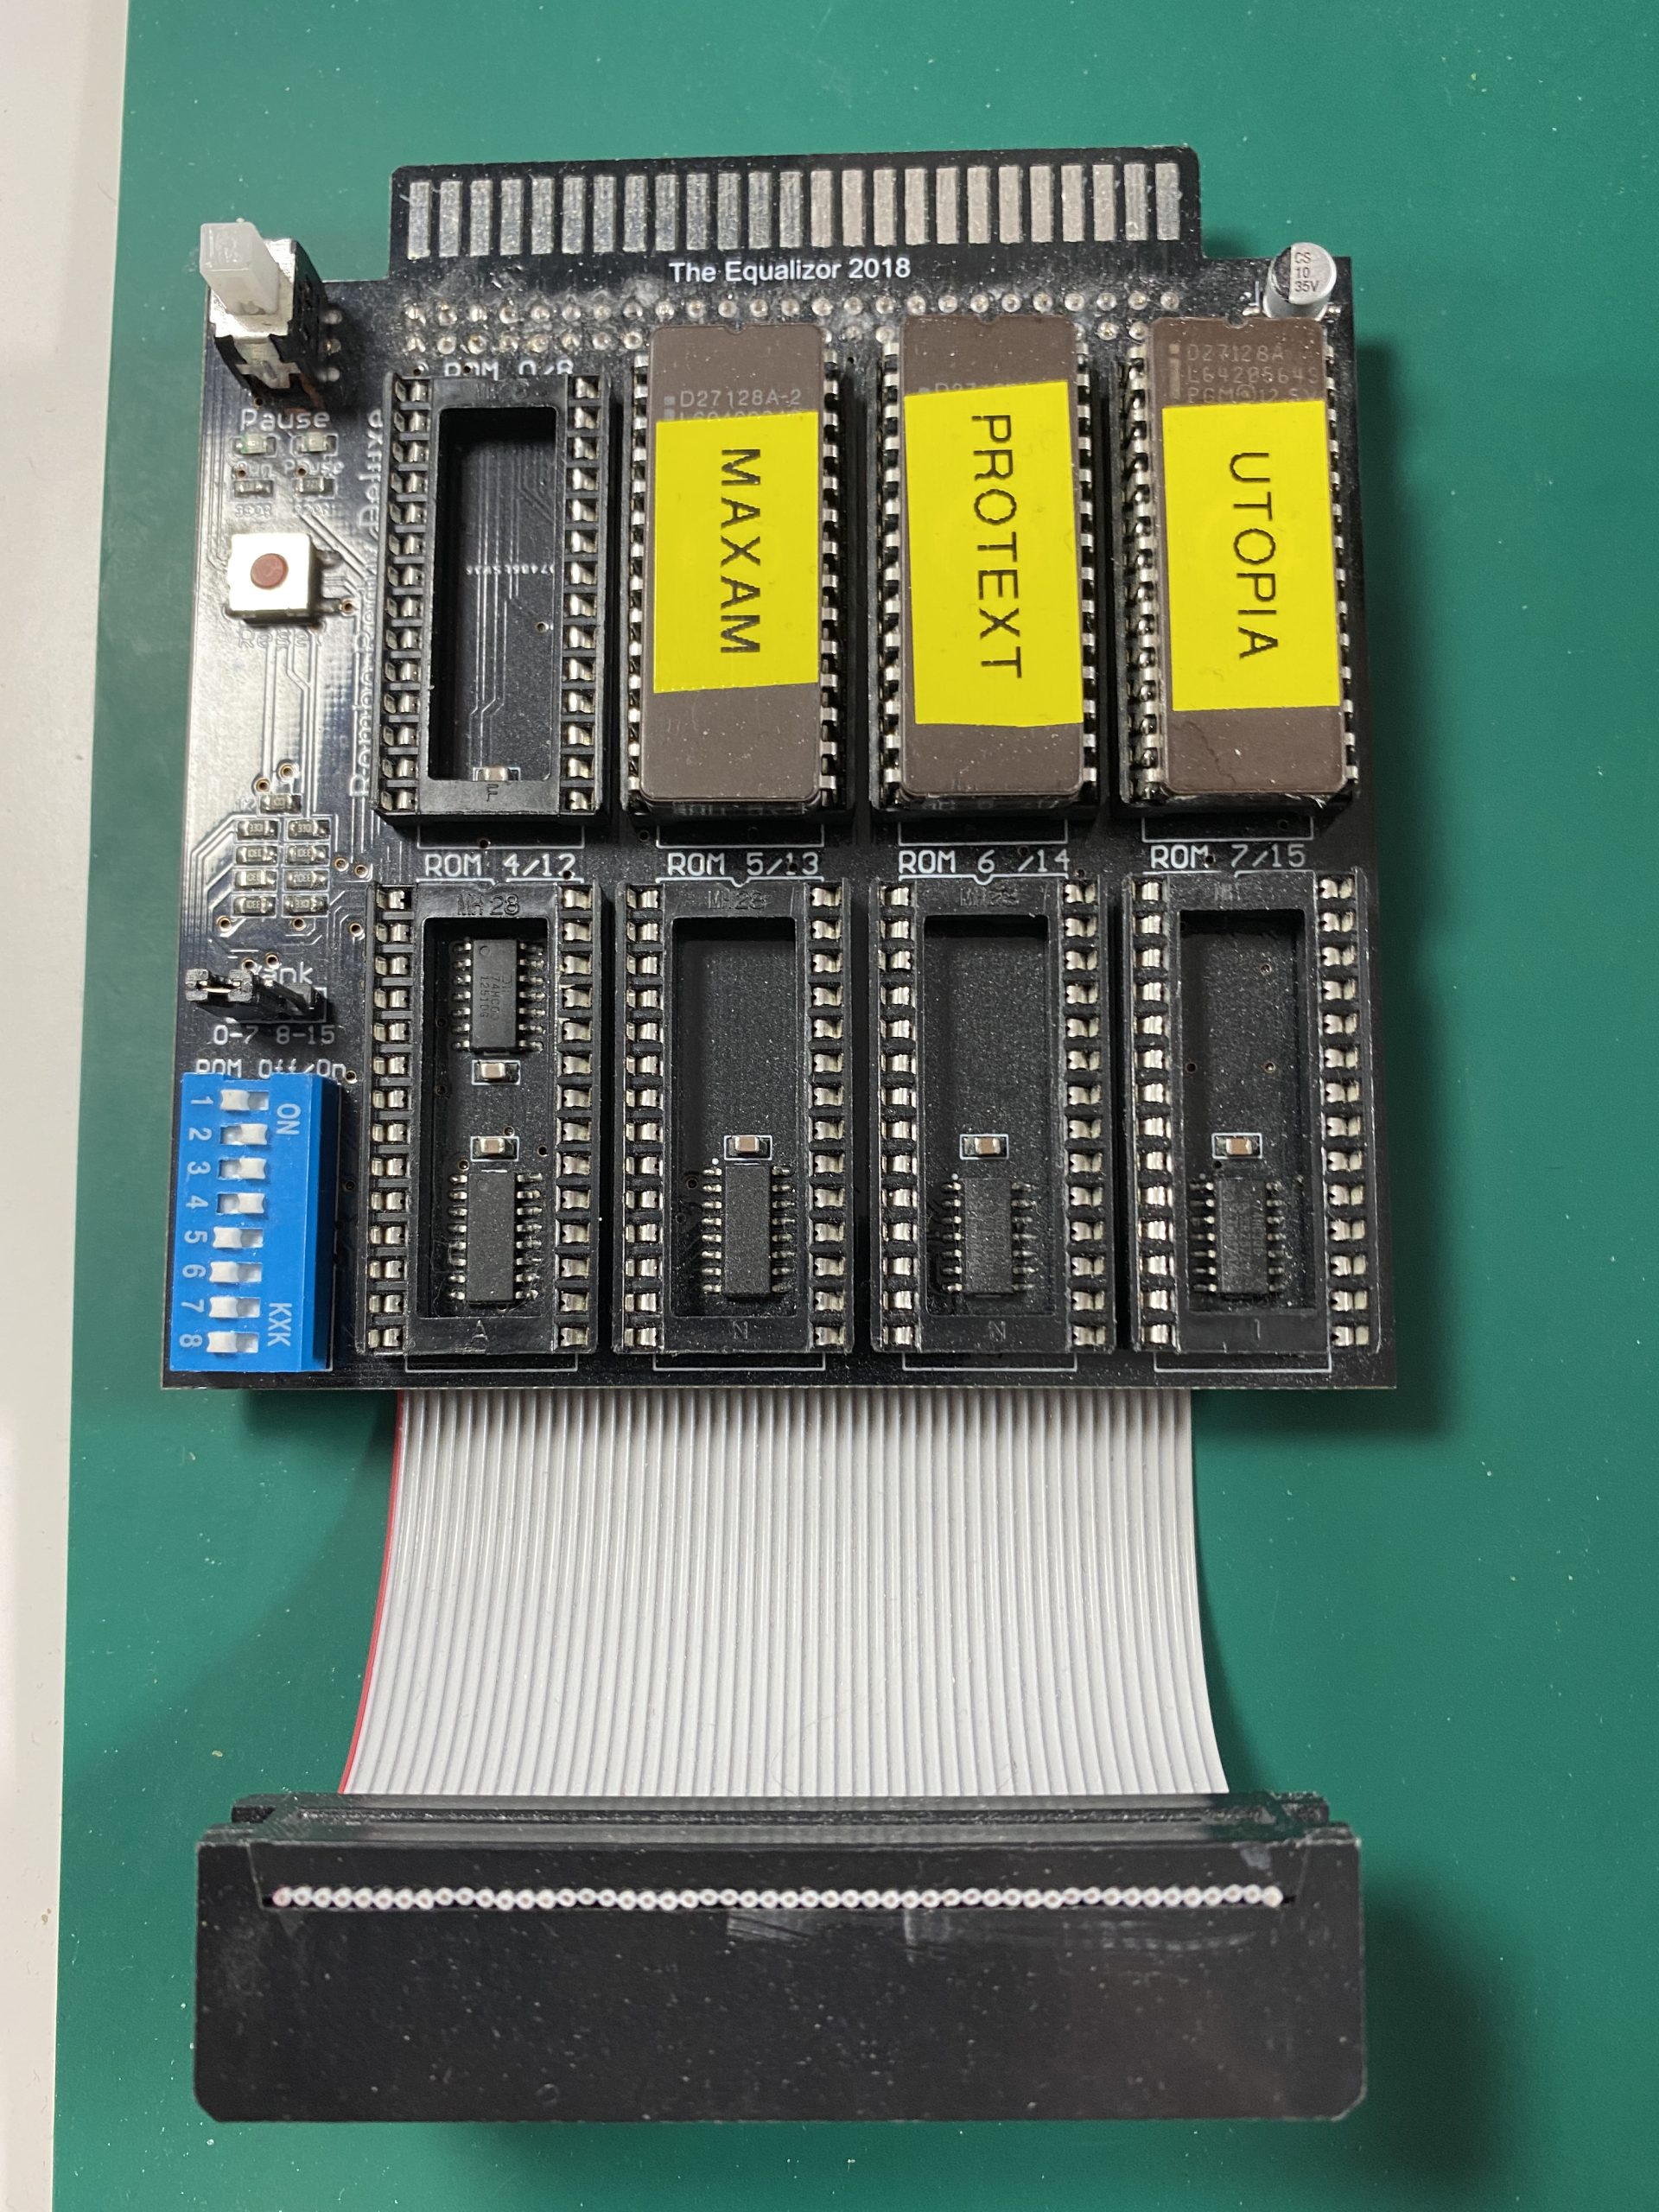 Tip. If you are using multiple ROMS only enable the MAXAM during recording as the other ROMS can cause incompatibilities.
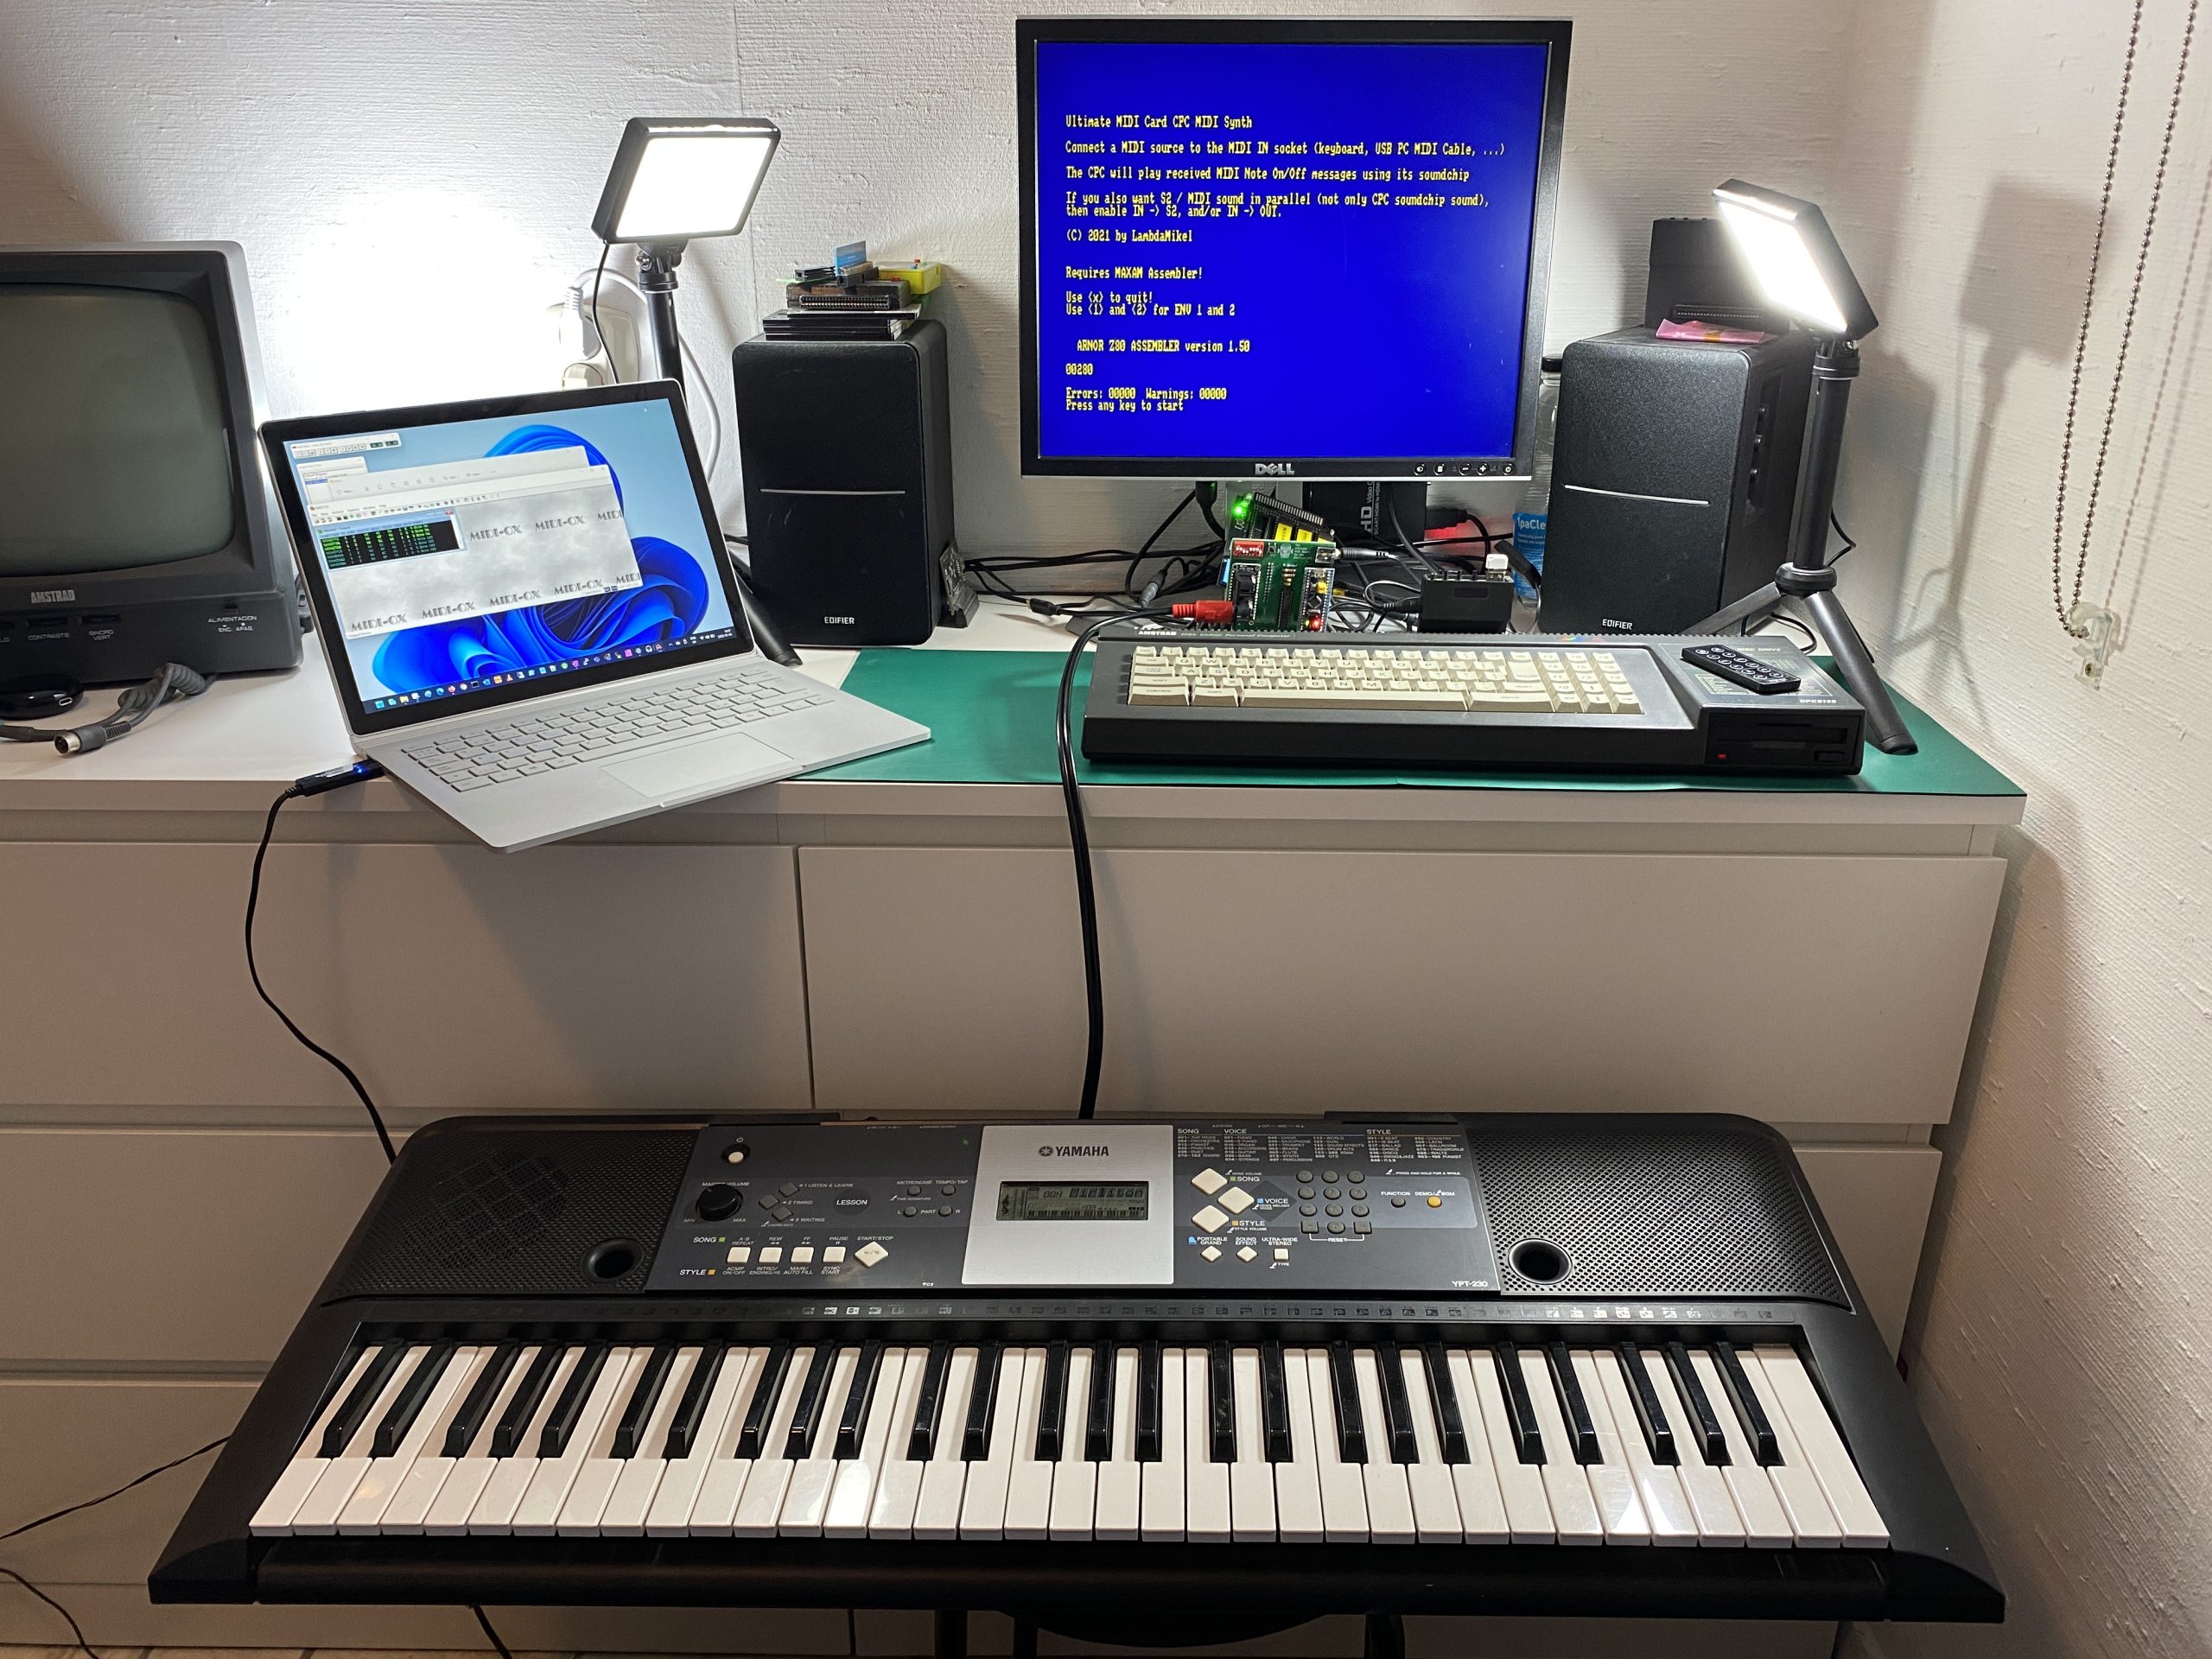
Connect everything up so it looks something like this. Note: In the photo below I have not got my MIDI cables connected yet.
 There are some additional things you’ll need, for example you’ll want to connect the board up to your speakers, and for that you’ll need a 3.5 inch audio cable and you’ll need USB to MIDI cables to connect to your PC. Lastly, if you want to connect to a MIDI device (like a MIDI keyboard) you’ll need MIDI cables.
Note: Not all MIDI cables are the same, I ordered another one initially (no-name cheap crap) and it produced more problems than it solved, the cables below worked perfectly for me.
- USB to MIDI cable – https://www.amazon.com/gp/product/B077X7R74Y/ref=ppx_yo_dt_b_asin_title_o02_s00?ie=UTF8&psc=1
- MIDI to MIDI – https://www.amazon.se/-/en/gp/product/B091DTZY23/ref=ppx_yo_dt_b_asin_title_o03_s00?ie=UTF8&psc=1
Getting connected to your PC
Now that you have the board connected up, you’ll want to verify that it’s talking to the CPC and vice versa. The board comes with 2 DIN sockets, one for MIDI in and one for MIDI out. The corresponding cables need to be connected to your DIN sockets. You’ll also want to get some MIDI capable software to run on your PC. I recommend MIDI-OX which is free for personal use.
- Download Midi-OX
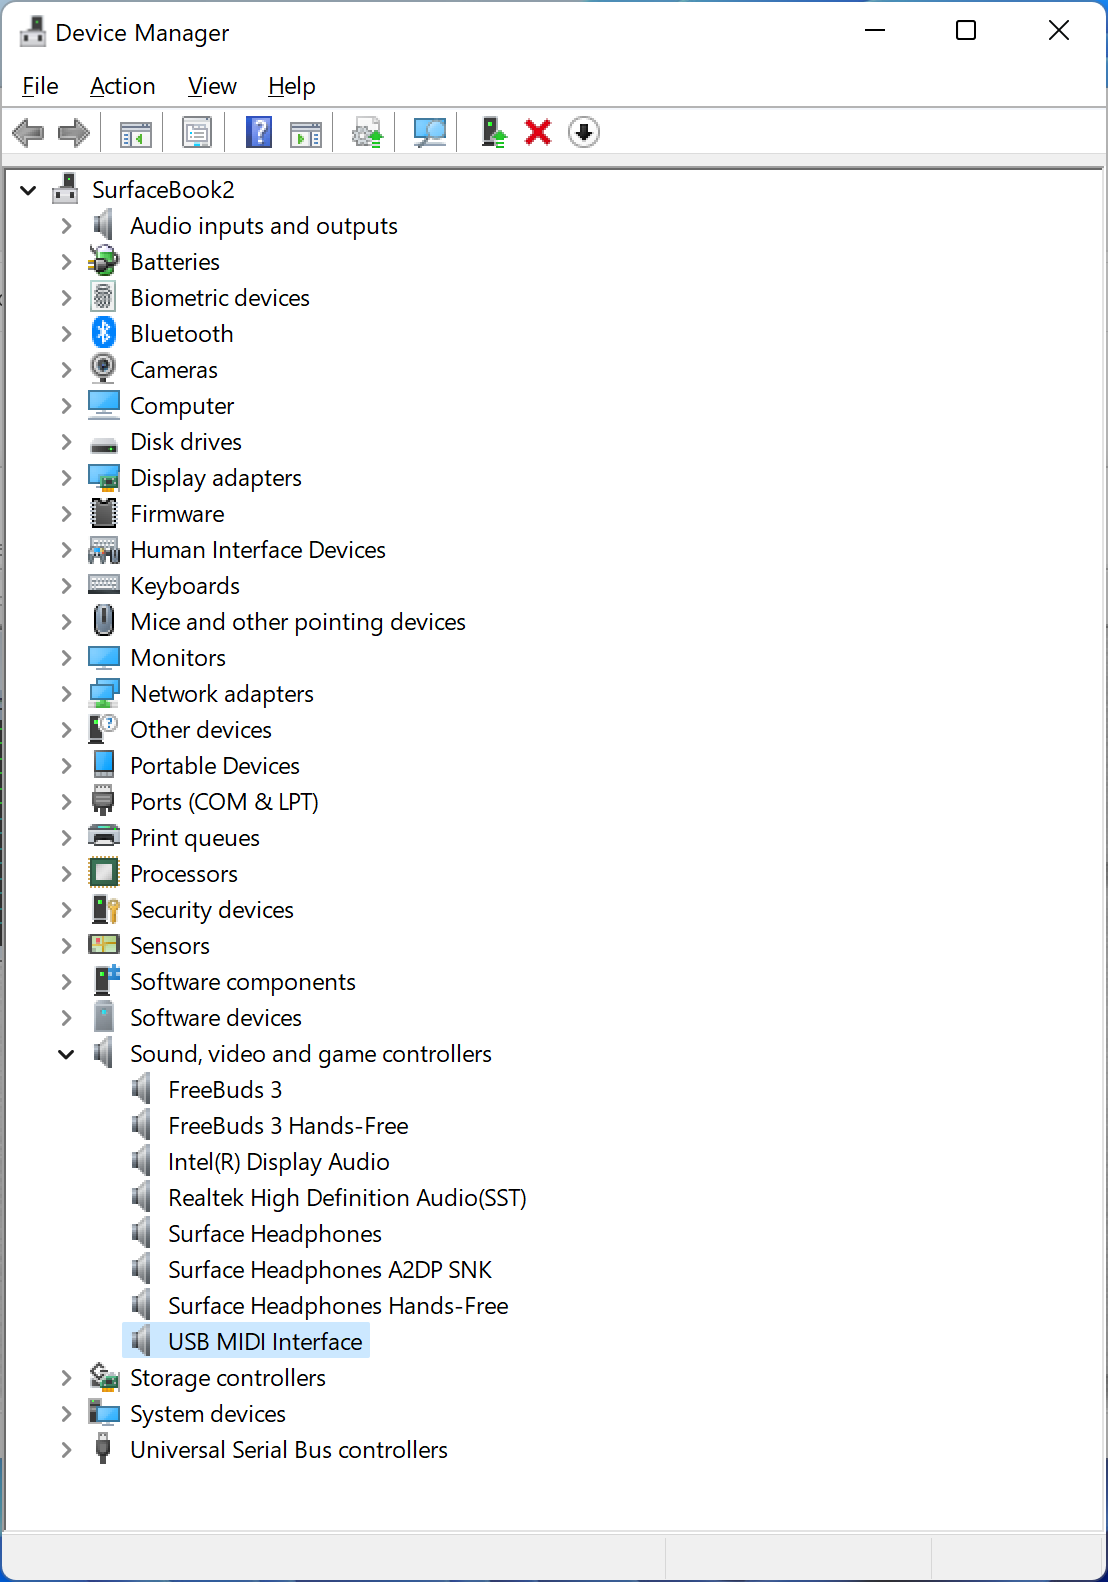
Once you’ve downloaded that software, install it, then start it up and connect your USB to MIDI cable to your PC. The MIDI cable doesn’t need any drivers and should be auto-detected by Windows. I’ve tested it on Windows 10 (and Windows 11) with no issues. If you look in device manager you’ll see the MIDI cable show up under Sound, Video and game controllers.
 Next, start up MIDI-OX. Click on Options and set the MIDI-in and MIDI-out options to point to your MIDI-USB cable.
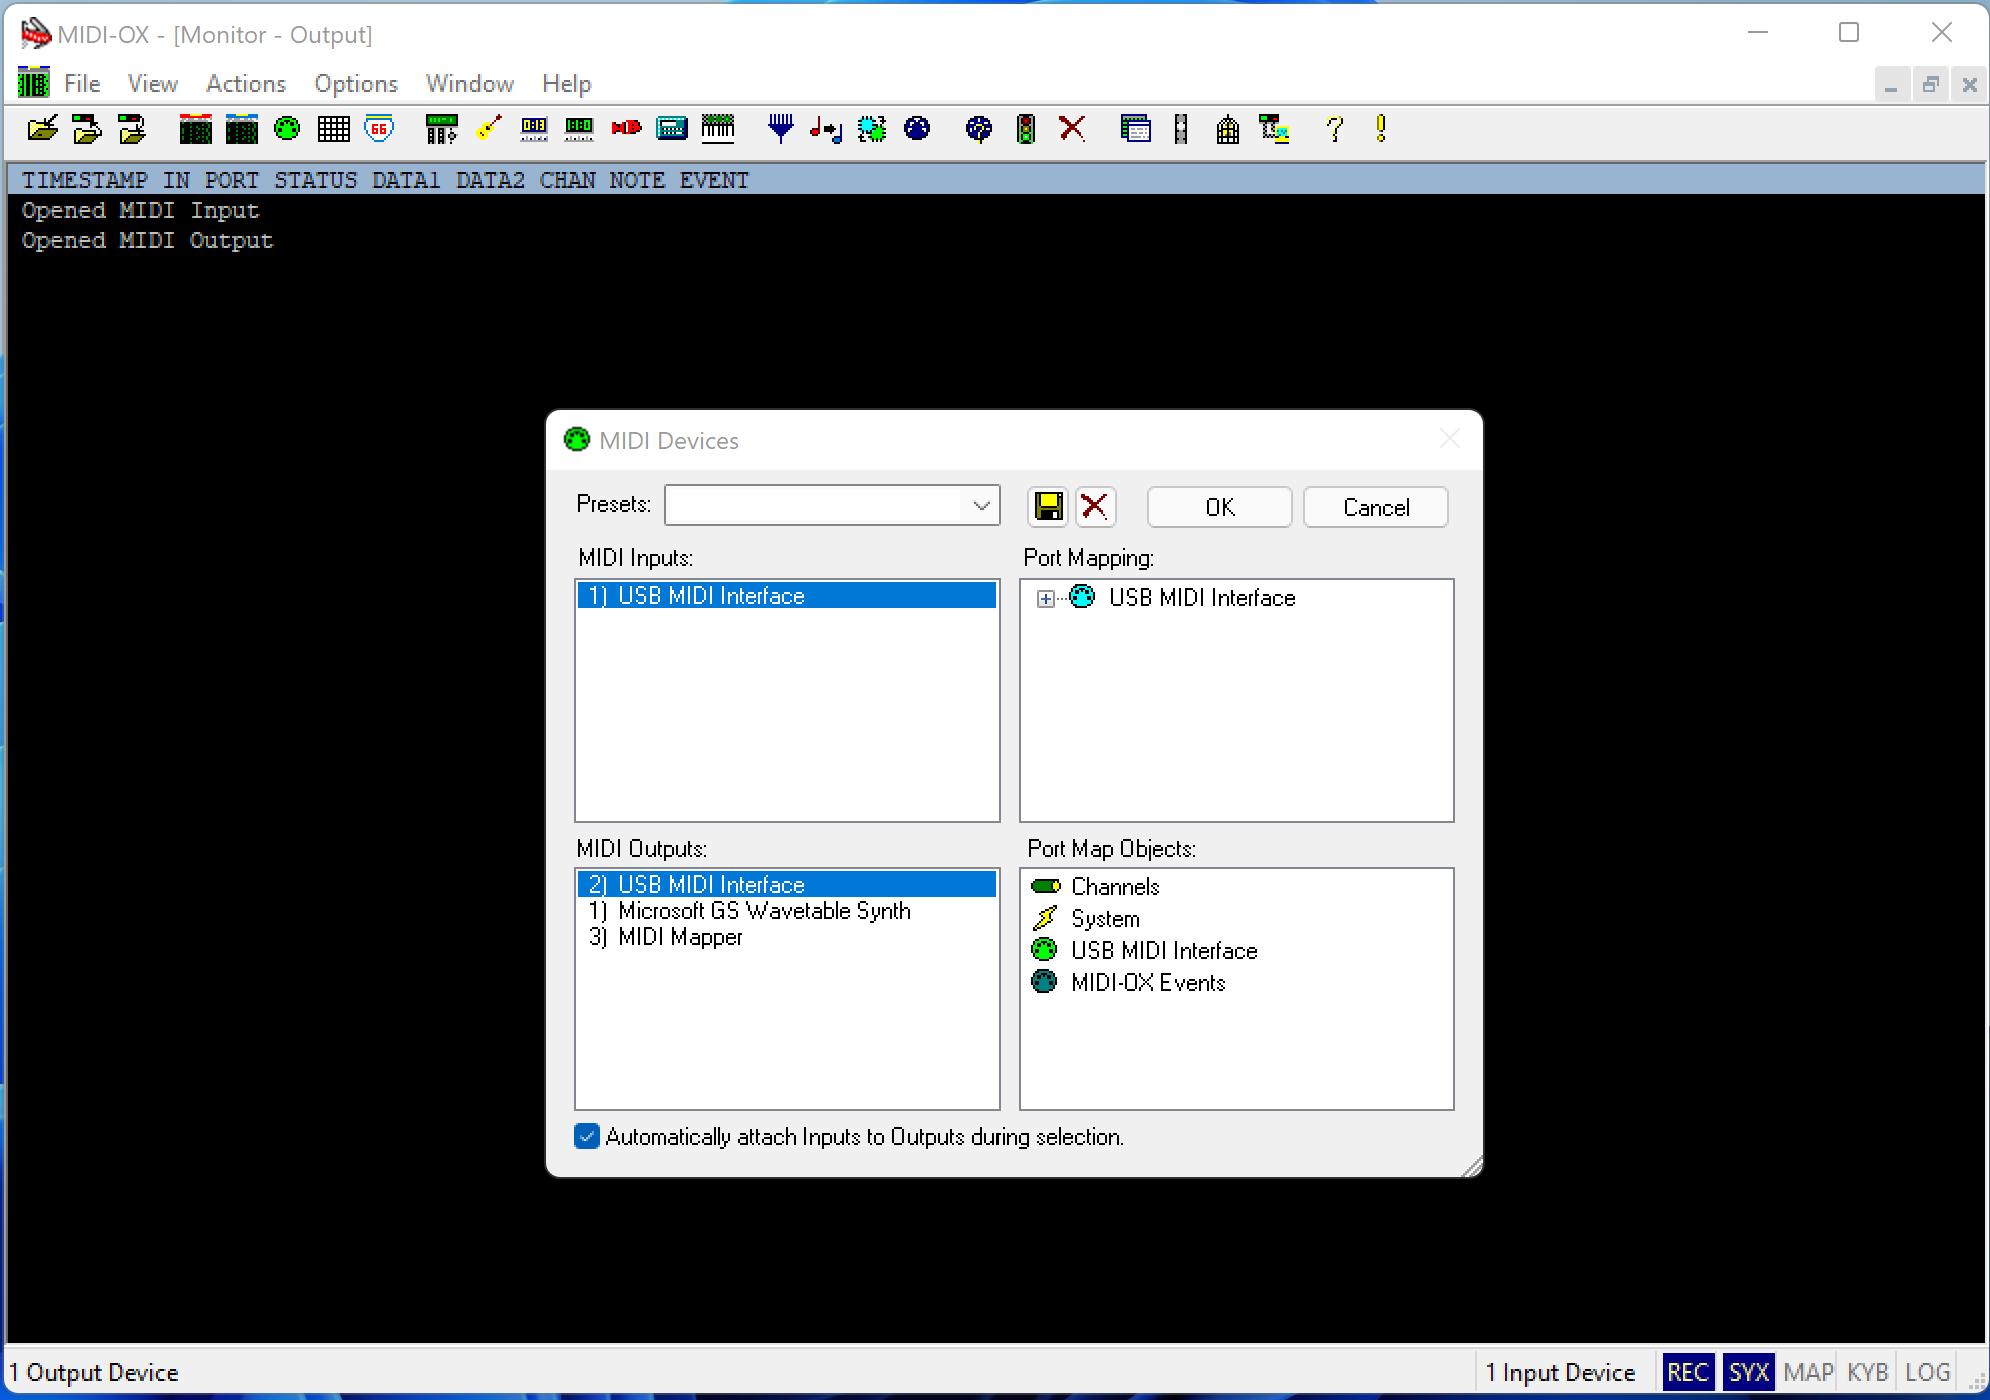
At this point if you output some MIDI on the CPC you should see it reflected in the MIDI-OX window.
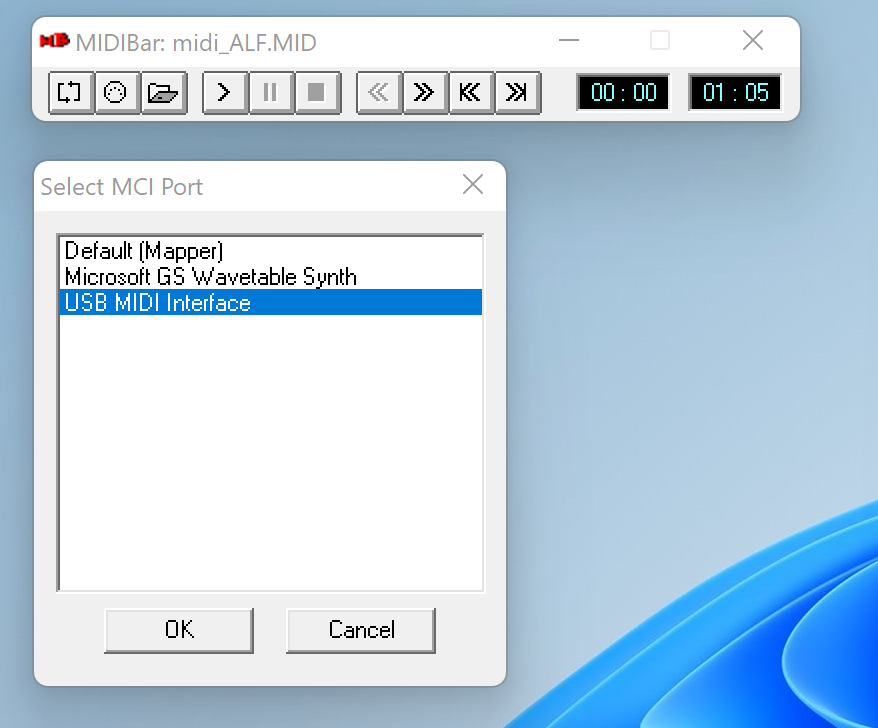
But let’s start with recording something from the PC to the CPC. To do that, start up MIDI-bar (in C:\Program Files (x86)\MIDIOX\Midibar.exe)
Once again, you’ll need to configure it to point to your MIDI-USB cable by clicking on the circle with dots, then select your USB MIDI Interface from the options available.
 Once done, download the following DSK files from Michaels GitHub, I used the following but he keeps updating with more content.
You’ll also want to download some MIDI files to test with. There are some samples on Michaels GitHub.
https://github.com/lambdamikel/BluePillCPC/tree/main/midi
On the UltMidi3 disc you’ll find a Recorde2.bas file, run it and you’ll see options to record (1), playback (2) and so on. In the short video below I played back a MIDI file using Minibar on the PC and recorded it directly to the CPC, amazing !
After you’ve recorded your MIDI file from the PC to the CPC you can save it for playback. It’s all really awesome.
Connecting a MIDI keyboard
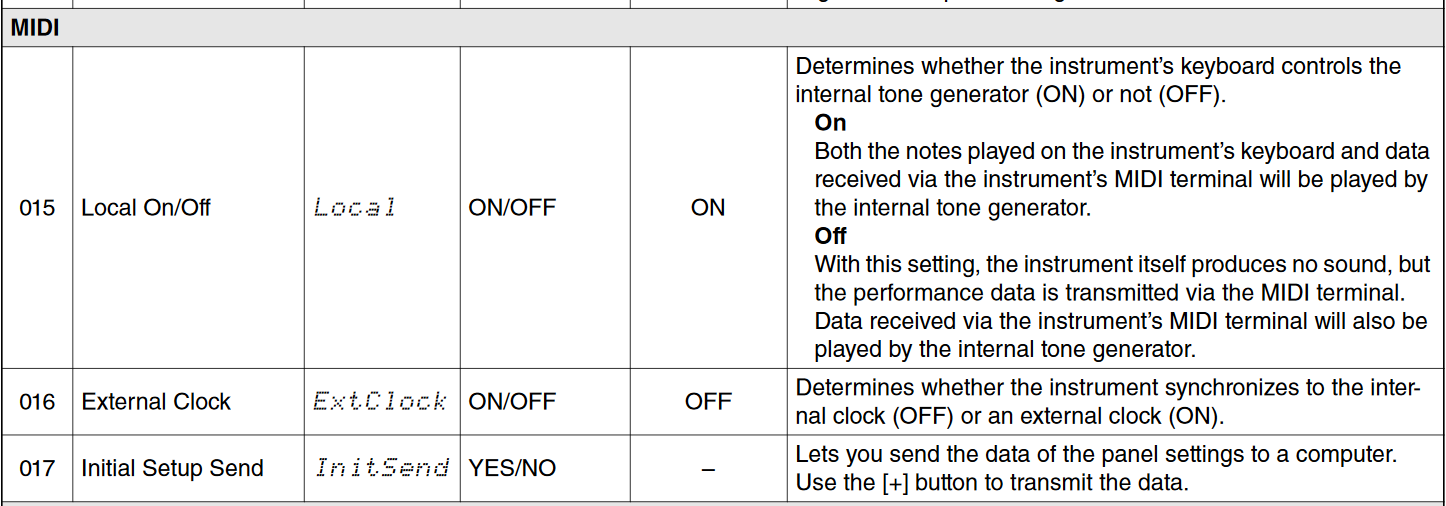
You can also connect up your MIDI keyboard and configure it to output to the MIDI cable (check the Manual for your MIDI keyboard to do so). I set the following two settings on my MIDI keyboard, function 15, 16.
- 015: Local Off
- 016: External Clock OFF
With Michaels help we figured out that my Yamaha YP2-230 MIDI keyboard was outputting to channel 1 (using Midi-OX we could see that). So we edited a line in one of his programs to point to that channel instead of the default (channel 0).
 The result ?
I could play on the MIDI keyboard and using CPCSynth.bas from the UltMidi.dsk I was able to see that happening in real time on the Amstrad CPC, awesome or what.
If you have access to a 512KB expansion on a 464 (like the DDI5) you can try out the 512 KB MIDI from RAM playback2.bin with EYESKY.DSK demo.
Conclusion
The Ultimate CPC MIDI Sound & MIDI Interface Card is just that, it’s amazing. It gives you options to play MIDI like you’ve never heard it before on your Amstrad CPC either directly through the CPC speaker or via some external speakers. You will be blown away by the sound quality.
That said, you will however need a fair amount of equipment, cables, software and patience to get it all going but the end result is definitely worth it !
I’ll upload a video review of the card to my youtube channel in the coming days, so please stay tuned !