Introduction
I’ve seen people referring to the M4 board on various forums and facebook groups so I was intrigued and wanted to see what the fuss was all about. I mean, think about it, an internet connection via Wi-Fi on an Amstrad computer from the mid to late 80’s. This was something I had to try out. So here are my initial thoughts on the M4 board from Spinpoint.
What is it ?
The M4 Board is not new, it is an expansion card from 2016 which enables WIFI access to and from CPC, Romboard and using an SD-Card as a mass storage device. That’s right the device first surfaced in 2016, and they are still in production today and you can still buy them. You can read more about it at http://www.spinpoint.org/cpc/m4info.txt
First of all, you’ll want to acquire one, to do so is relatively simple, head over to http://www.spinpoint.org and leave a comment asking how to buy one. I emailed him directly and got a quote for the board with EDGE connector and shipping for 47.5 Euros. Not cheap, but a lot of functionality to play with for the coming years.
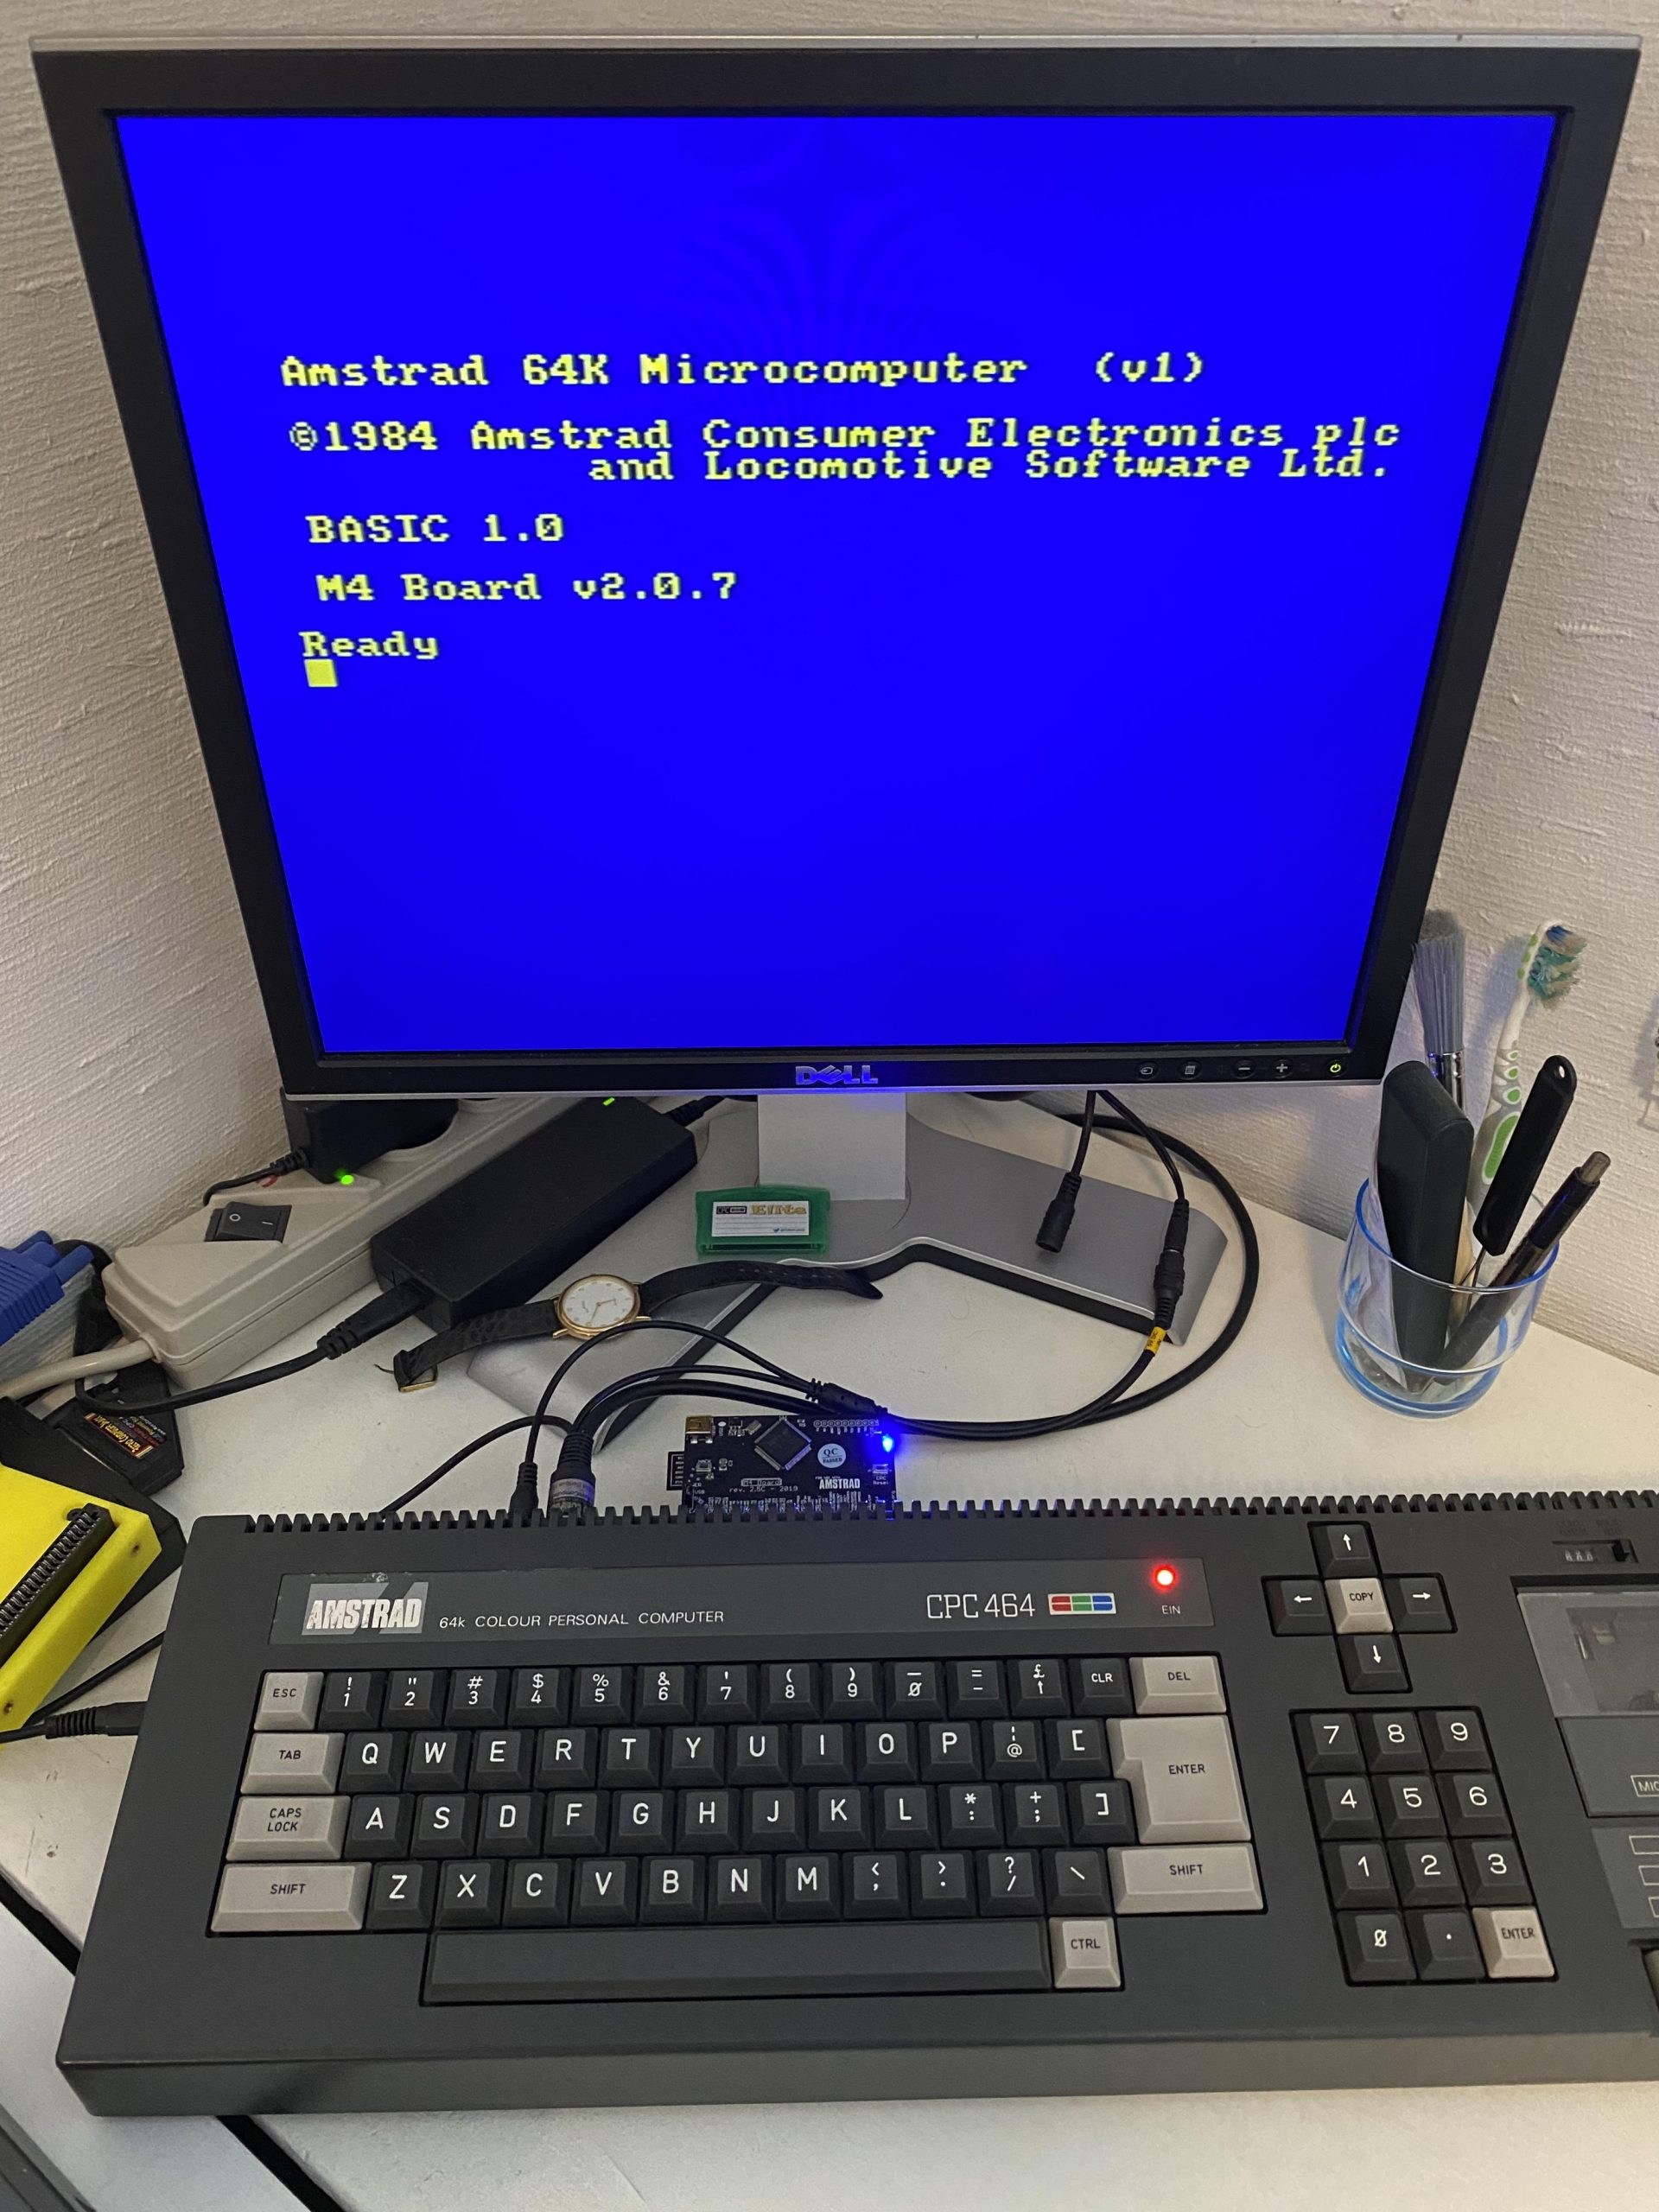
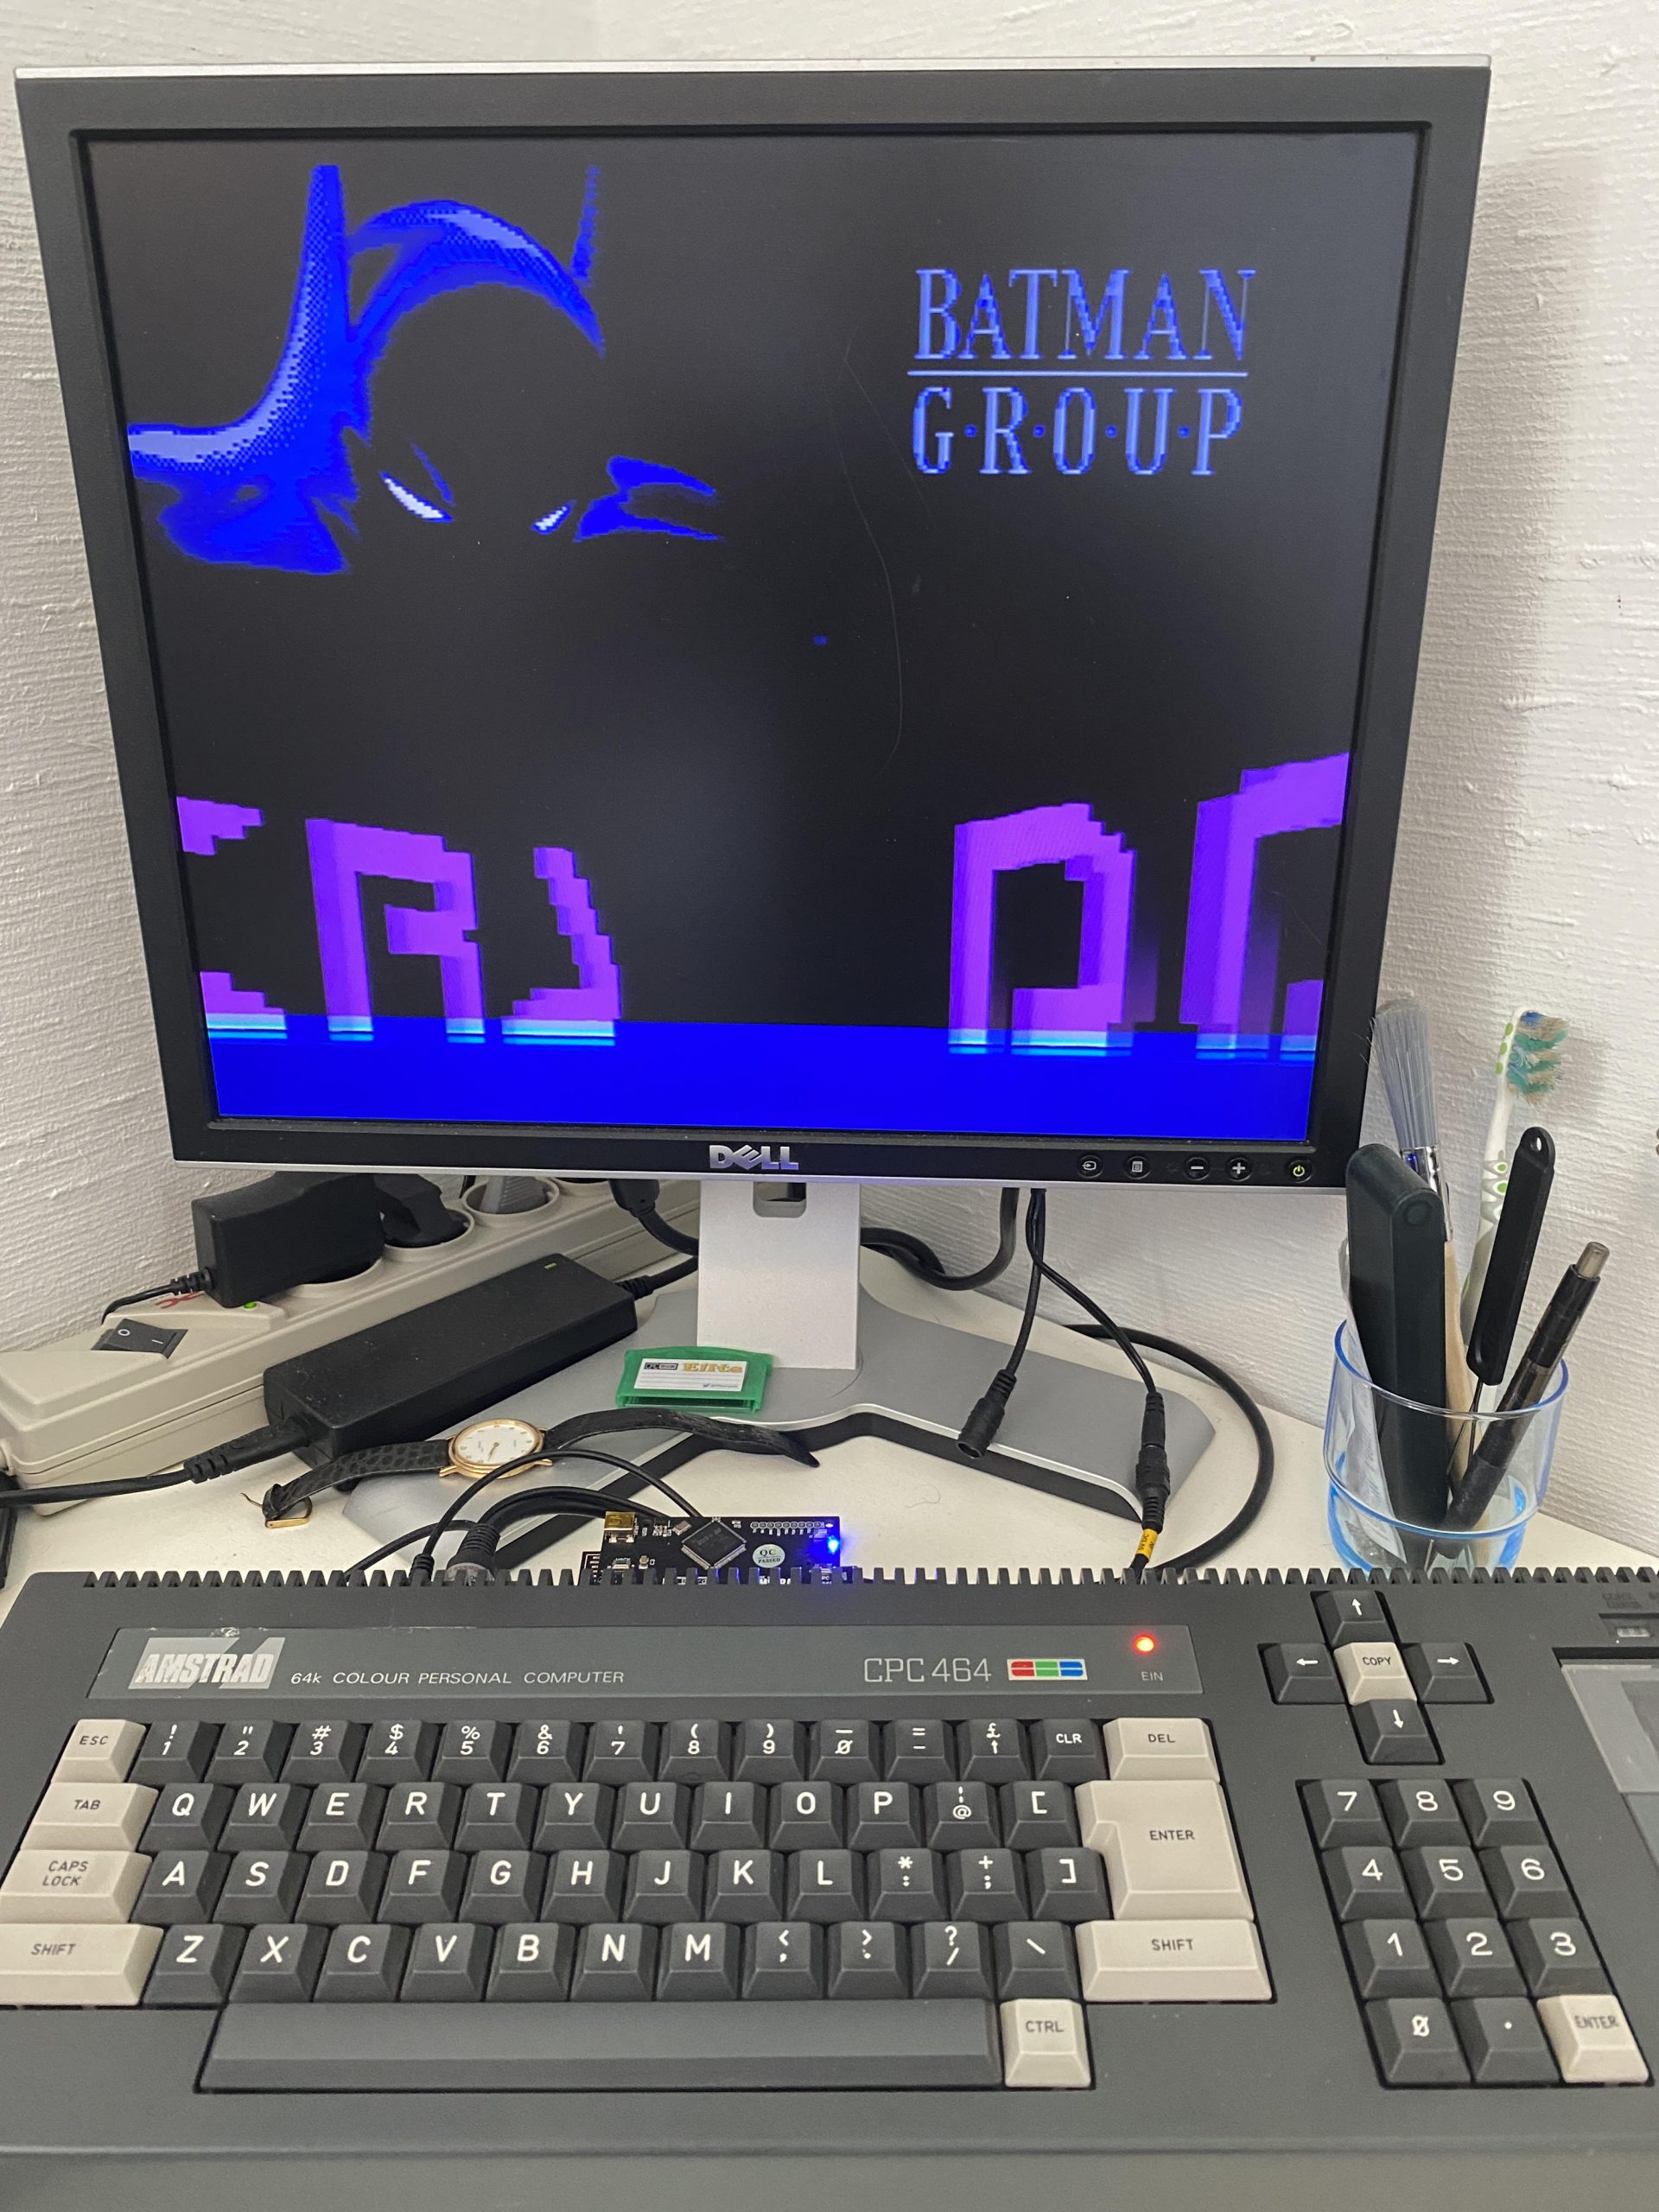
In the photo below you can see my M4 board plugged directly into the back of my Schneider coloured CPC 464. It reveals itself at post, along with a version number of the firmware.
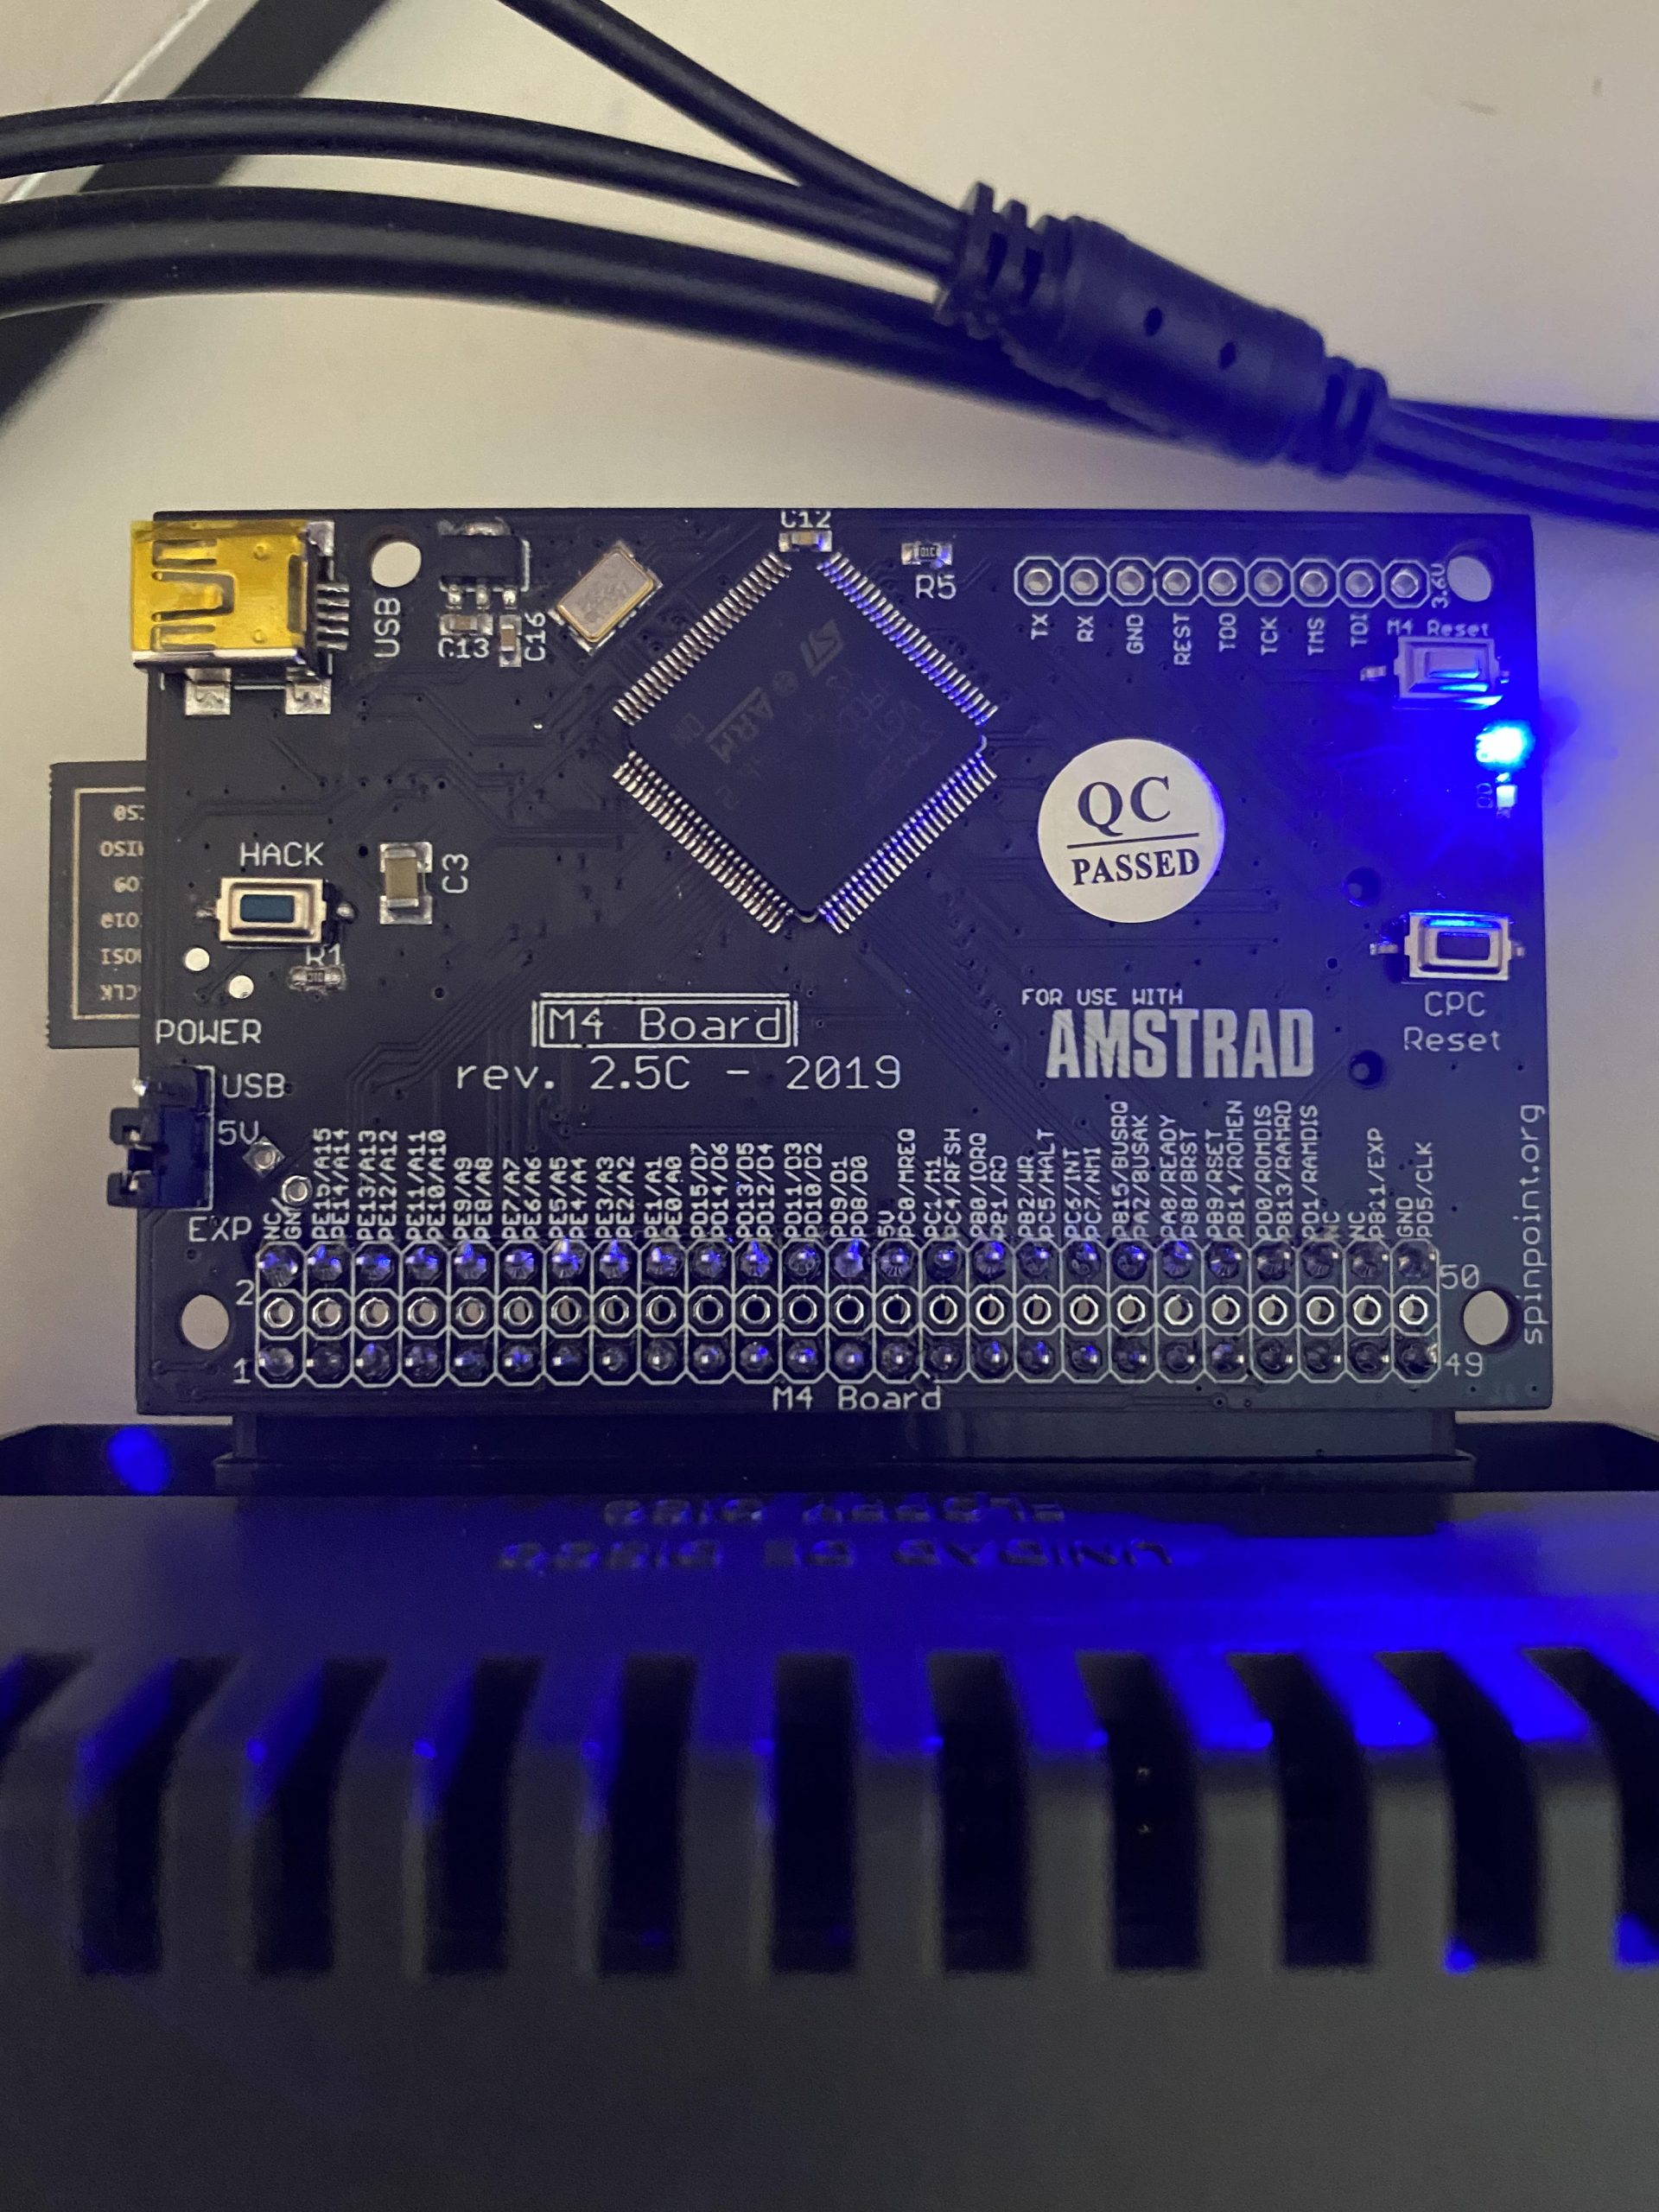
 A closer look. Here you can see the board is extremely well laid out with a main chip in the center and connectors and buttons scattered around, everything is very well labelled. for those so inclined, my board is dated 2019 even though I purchased it in April 2021, I guess he has a bunch of those older PCB’s still lying around.
 The board offers more than the cool Wi-Fi abilities, you can also plug in an SD card to gain access to gazillions of games copied to the card, you can also store up to 32 ROMs on it, and that’s a pretty cool function indeed. In this blog post we will take a look at getting it connected to Wi-Fi and copying some games from a PC to the local storage.
Getting connected to Wi-Fi
Before starting, insert a FAT32 formatted SD card into the SD slot. This is needed to store information such as your Wi-Fi settings.
To get connected to Wi-Fi you’ll need to use the |netset command along with some parameters so it knows how to connect. Below is an example of that on a CPC 6128.
|netset,"name=CPC6128, ssid=Amstrad, pw=amstrad-noob.com, dhcp=1, dns1=8.8.8.8, dns2=8.8.4.4, ntp=time.windows.com"
Note: Don’t worry if you make a typo, the CPC has a very nice ‘copy’ ability so you can copy commands previously typed by holding down SHIFT, then move the cursor to where you want to start copying, then press COPY, it’s that easy.
I’m using a CPC 464 in this blog post so if you try entering the above you’ll get a
“Type mismatch“
error shown here.
The solution (on a CPC 464) is to assign a variable to the input as basic 1.0 doesn’t work well with this. So if you are using an Amstrad CPC 464 try this.
noob$="name=CPC464, ssid=Amstrad, pw=amstrad-noob.com, dhcp=1, dns1=8.8.8.8, dns2=8.8.4.4, ntp=time.windows.com"
If all went well, the output should say:
“Ready”
Next type
|netset,@noob$
This tells the M4 board to use the settings you applied using the variable as input for the parameters.
If all went well, the output should say:
“Ready”
Next type
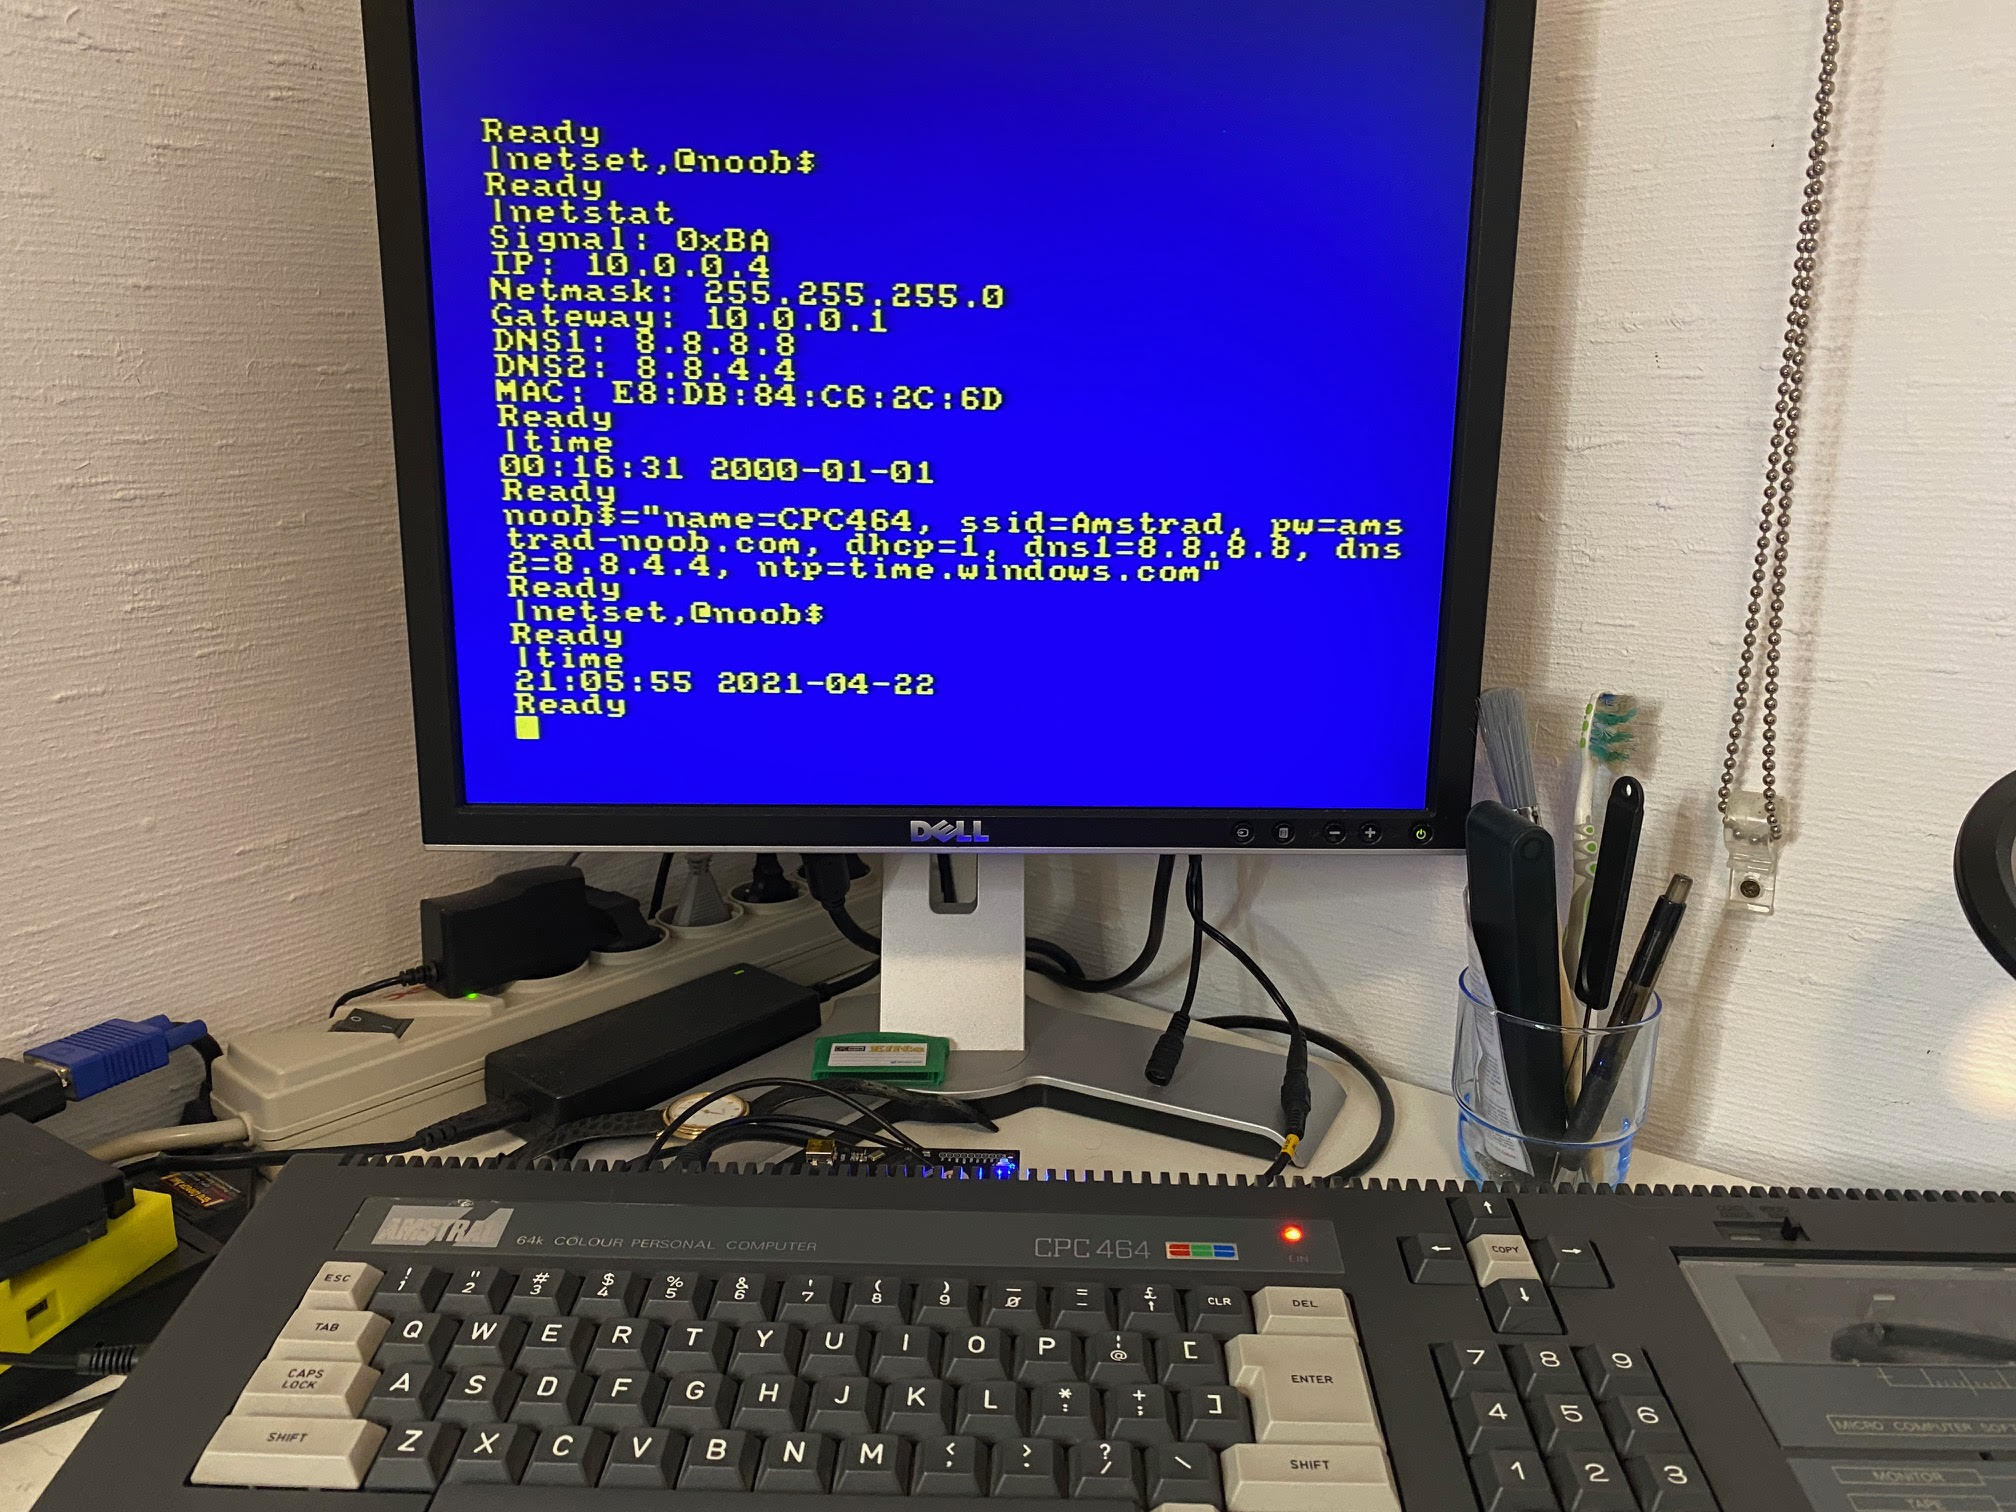
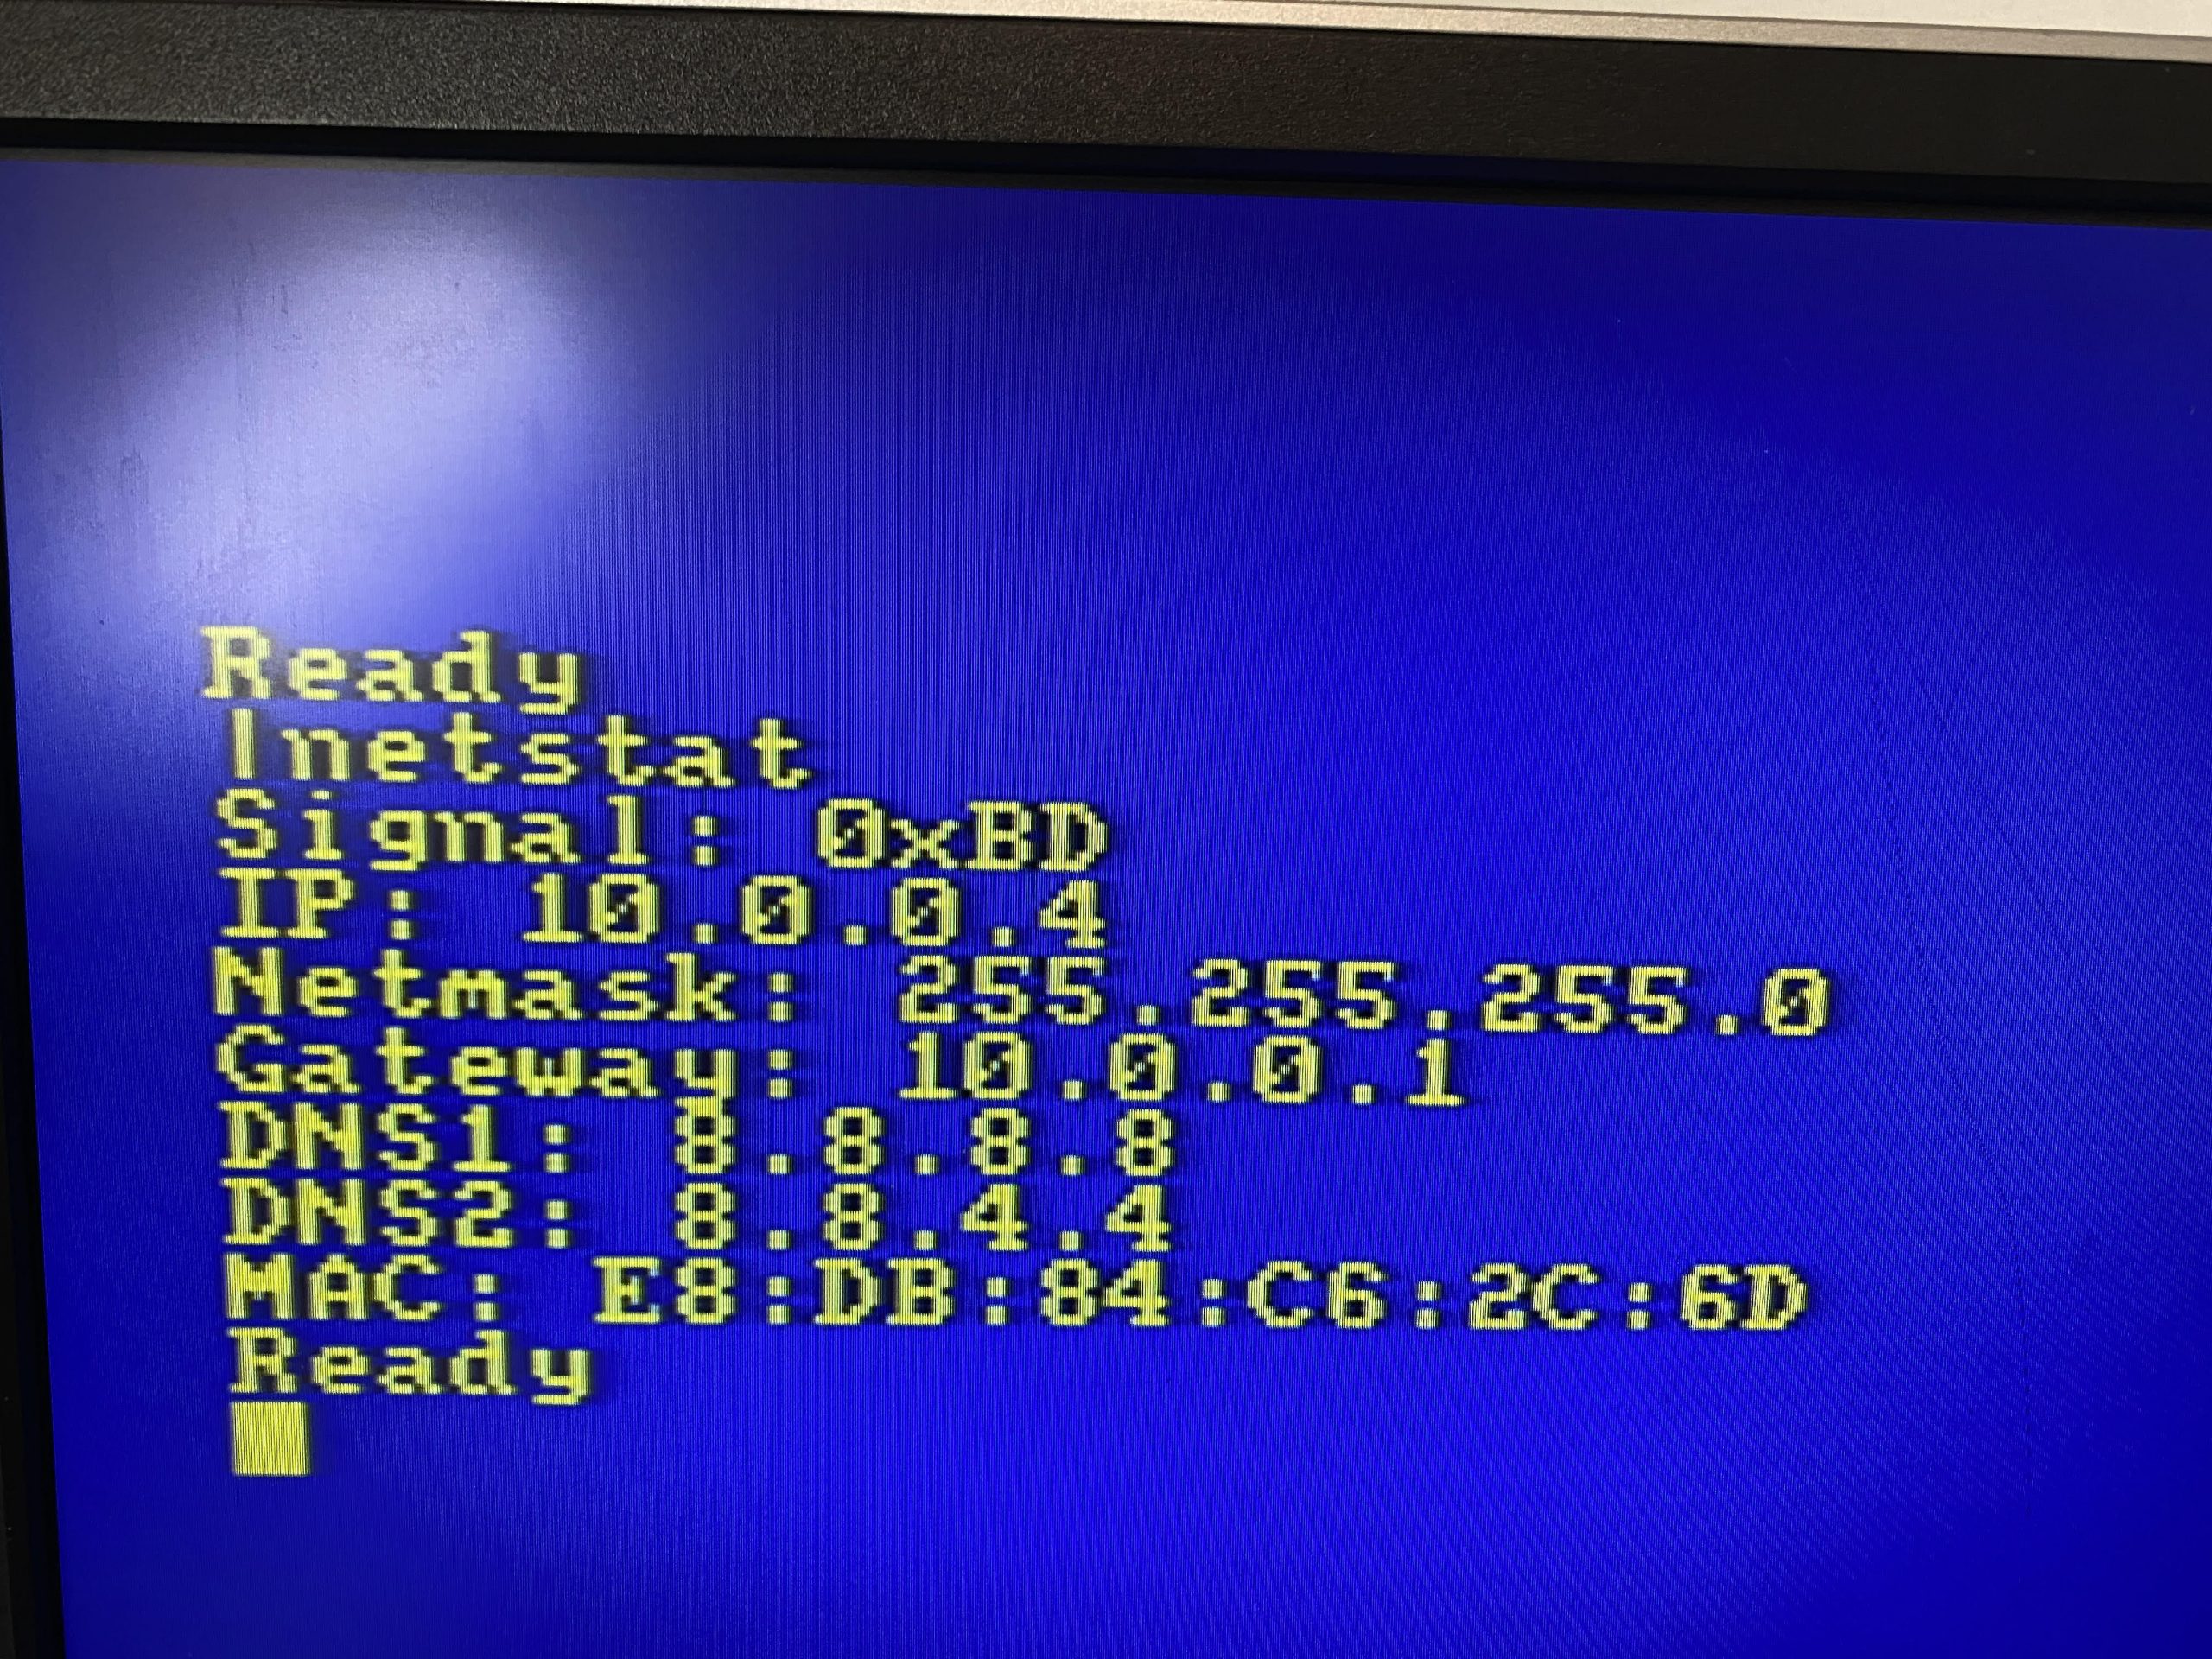
|netstat
It should reveal your current internet settings including mac address, dns settings and IP address.
If it doesn’t and instead says “No AP found” or “Connecting” try the command again.
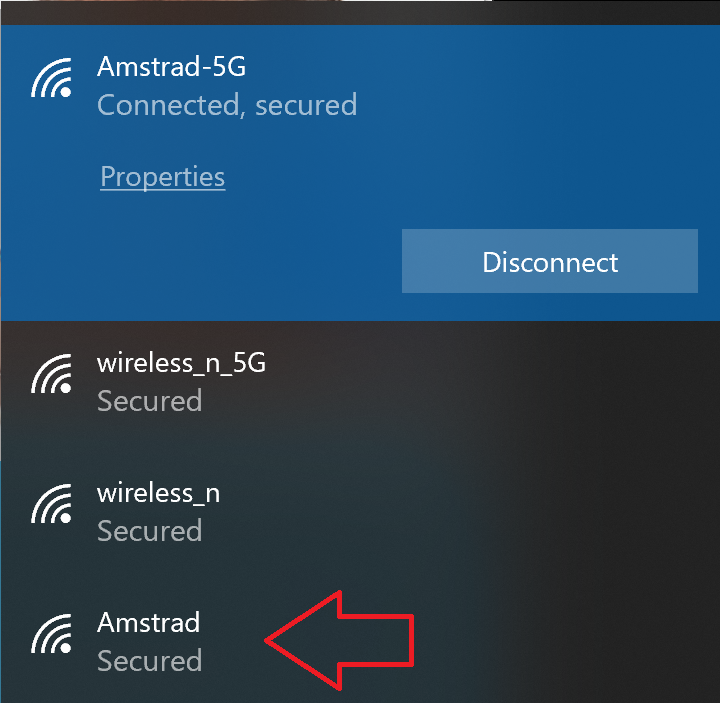
If it stays on “No AP found” make sure to type the SSID using the exact same case (upper/lower) as you can see the SSID being reported on your normal computer. So if your SSID shows up as “Amstrad” then use that SSID in your parameters, for example “amstrad” won’t work, it must be “Amstrad” in this example.
To prove things are working type
|time
it should retrieve the time from the NTP server specified in the parameters, it took a few attempts but as you can see it is reporting today’s date/time below.
How Awesome ! The date and time are synced via the internet on an Amstrad CPC !!!
Copy games from a PC to the M4 storage
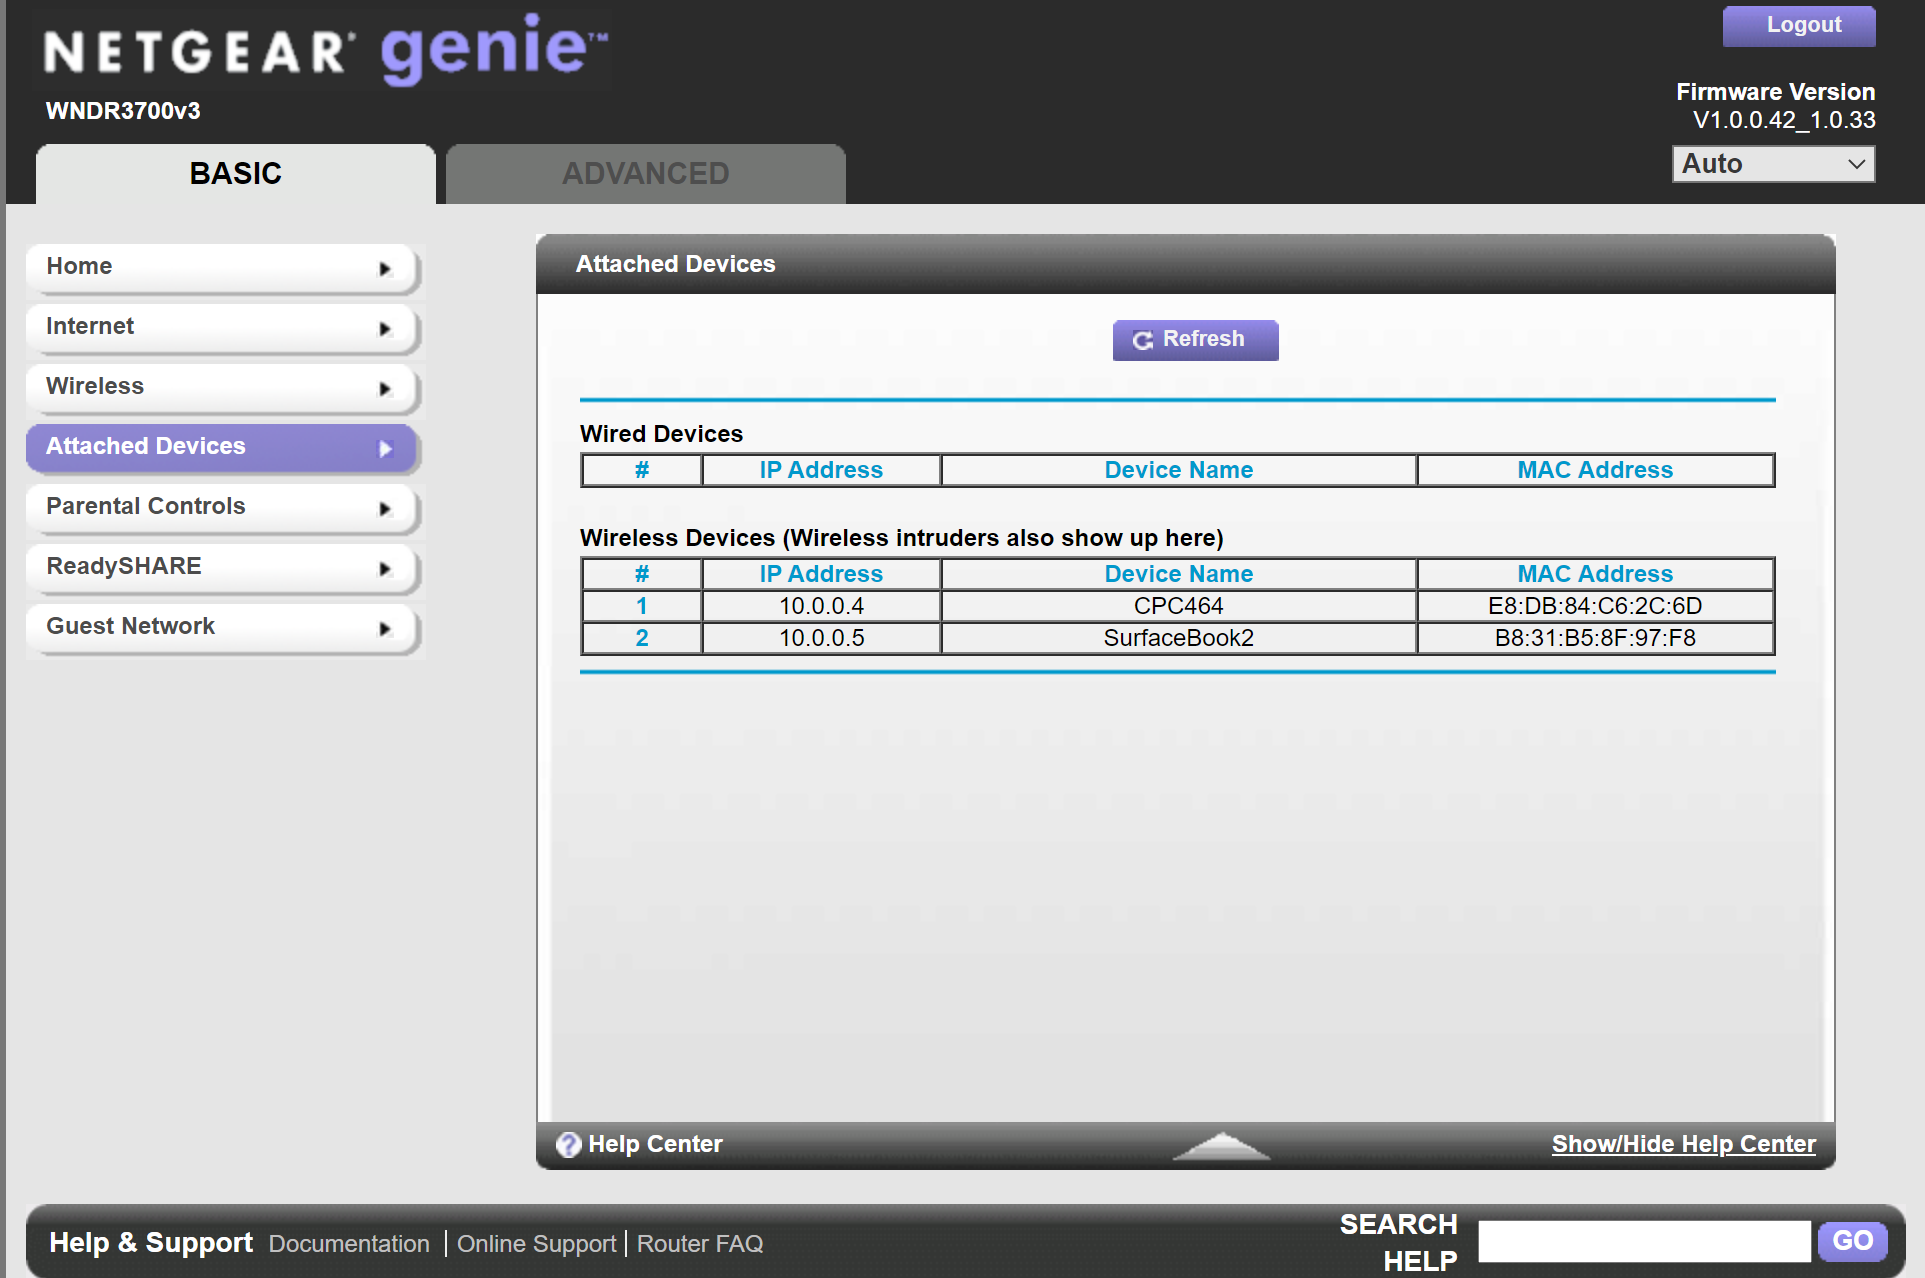
Next, on a Windows (or other internet connected computer), make sure that you are first connected to the same network router as your CPC is connected to, mine is a Netgear router for this test. In the Netgear admin interface i can see that both this computer (Surface Book 2) and the CPC (CPC464) are connected.
 Now that I know both computers are on the SAME network, I can do stuff on the Windows PC. Browse to the IP address of your CPC in a web browser in the following format http://x.x.x.x where x.x.x.x is the ip address revealed using |netstat
You should see something like this in your web browser.
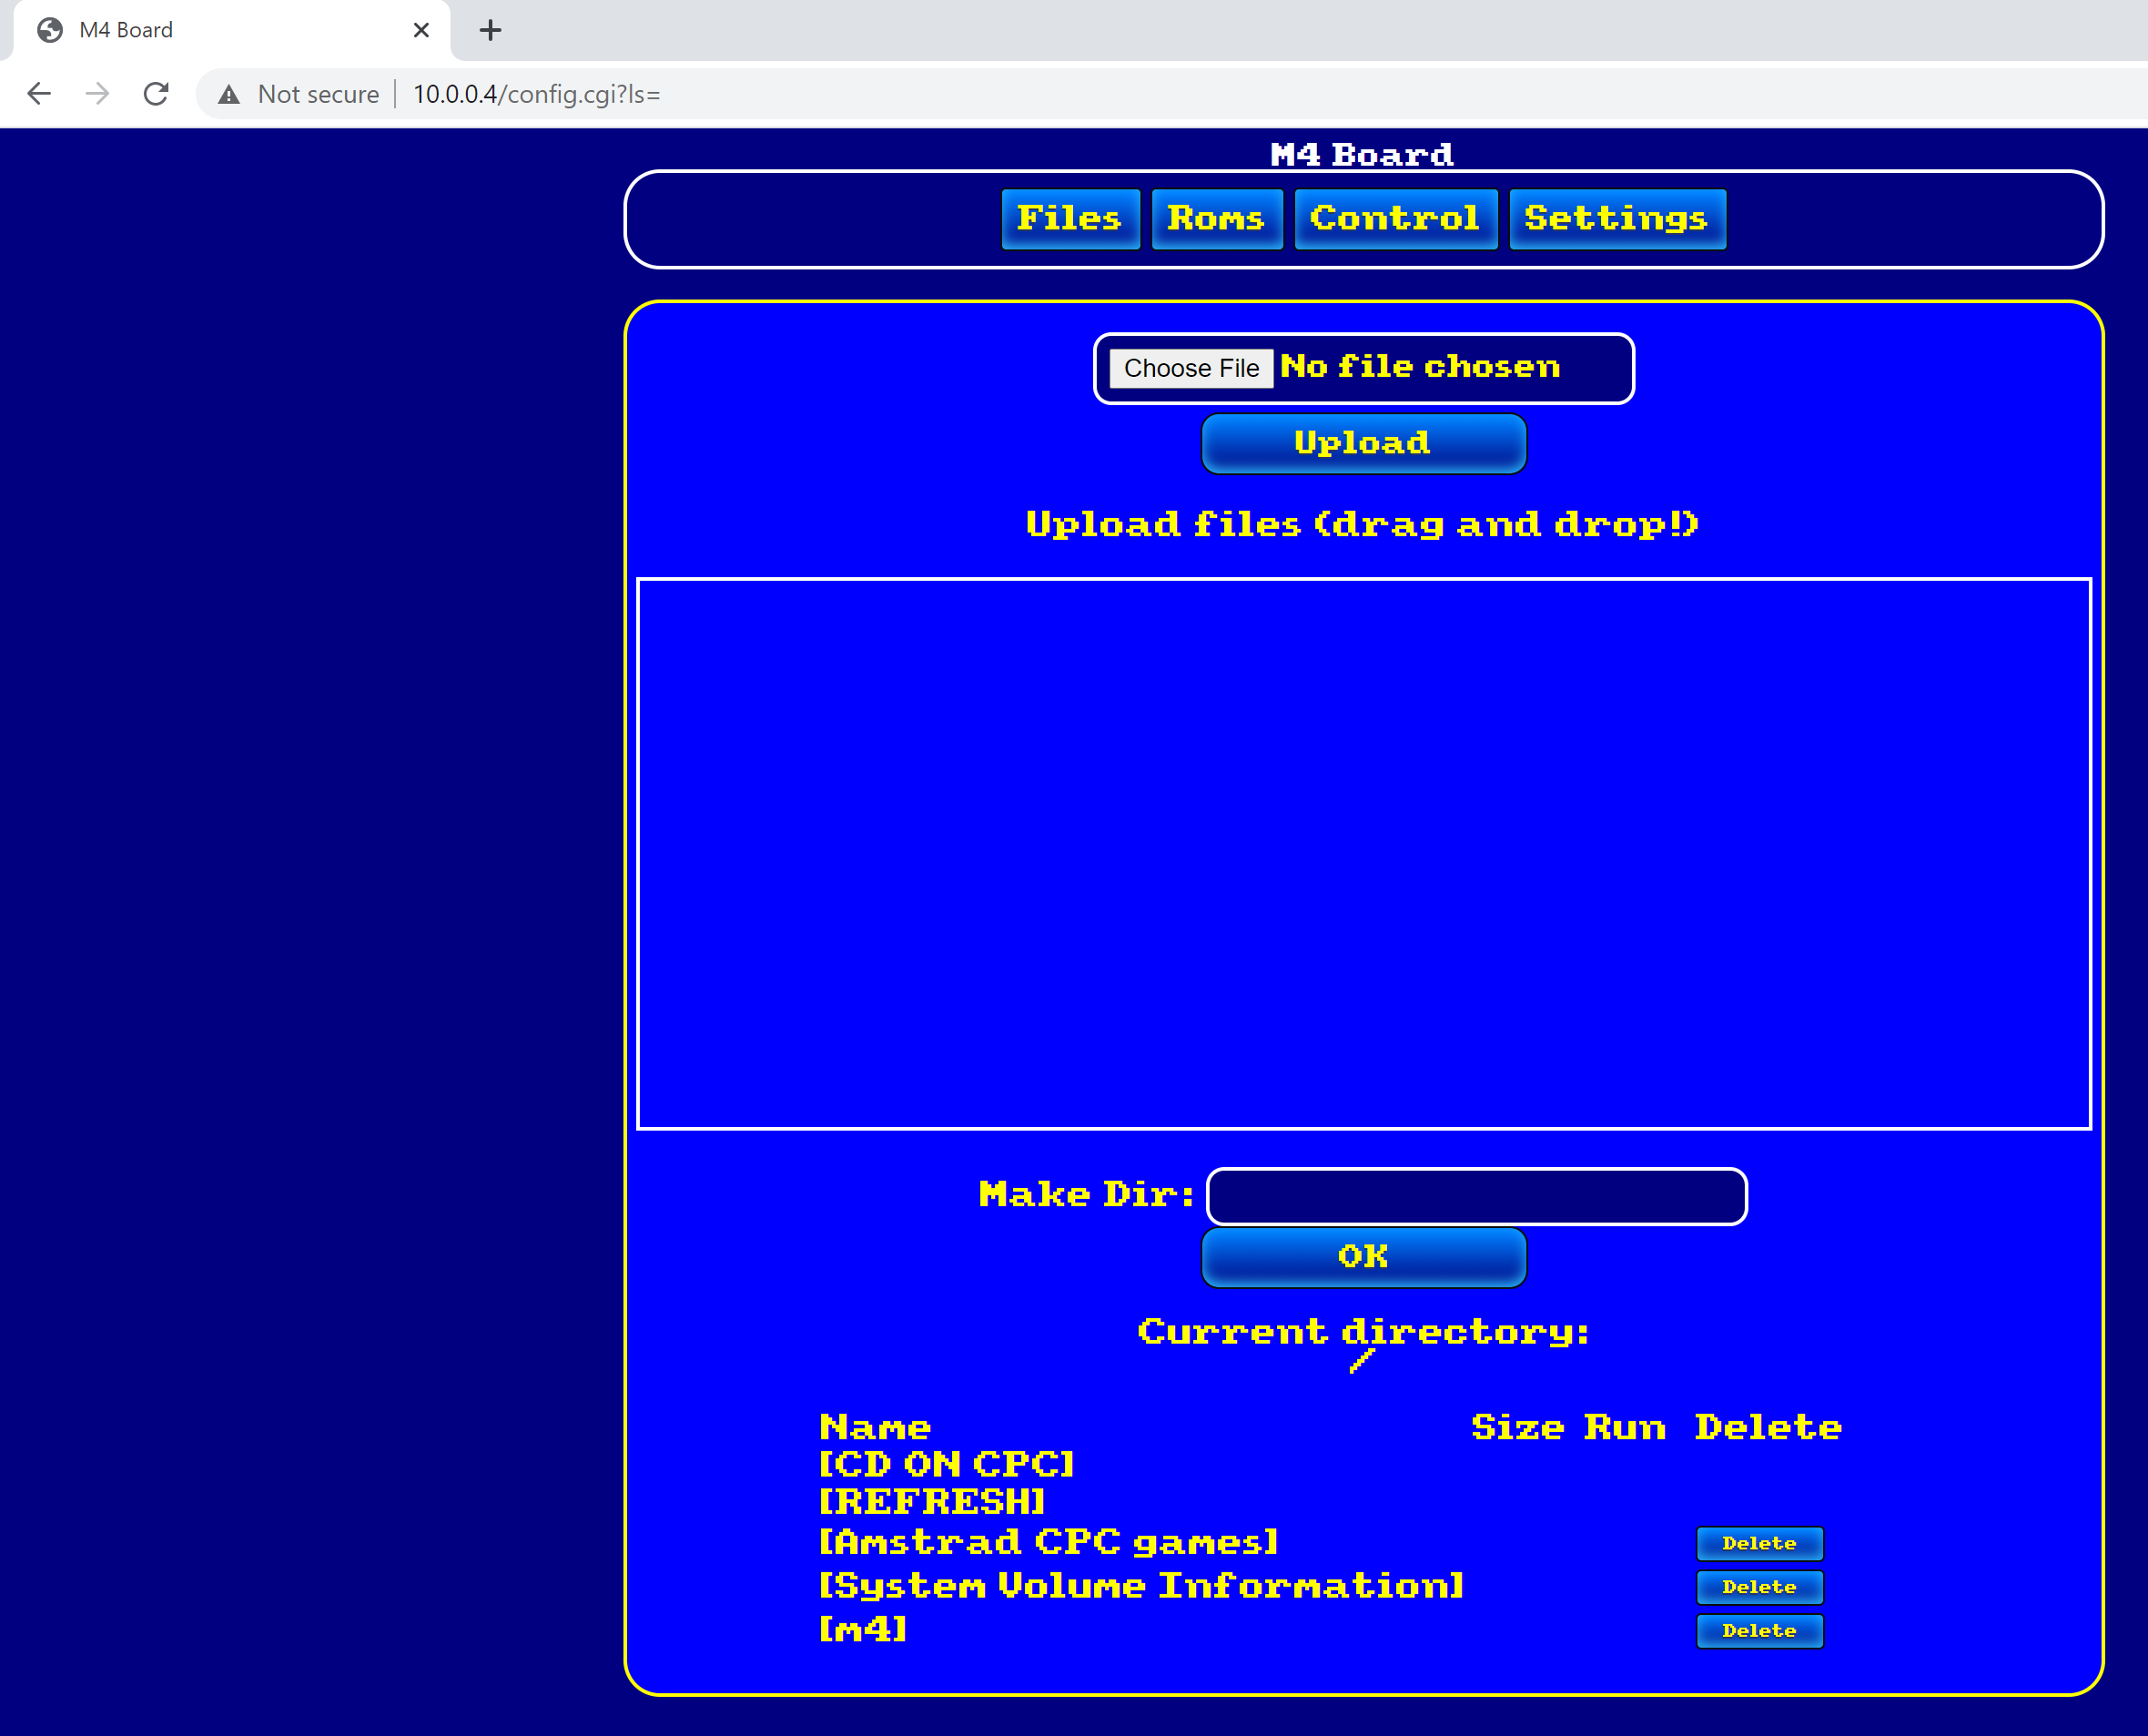 As you can see you have a bunch of options there, in this blog post I will only try and run a game by copying it to the M4 from a Windows computer. In the Make Dir: section, enter GAMES and press OK.
It appears in the view like below.
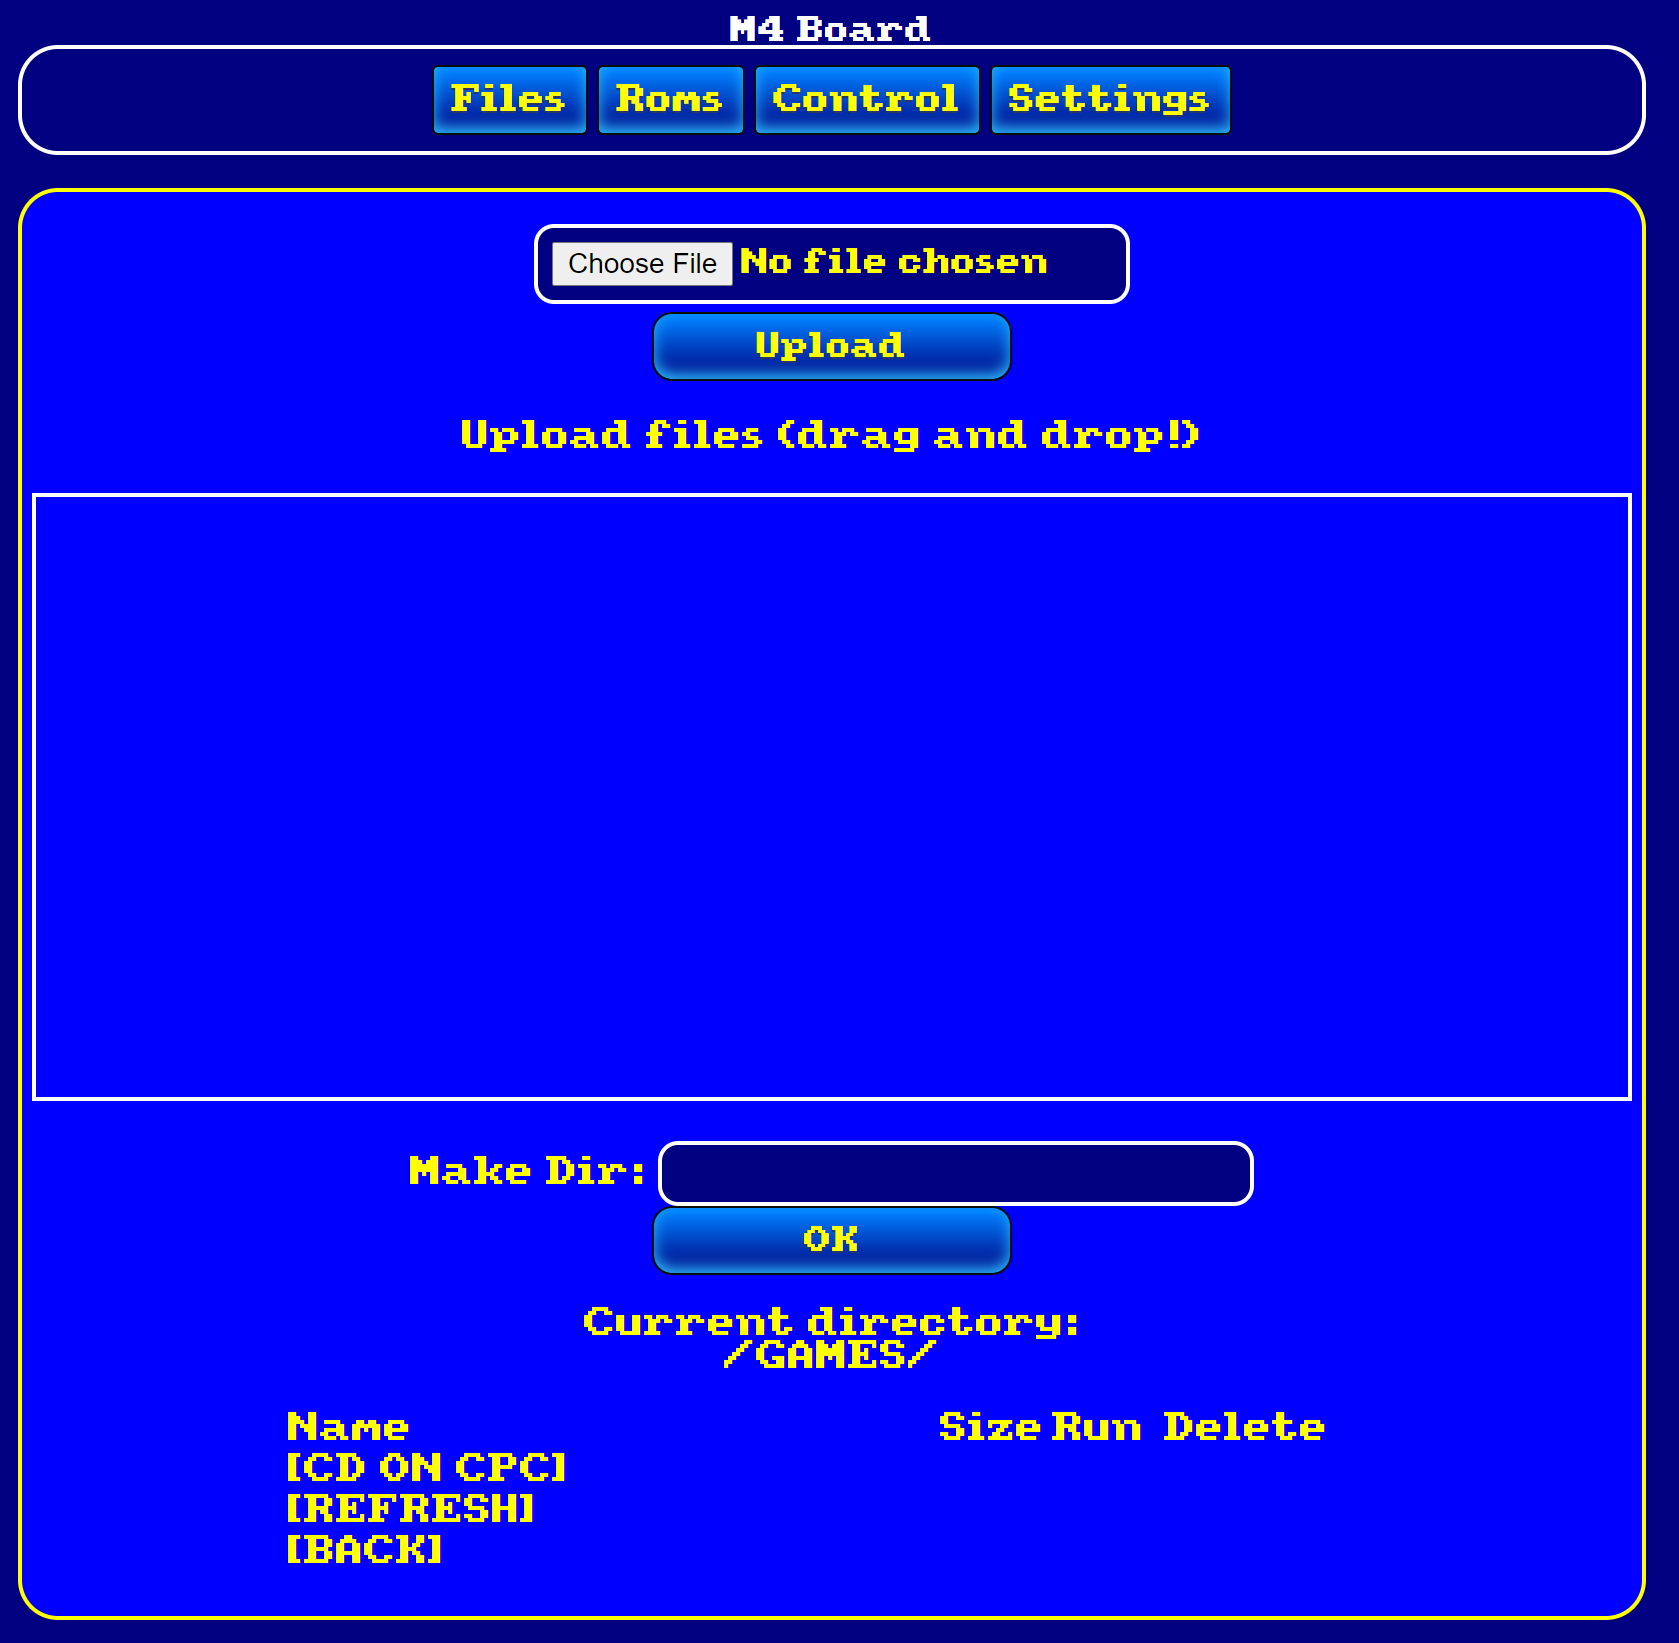
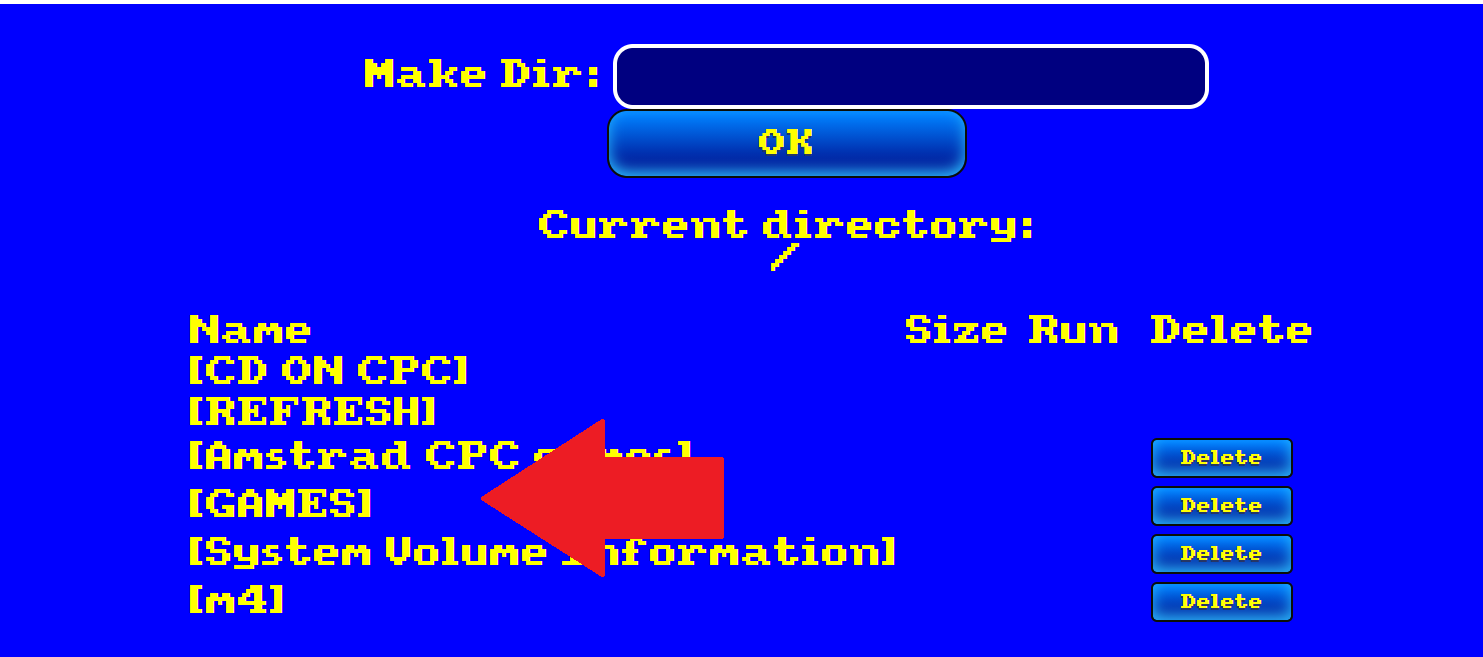 Next, click the GAMES directory you just created and you should see that it’s listed as the current directory
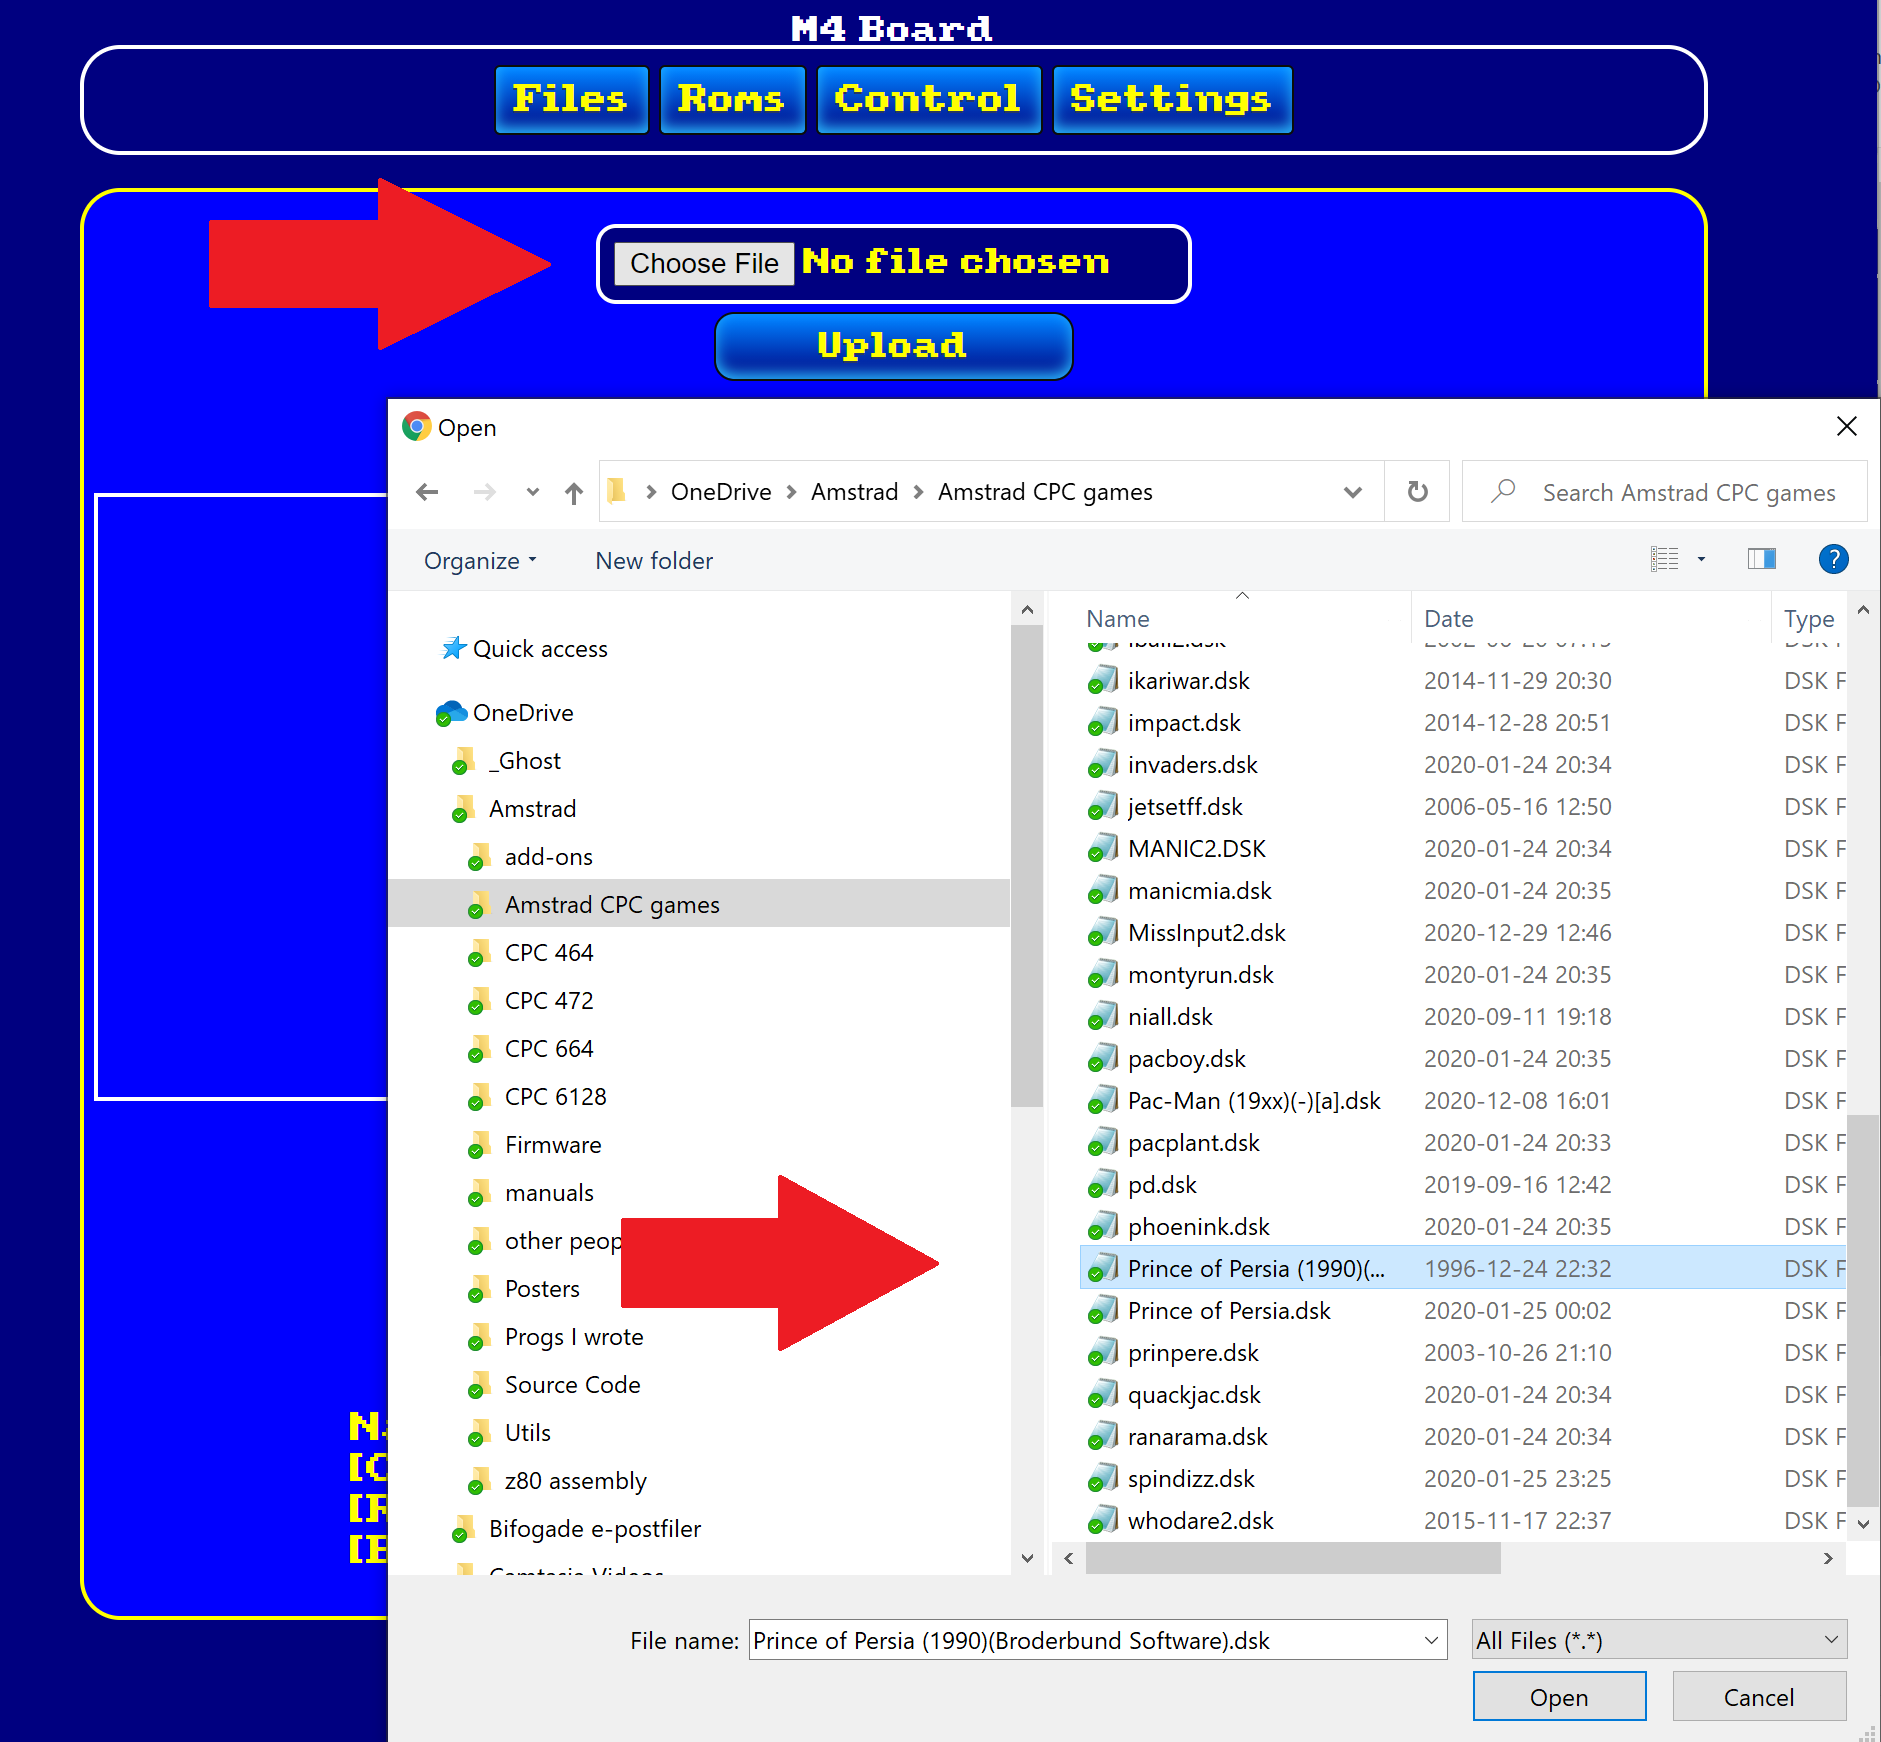
 Next, you can select Choose file, select one game, and select Upload to upload one game..
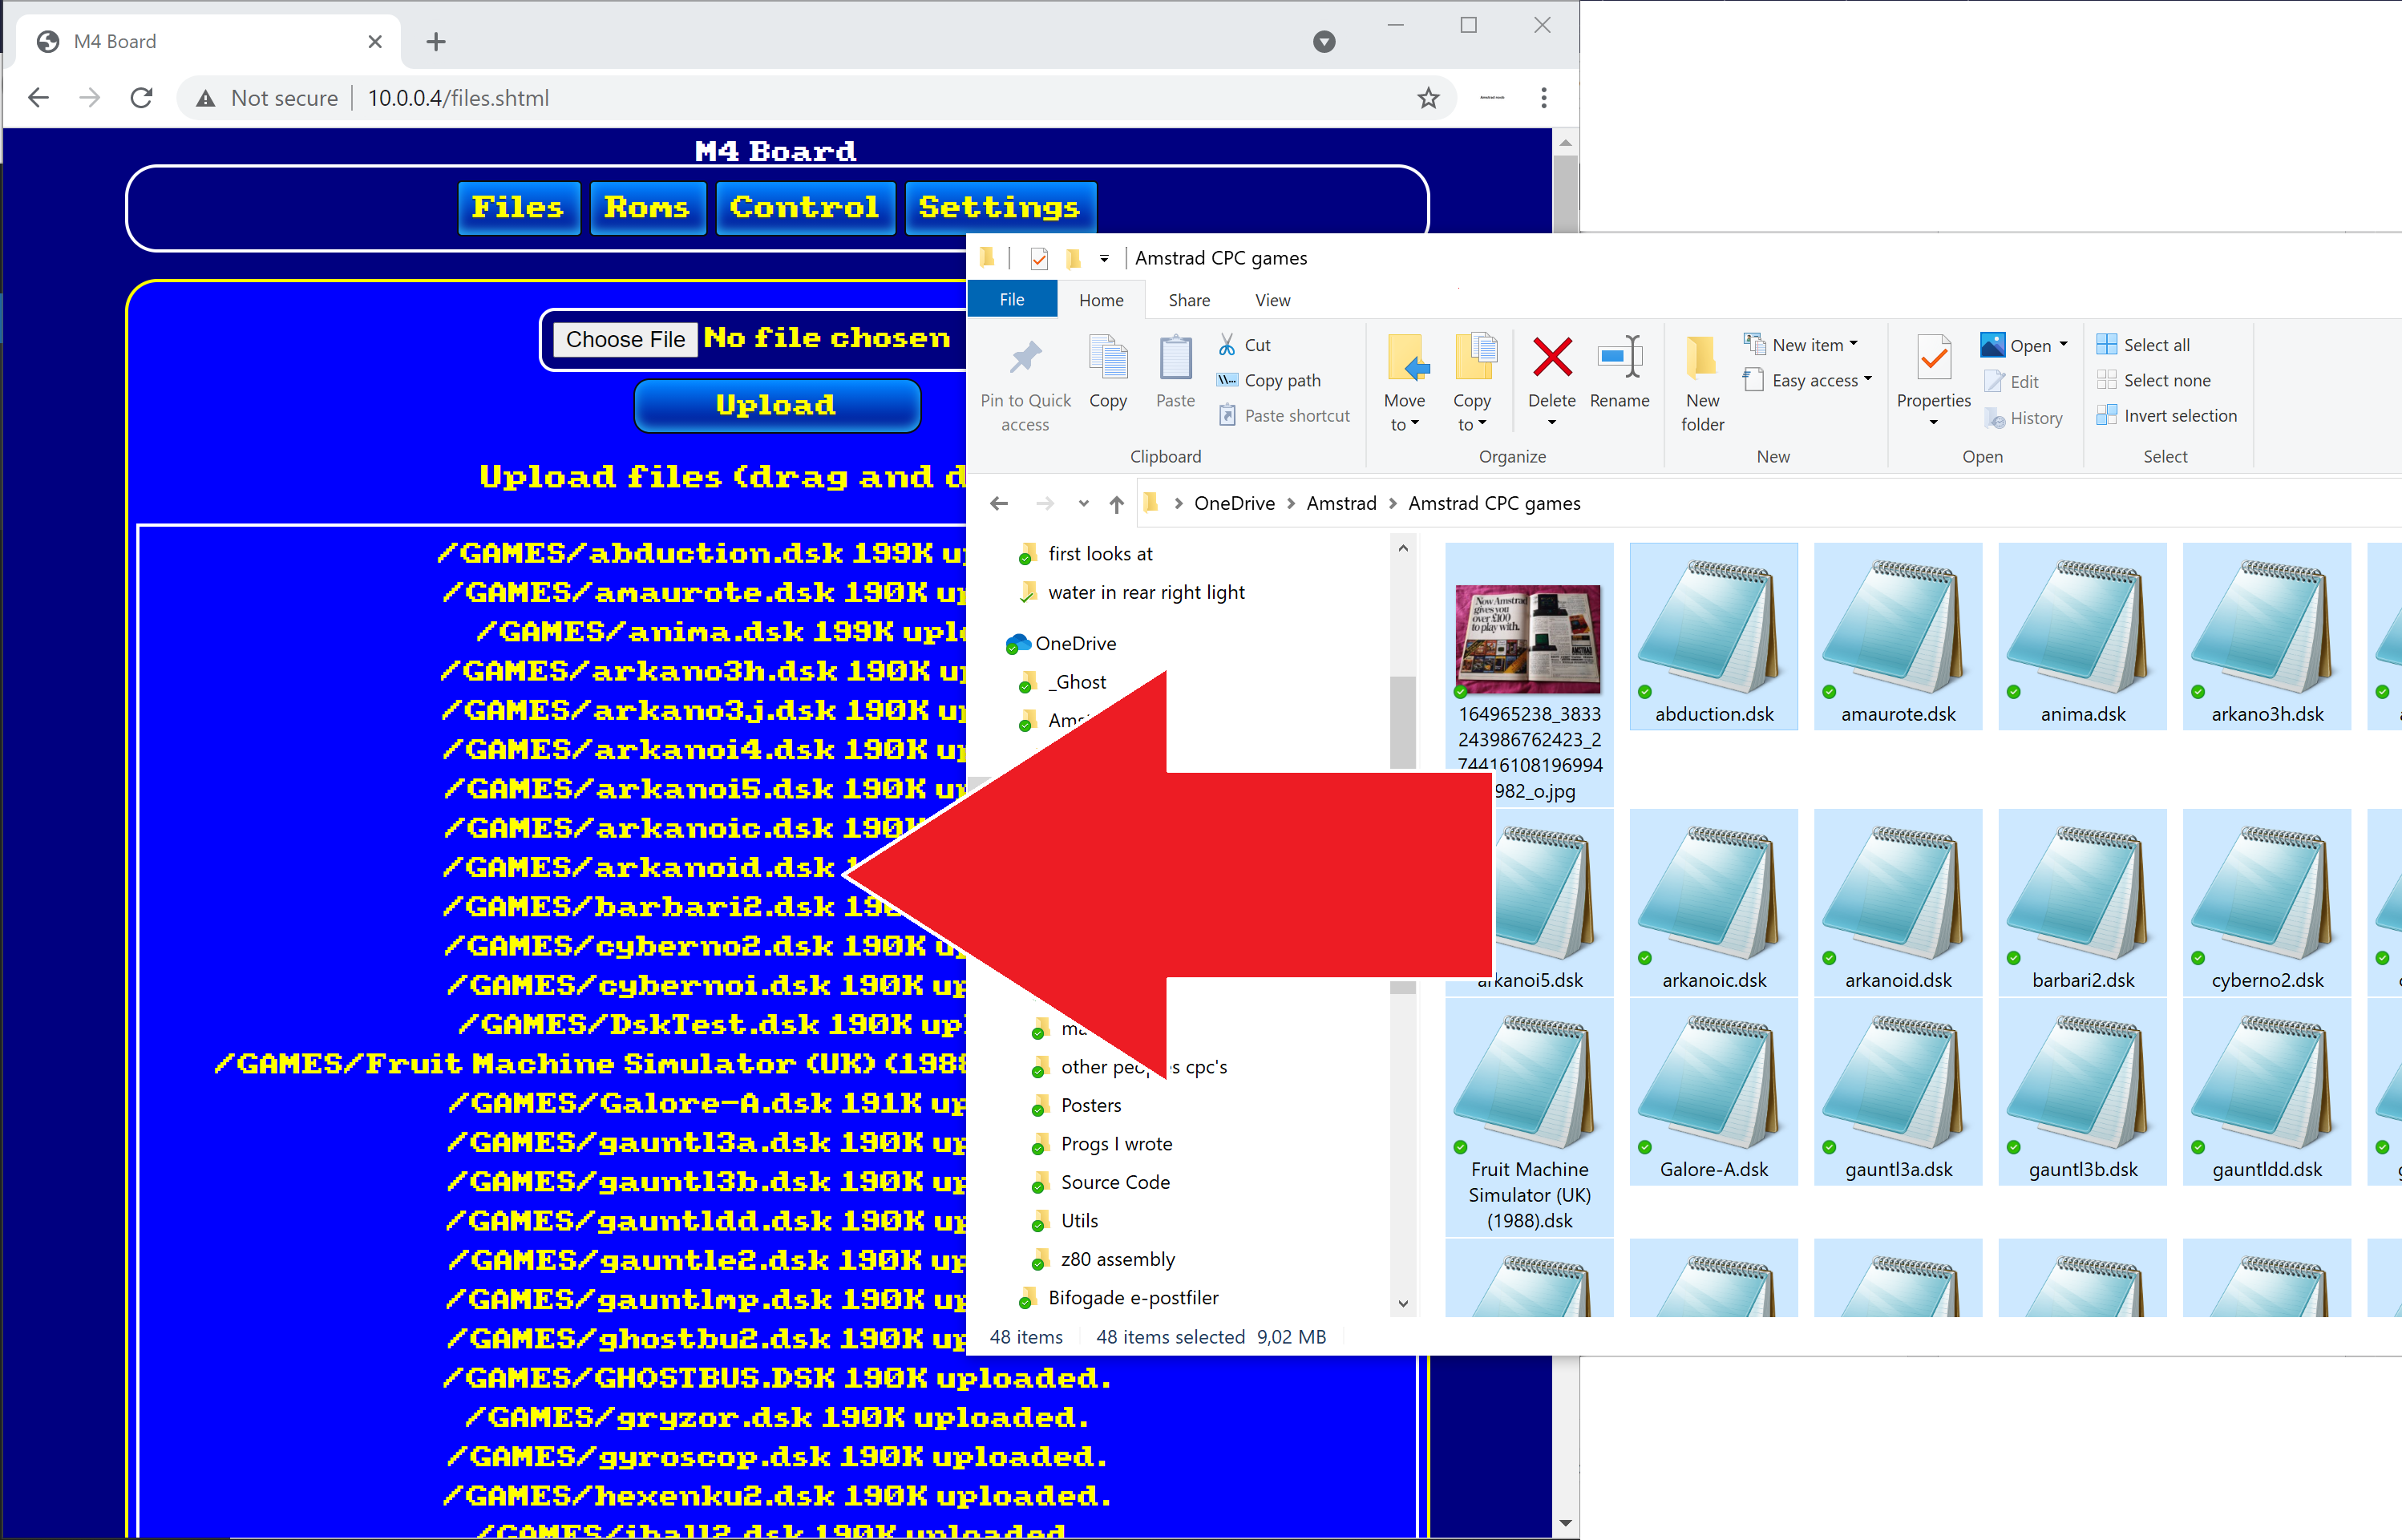
 Or drag and drop some games…by selecting a bunch and dropping them into the square, this did make my browser show some ‘unresponsive errors’ but just wait… and it will work.
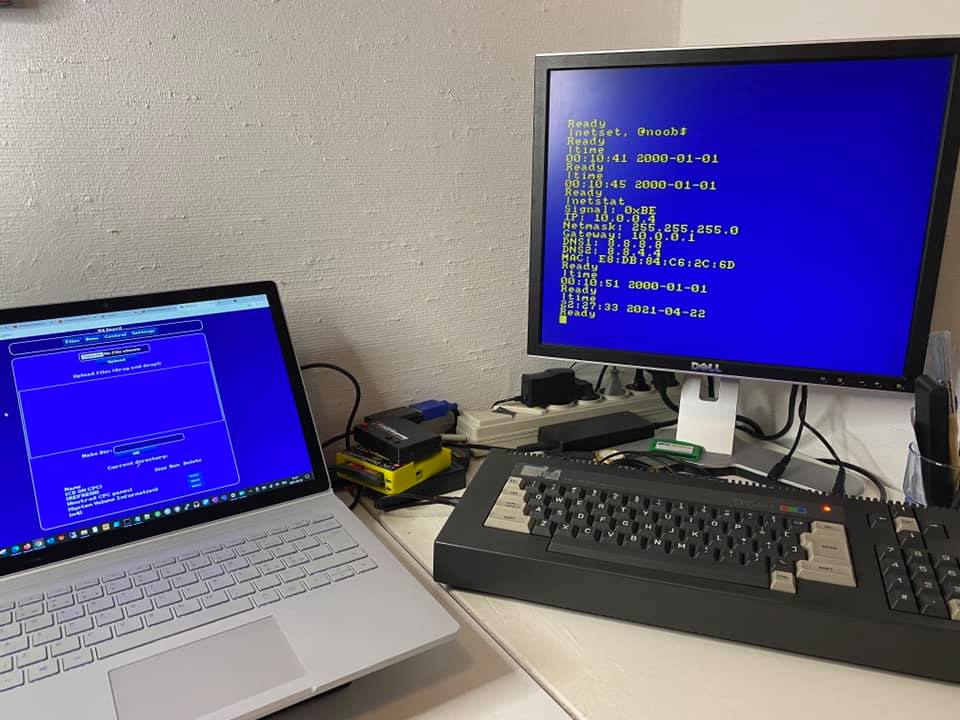
After mine was done copying all the files it looked like the blue box on the left of the screenshot below.
 So now that’s done, back to the CPC !
Navigating the M4 storage
On the CPC type cat, You should see the GAMES directory (and others) you just created.
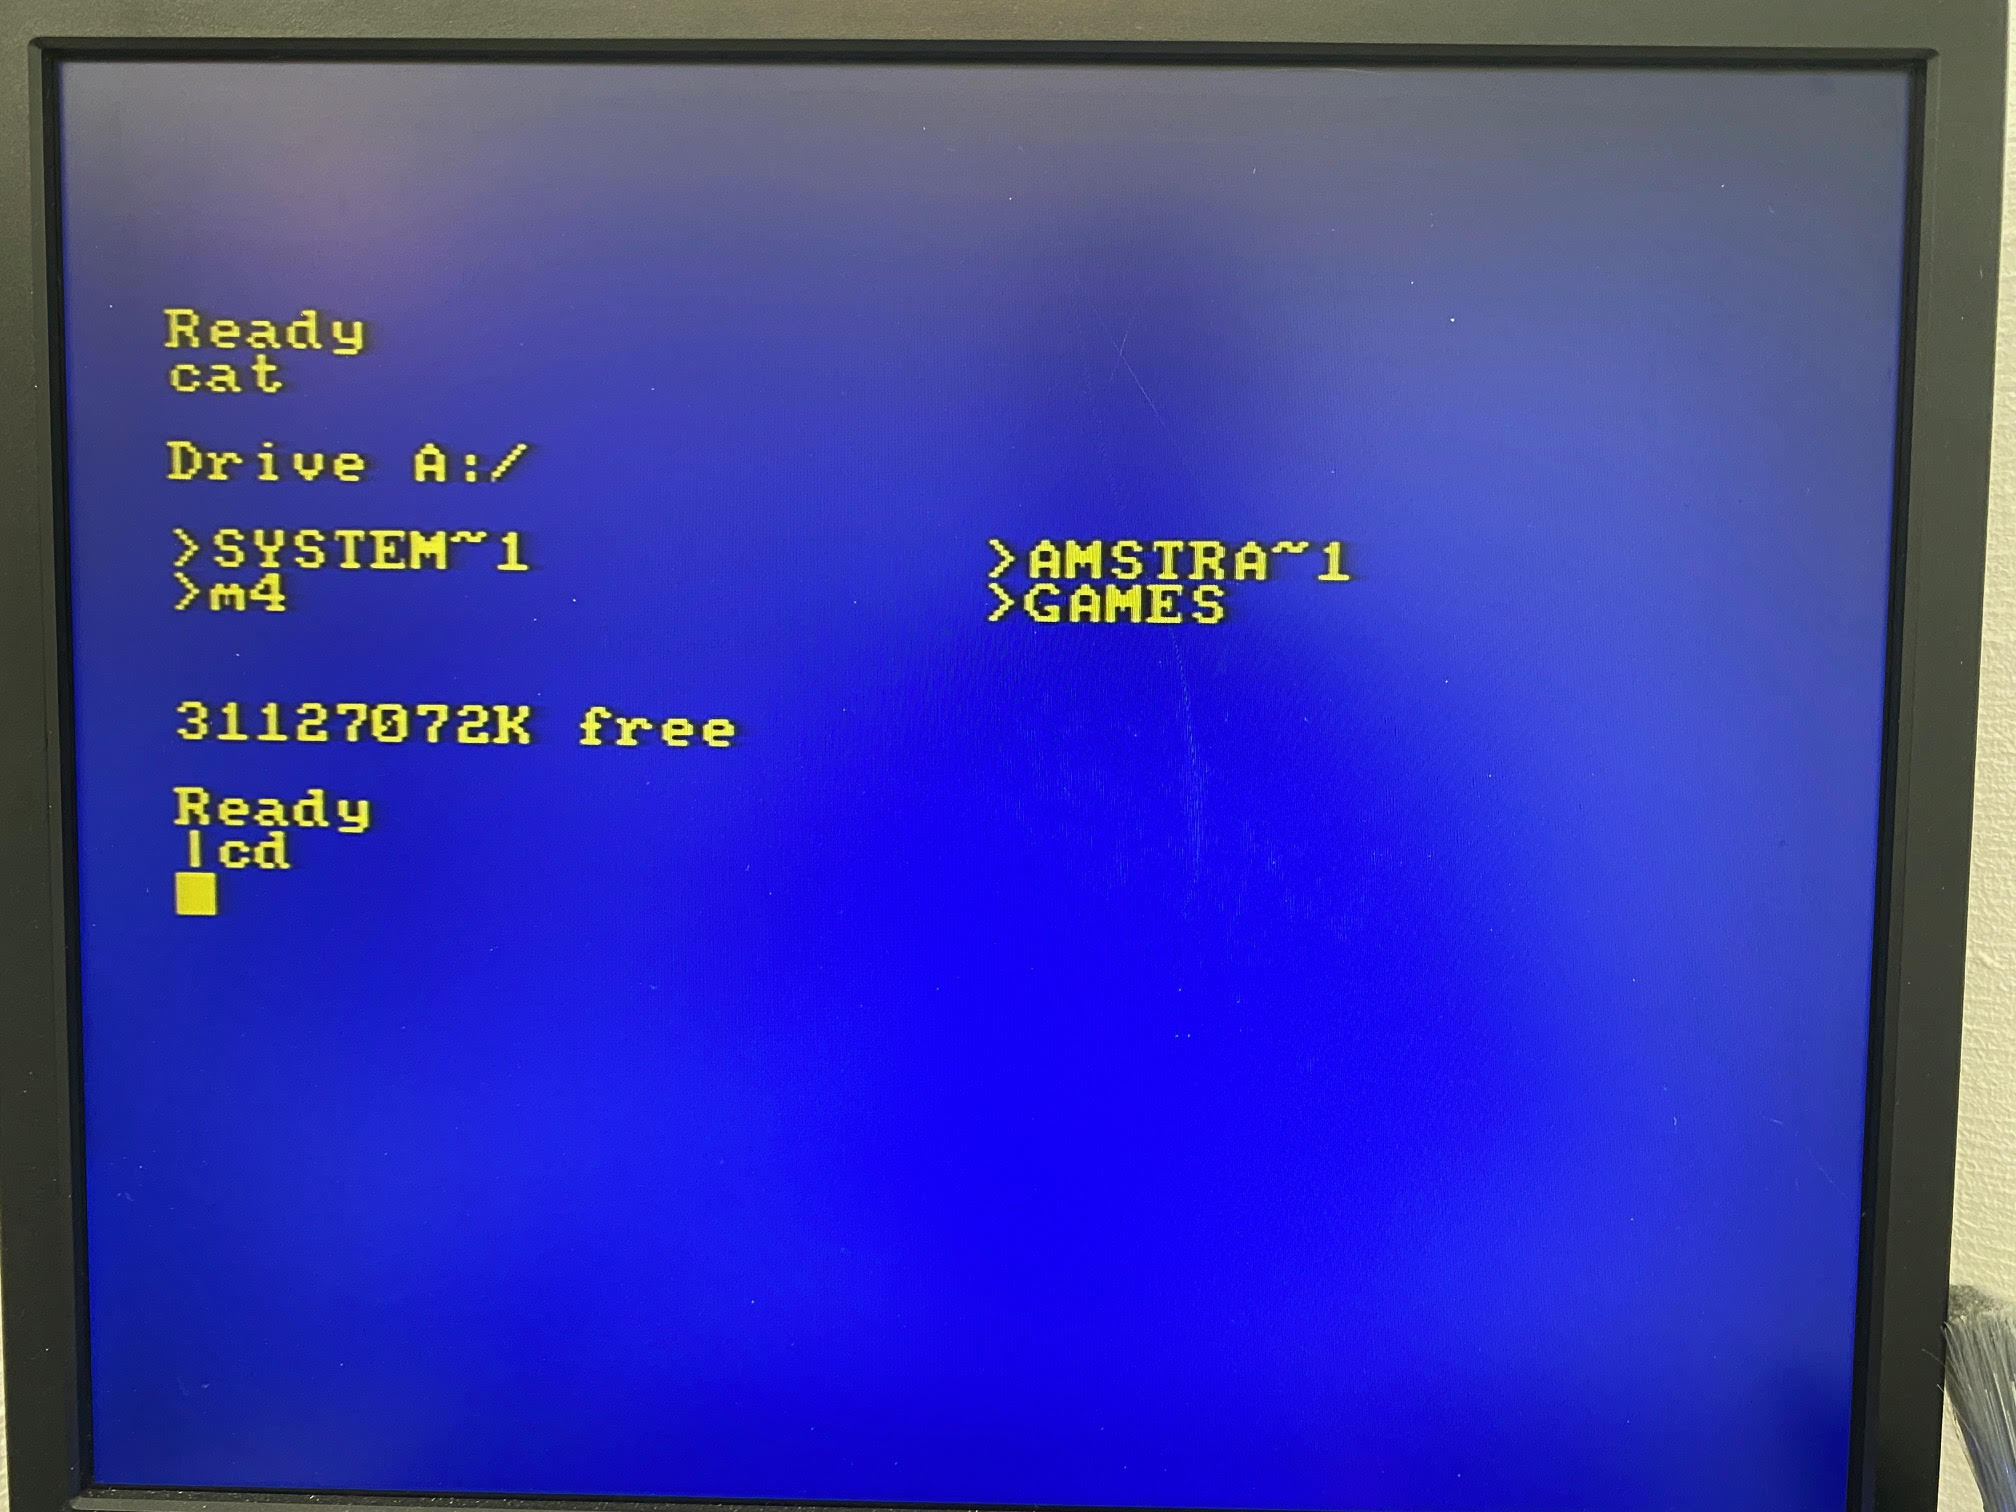
Note: on CPC's with Basic 1.0 (CPC464), RSX commands work in a different way, you can't pass the parameters directly to the rsx.
You will have to do it using a variable.
Ie. change into a sub directory called "DISCS". Type:  A$="DISCS":|cd,@A$
To make it easier to navigate for basic 1.0 users a prompt was built into |cd command.
You can press |cd (enter) then type or use cursor copy for the name.
As I’m using a CPC464 with Basic 1.0 in this blog post, I had to use the tip above ^
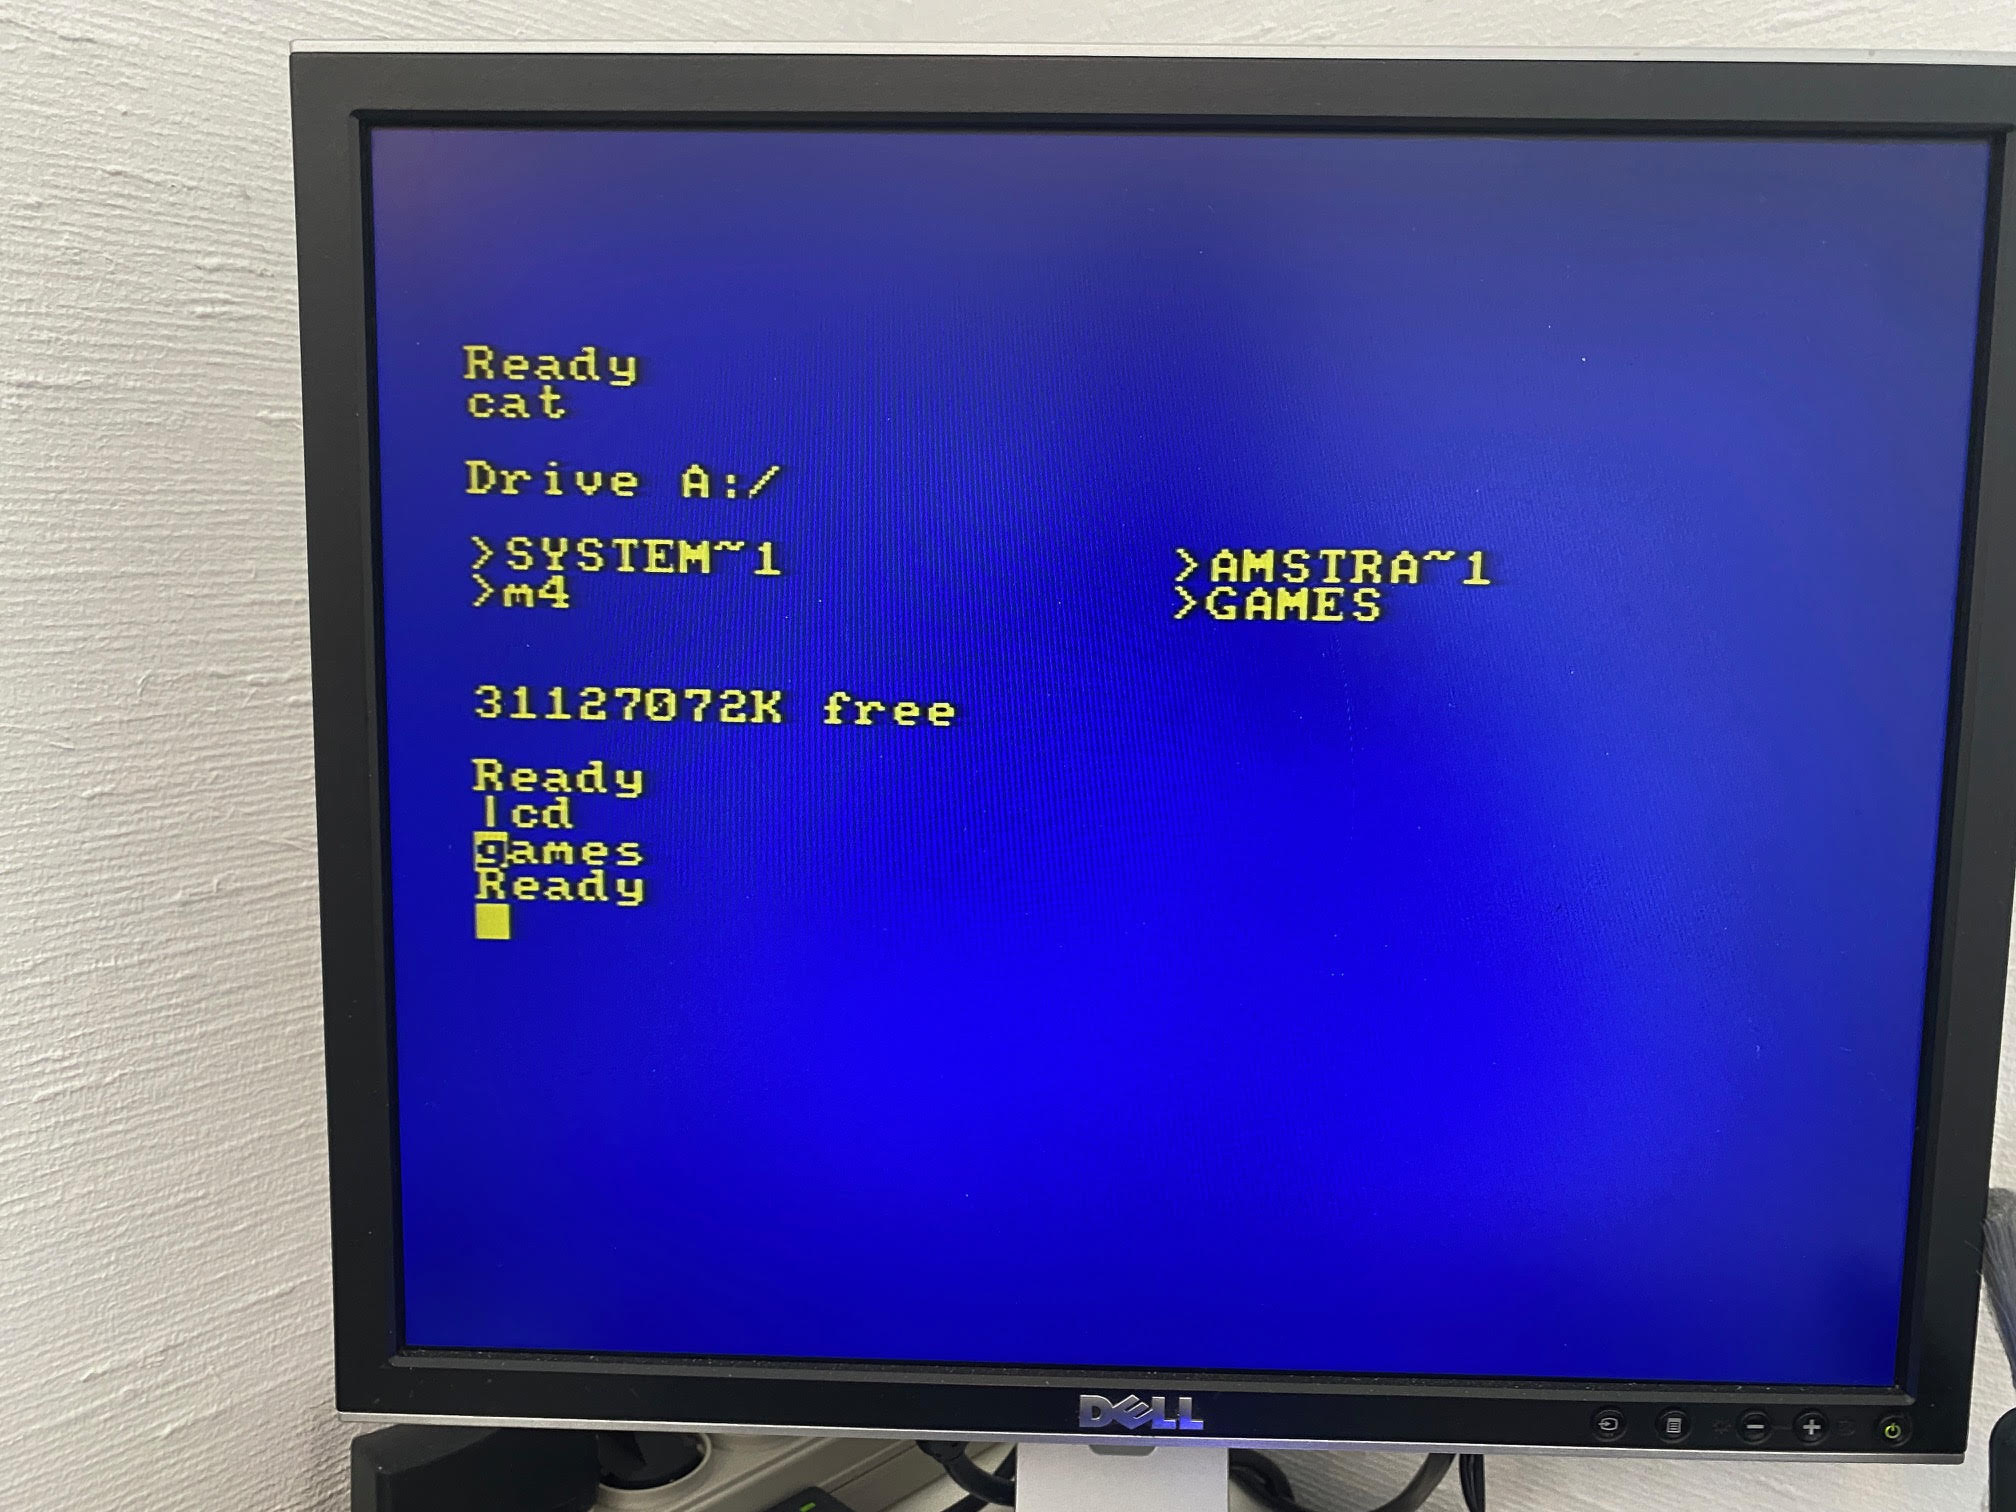
So first I typed cat followed by pressing |cd and enter, this then prompts you to type something so I typed the name of the directory, games and pressed enter again, it said Ready.
 At this point I can type cat again to see what is in that directory.
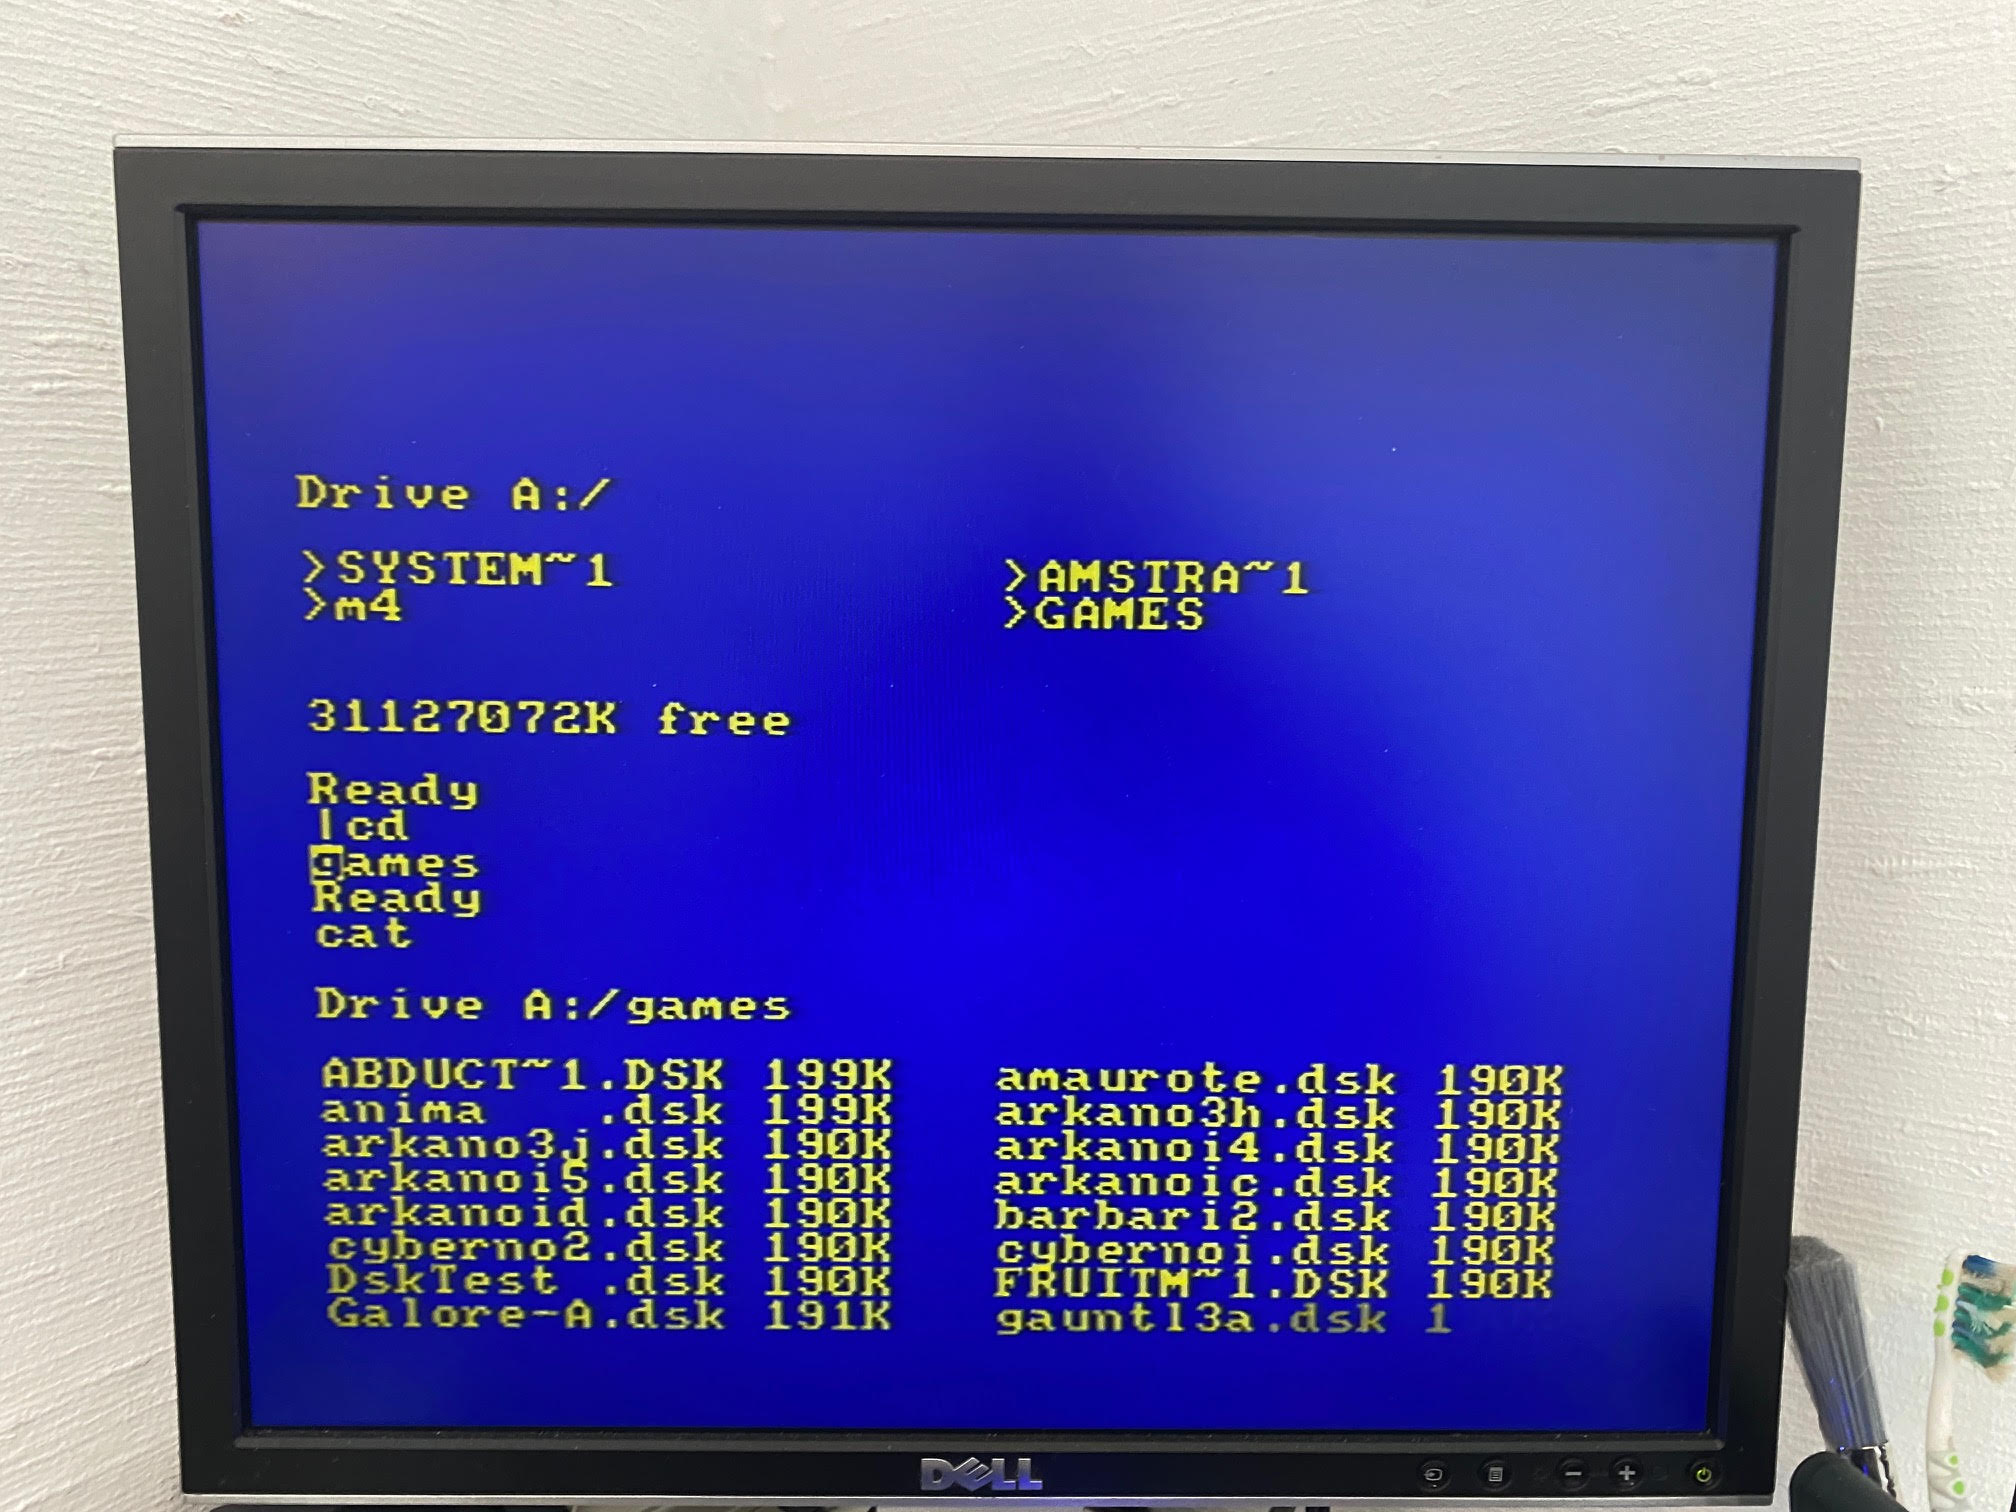
As you can see all my games are in DSK format (disk). To launch them, use the |cd command and press enter. Next, enter the name of the game disk, eg: whodare2.dsk
If all went well, it has mounted that disk and you can see the contents of the disk itself using cat.
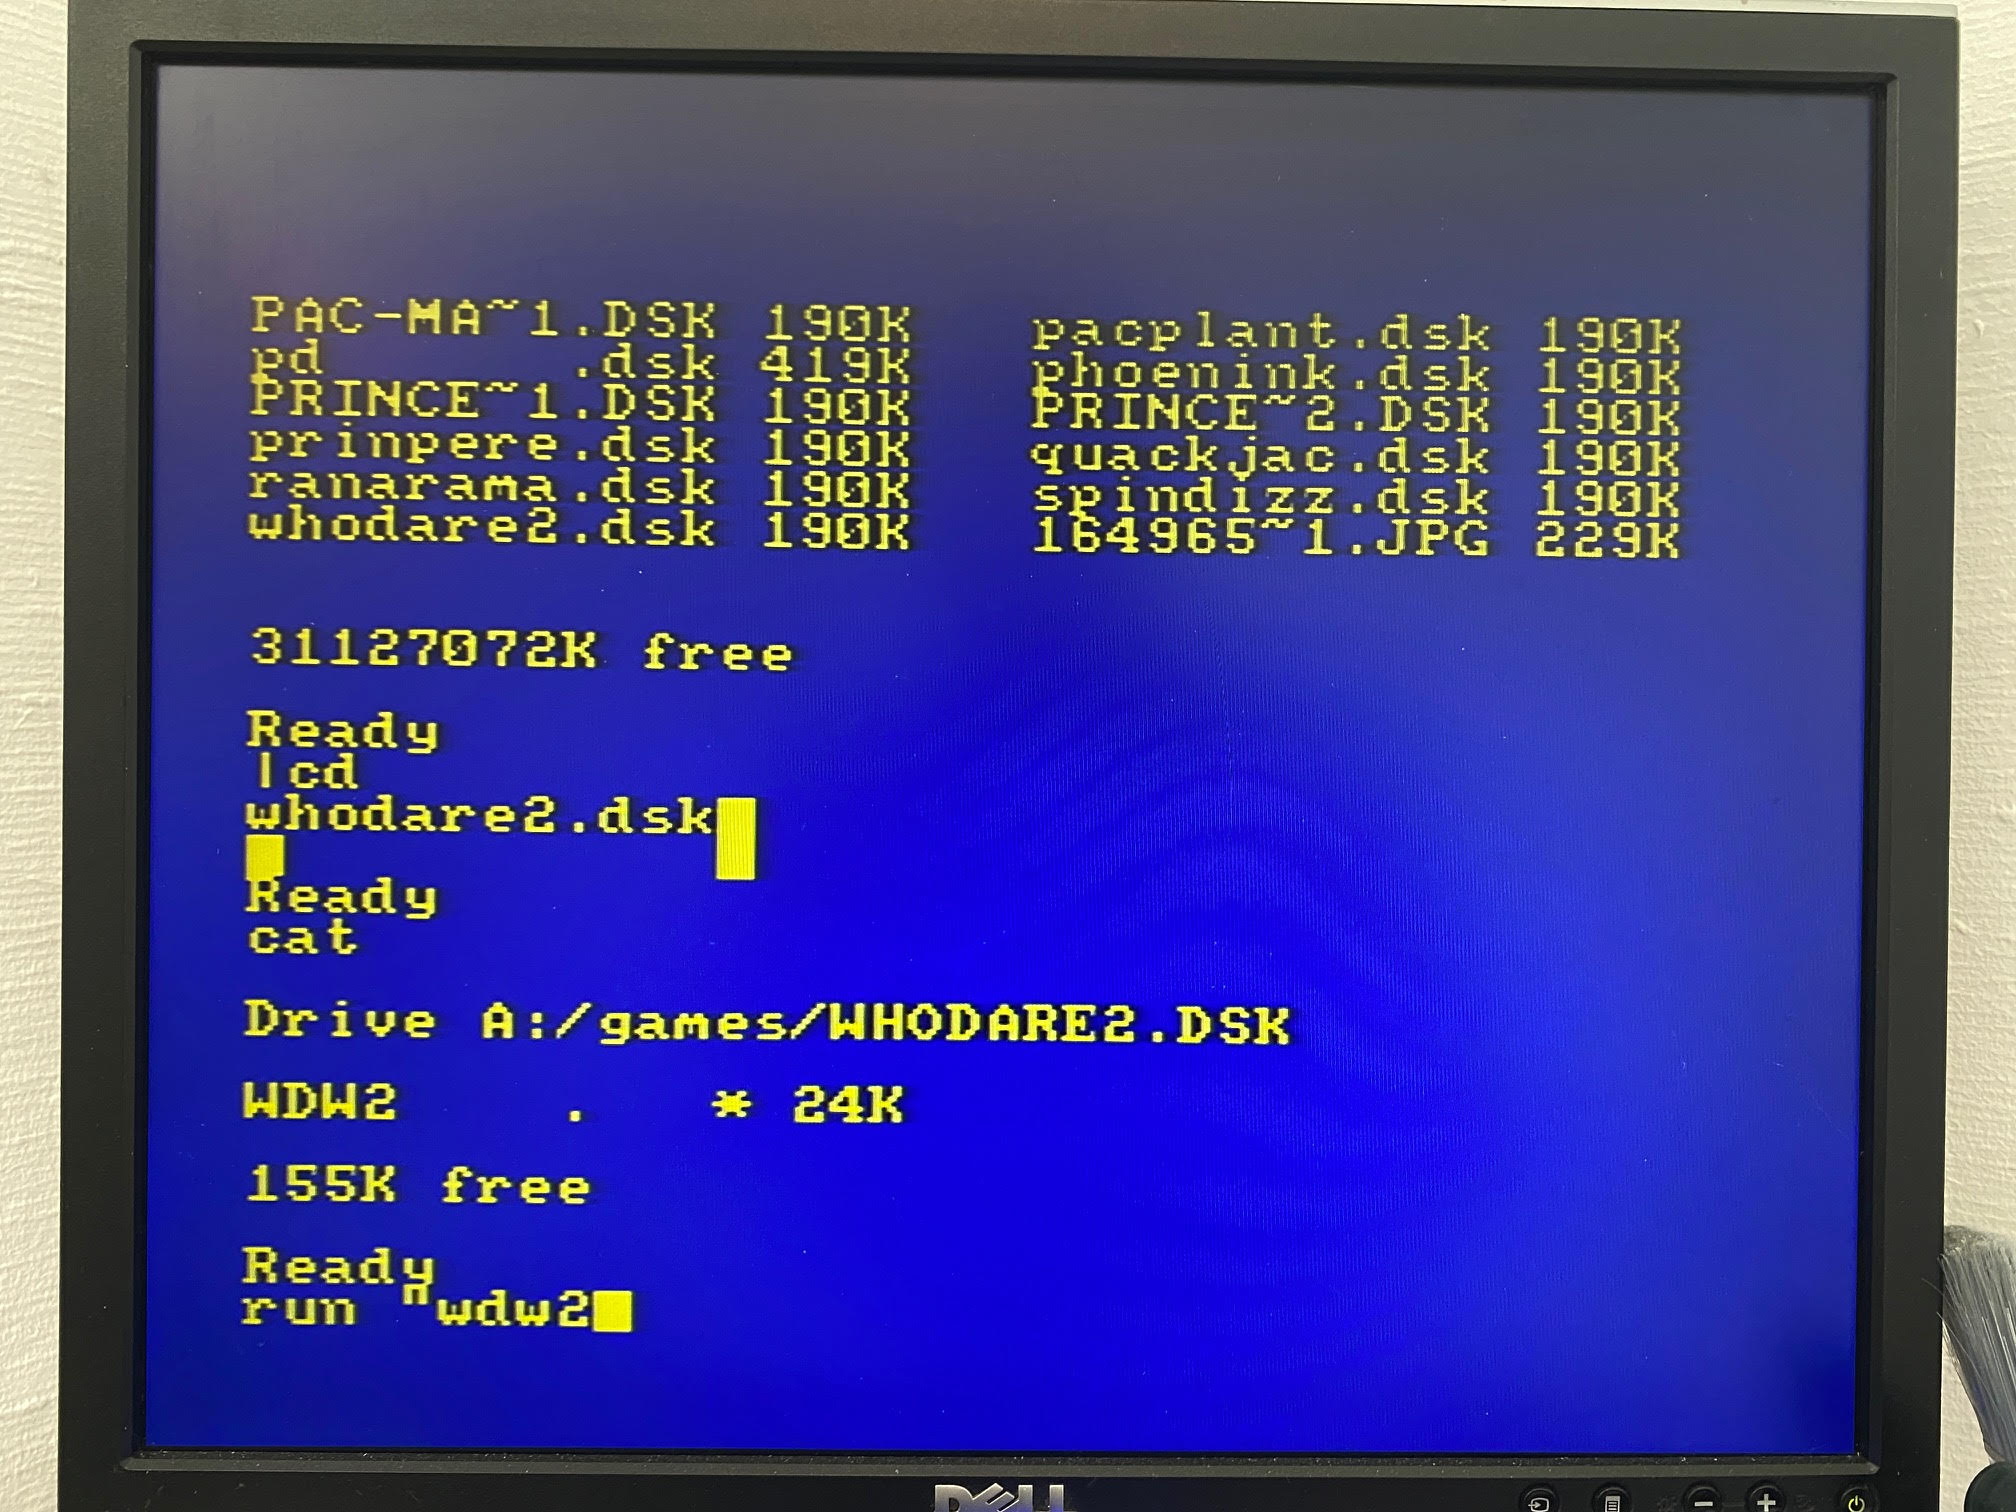
finally, to run the game type the name of the game as normal
eg run “wdw2
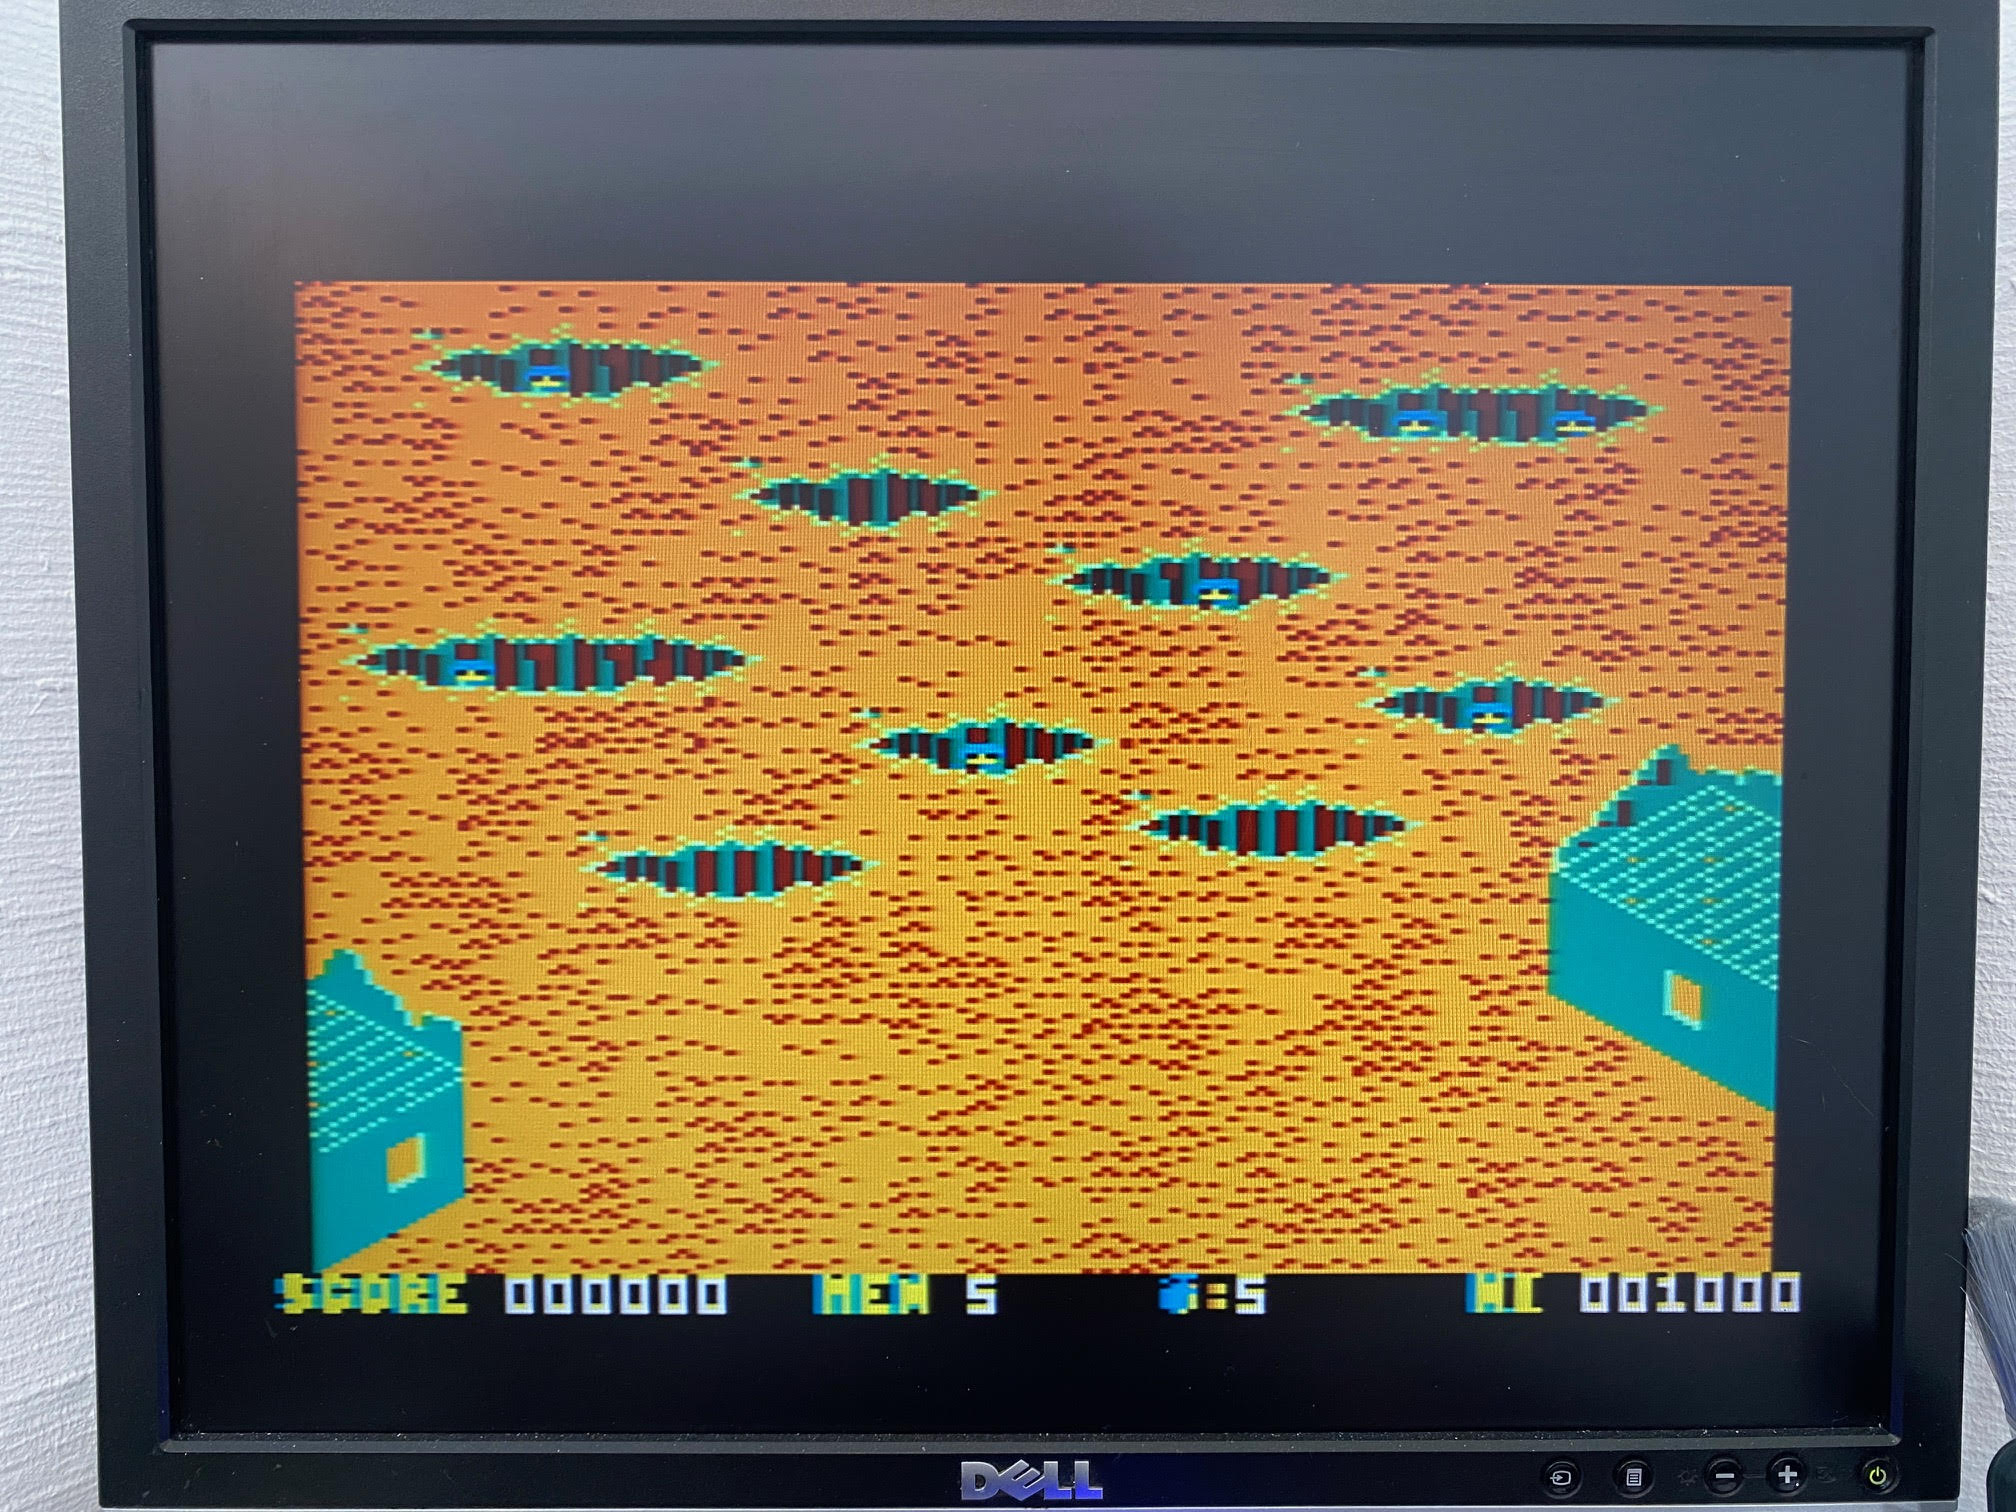
Success !
Download games from the Internet
Now that you have connected to Wi-Fi it’s time to test downloading something. I wanted to first create a directory to store games downloaded from the internet called “www”. To create a directory type |mkdir, “dirname
but… as this is a CPC464 I had to do it this way.
dir$=”www”
|mkdir,@dir$
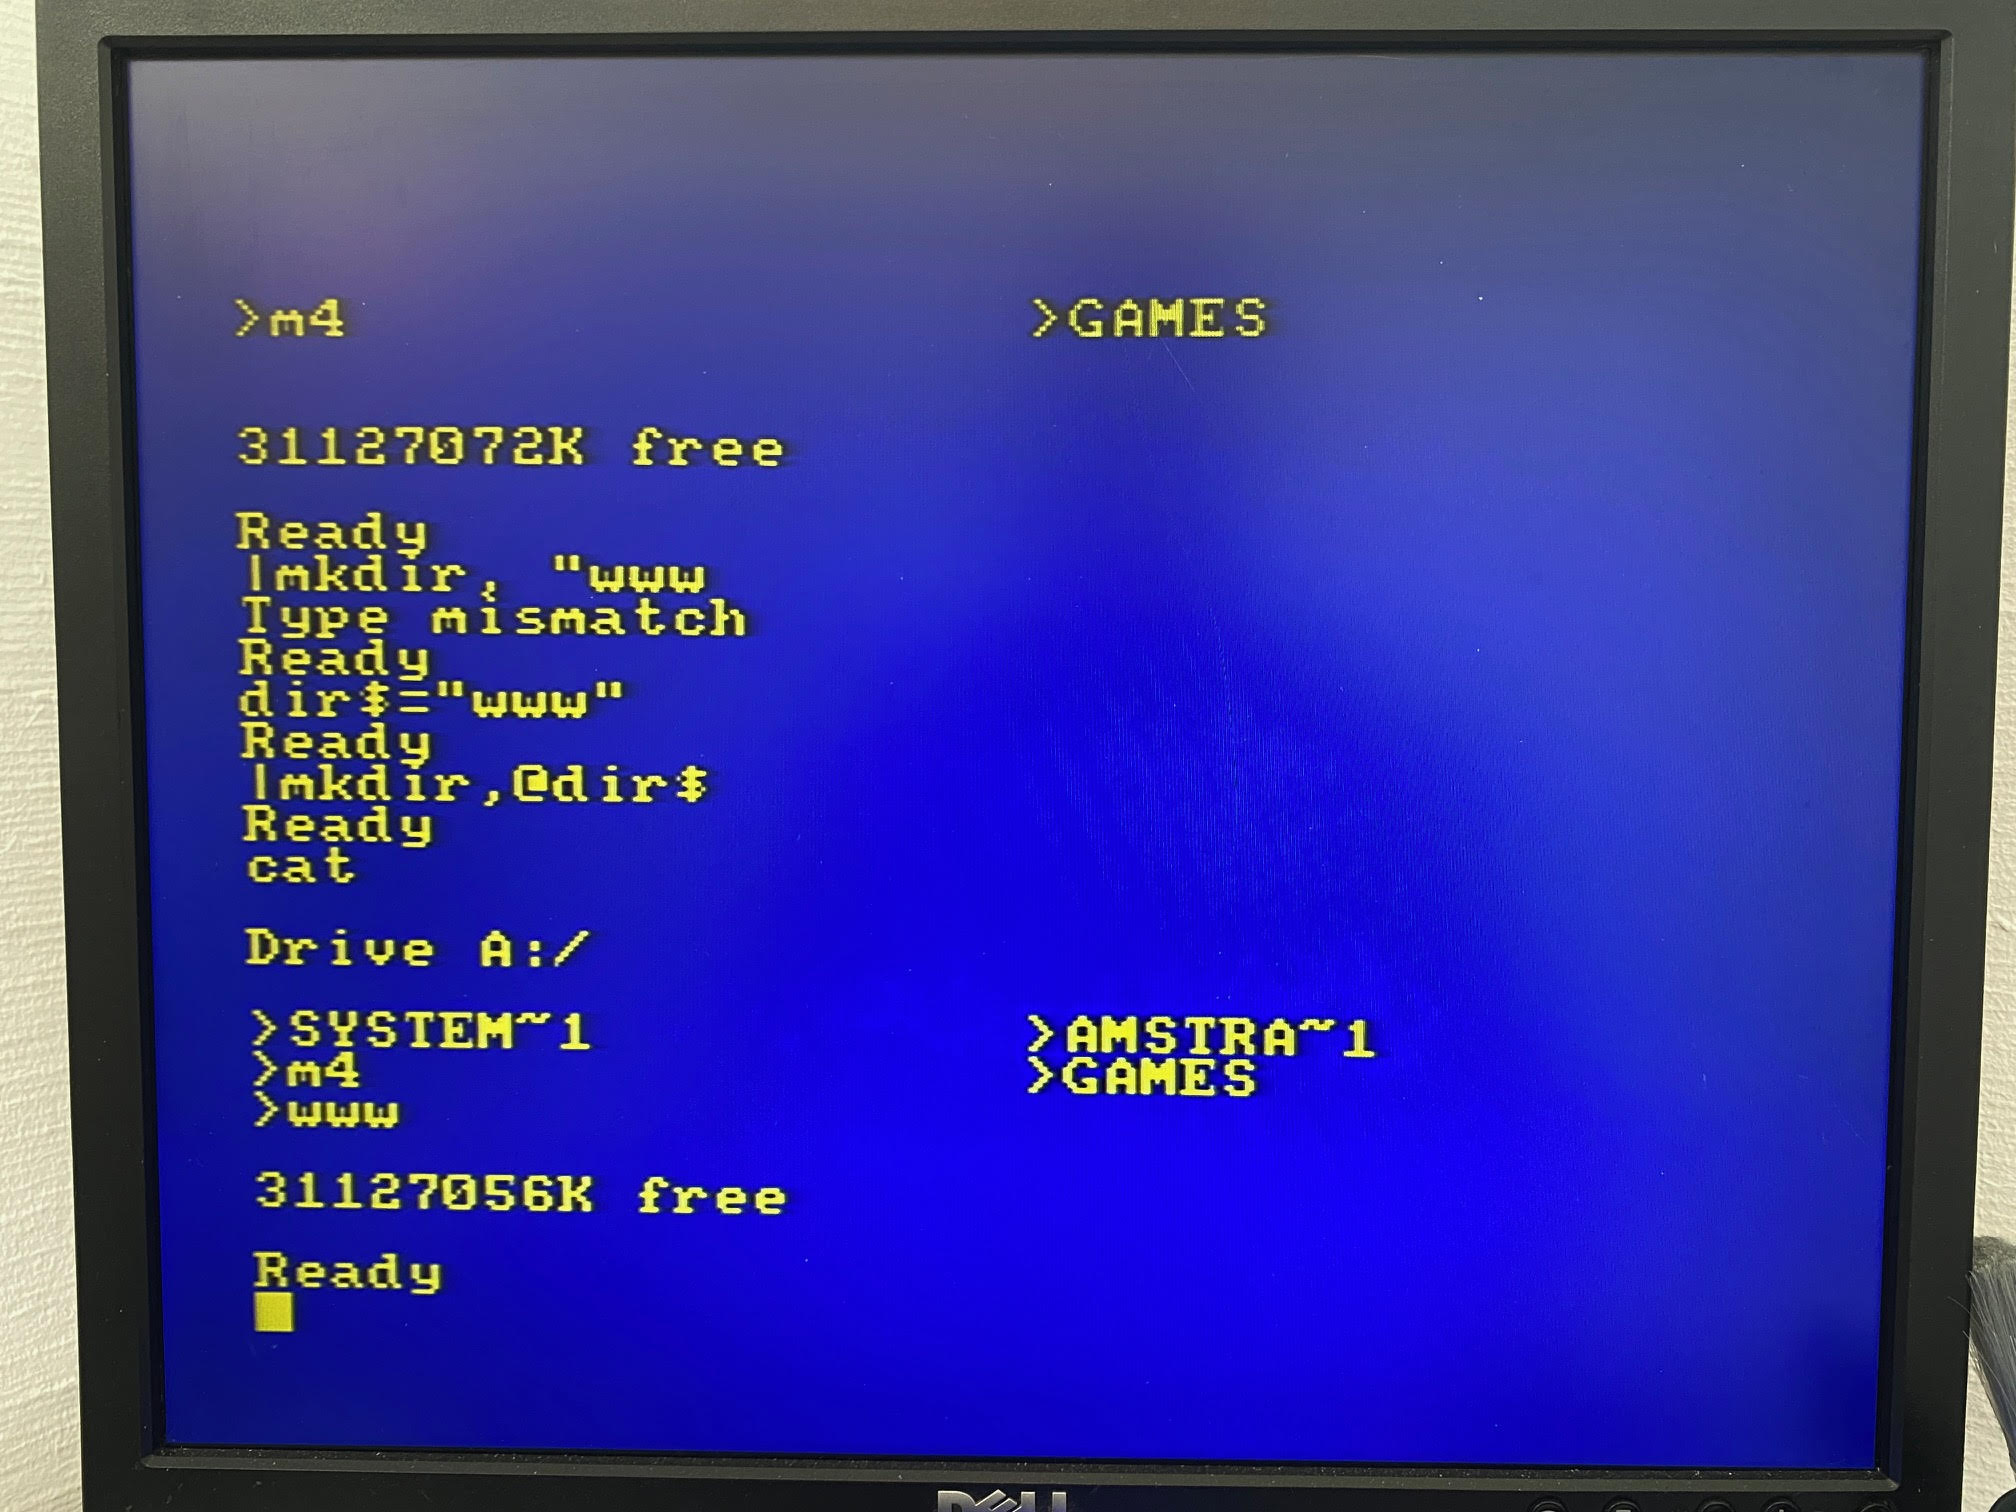 Now that the directory is created use |cd as described previously to navigate to that directory.
There’s currently nothing in the “www” directory. To download a game from the internet we are told to use the following command (on a CPC 6128).
|httpget,"spinpoint.org/battro.dsk"
But this is a CPC 464 so I have to do it this way.
file$="www.amstrad-noob.com/Games/arkanoid.dsk"
then issue the following
|httpget, @file$
This works fine but the downloaded file is 1k instead of 190k,see below screenshot.
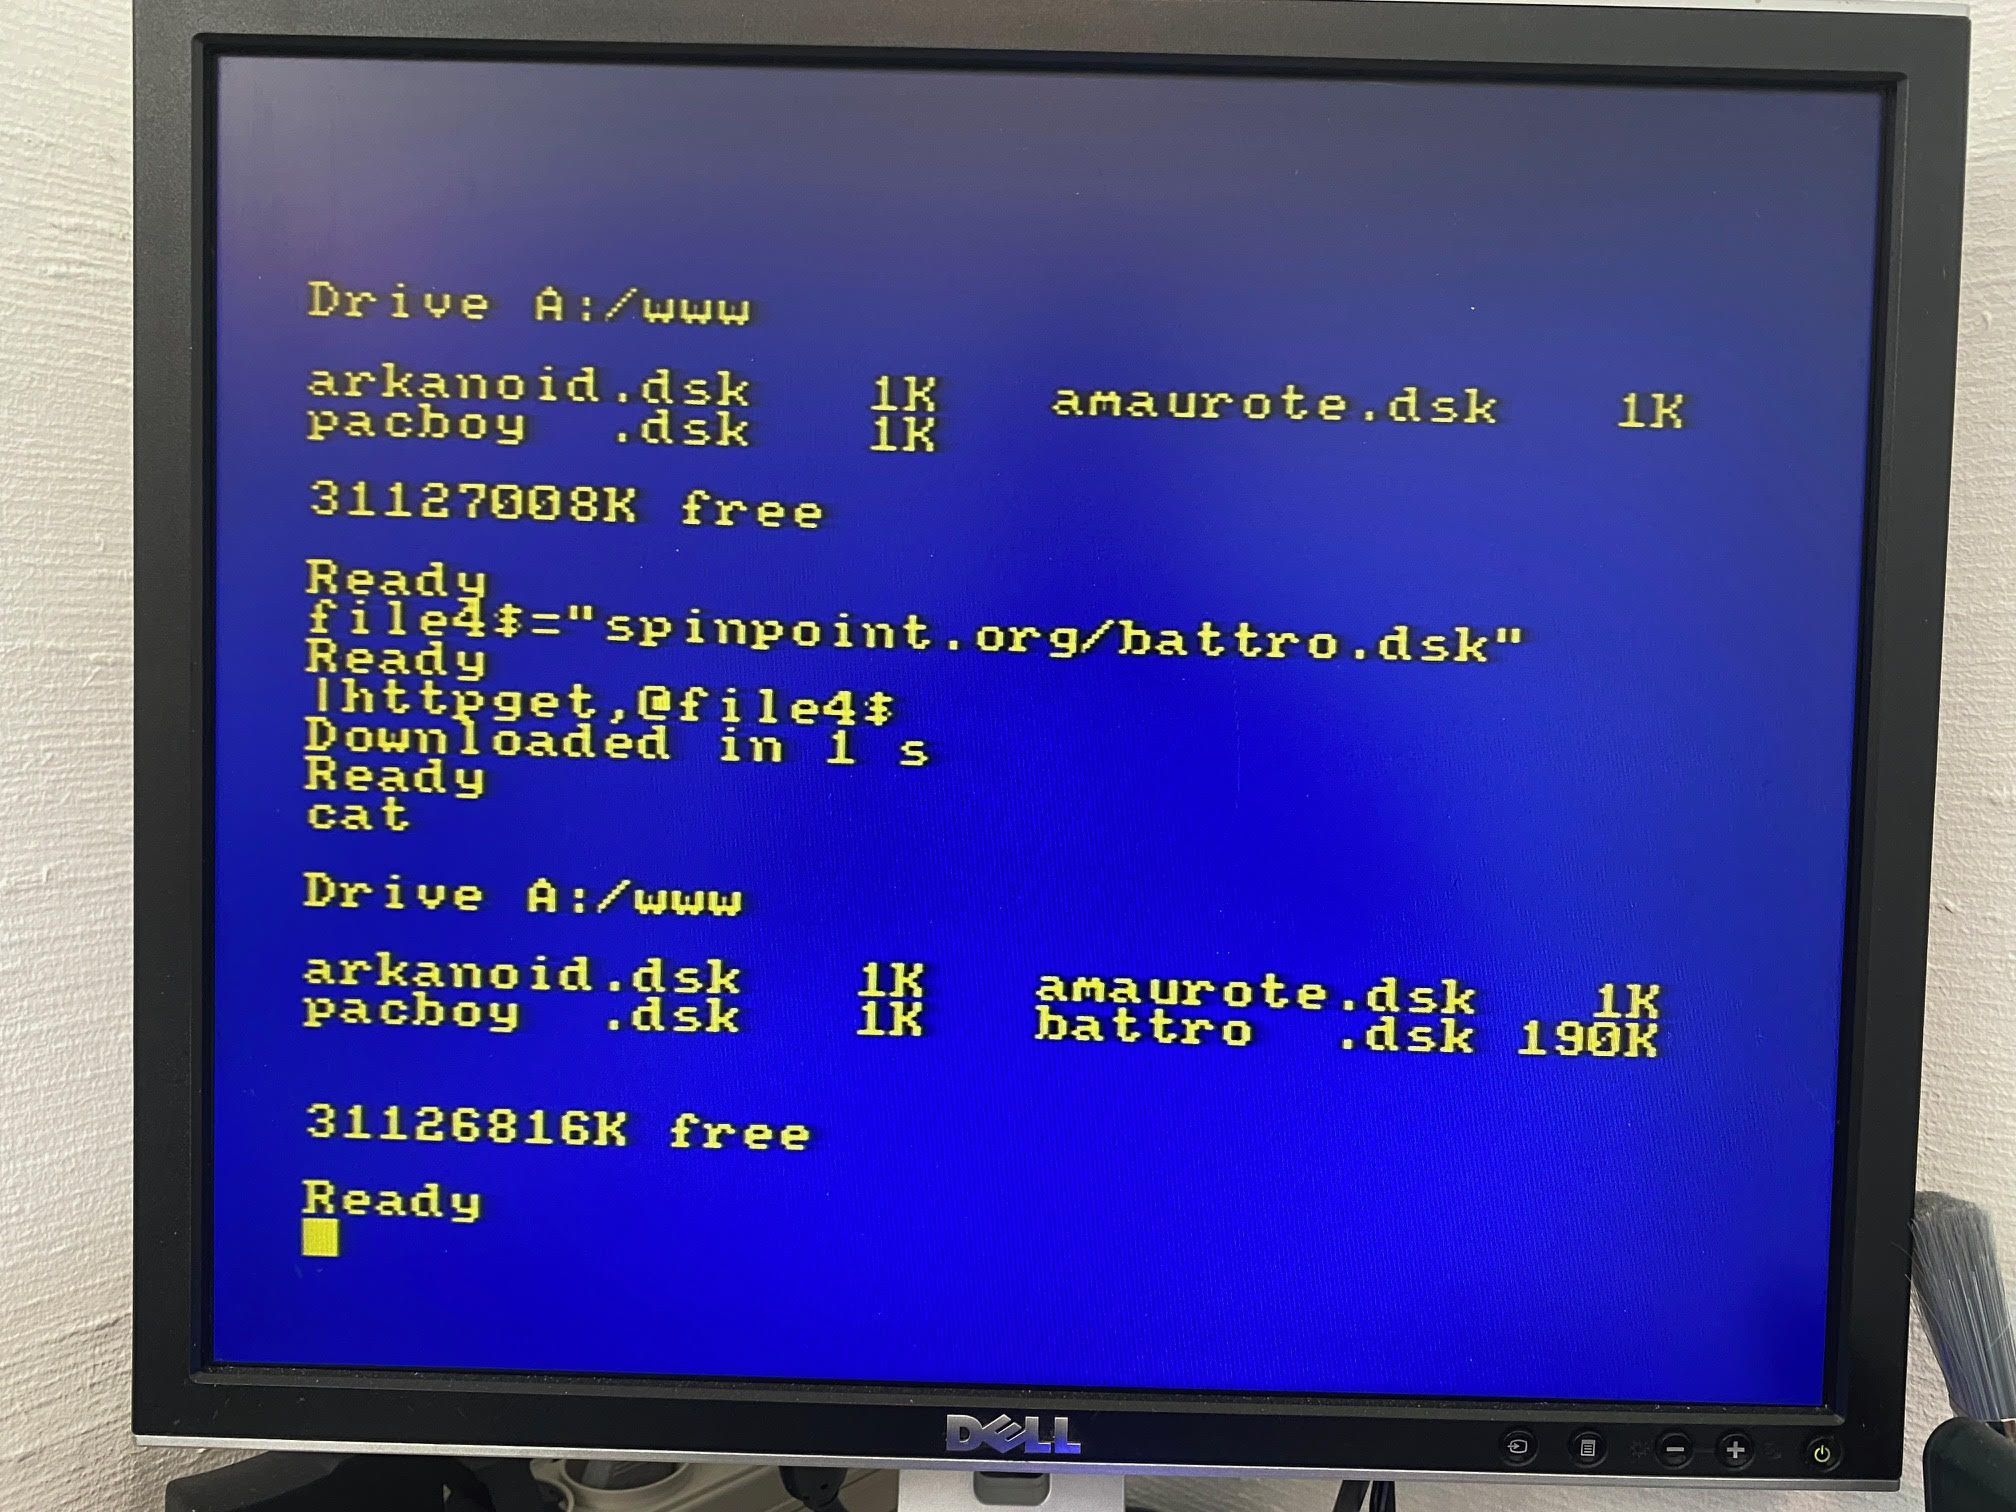
After some tests and emails to Duke it was confirmed that the M4 board doesn’t support HTTPS, only HTTP. So for now I’ll download the following file from Dukes HTTP site and I’ll work on getting a HTTP version of my amstrad-noob.com/games available.
file$="www.spinpoint.org/battro.dsk"
then issue the following
|httpget, @file$
after mounting the downloaded file using
|cd
then
battro.dsk
I was able to run the demo !
Awesome or what !
 Conclusion
After using the device I can say I’m definitely impressed, it gives internet and storage support (32gb max) to the Amstrad and that’s awesome. I wish it also supported HTTPS but it doesn’t. It’s a bit trickier to use on a CPC464 due to the way |RSX commands work on that platform, much easier with Basic 1.1.
You can use the M4 board’s ROM mapping facility to boot with BASIC 1.1 on a 464.
From http://www.spinpoint.org/cpc/m4info.txt:-
—snip—
With the M4 board you can replace the lowerrom, so you can use Basic 1.1 on CPC464 too.
I have made a small program to do this for you, you can download it from the CPC if you have setup the WiFi
a$=”spinpoint.org/cpc/ROMUP464.BIN”
|httpget,@a$
or download via your webbrowser http://www.spinpoint.org/cpc/ROMUP464.BIN and copy it to the microSD card.
and run it by
RUN”ROMUP464
It will also set M4 rom to 7, which is best for compatiblity with games. You can change it from the webinterface again.
—snip—
Hi.
I ordered this M4 module on spinpoint.org, but the tutorials I saw only talked about importing games; Is it possible to use this M4 to connect to a router and access a bbs?
Thank you.
if you look at my video here https://www.amstrad-noob.com/2021/04/23/video-using-an-m4-board-on-an-amstrad-cpc-464/ you’ll see that I connect it to my home wifi hotspot, and access the internet to download stuff, so if your ‘bbs’ is online and allows http traffic it could work, but i do know you can definetly access the internet using this as long as it’s http traffic (not https)
I would like to order a M4 board for my amstrad cpc 6128.
Are those still available ?
Thank you ?
Gérard.
hi Gerard, i’m checking with the guy who makes them, if he replies i’ll let you know
cheers
niall
ok there is a waiting list, to get on the list for the M4, drop an email to dukespinpointorg and tell him you want to be added to the list and that Niall sent you
cheers
niall