Introduction
I’ve always regretted losing the original discs (and CPC computer itself) that came with my original CPC 6128 as those discs contained every program I wrote using Z80 machine code. Losing that source code and all the comments I had inserted at the time is a major bummer, I’d love to look through it today.
Other parts of this series, including this one are listed below.
- Disassembling my old code part 1 – Getting started with WinAPE <—- you are here
- Disassembling my old code part 2 – Setting screen mode & Soft 968
- Disassembling my old code part 3 – Text operations
- Disassembling my old code part 4 – Set cursor position & disc cache
- Disassembling my old code part 5 – Get Shift key and set translate
- Disassembling my old code part 6 – Processing disc activities
- Disassembling my old code part 7 – Drawing rectangles
- Disassembling my old code part 8 – Processing HEX in the left pane
I wrote the code using a ROM in a Rombo Rombox called MAXAM, it was an assembler/disassembler/text editor for Amstrad CPC and it was using that hardware that I learned how to program in Z80 machine code.
This blog post is going to explain how I’m trying to get back into my old code and to see why I coded it the way I did, I will slowly work my way through the code and document it here.
This is the first part, how I actually disassembled my old Z80 machine code on a Windows 10 computer using the WINAPE Amstrad CPC Emulator. I wrote this code back in 1988 and I was 21 years old at the time, a long time ago indeed, I’m 53 now at the time of writing this blog post.
I didn’t instantly understand how to program in Z80 machine code, I had to teach myself by trial and error over a period of years, and that involved reading books and acquiring hardware to assist me to program (such as Maxam). Back then the internet was not really a thing so anything you wanted to learn was done via college courses, books, magazines or strangely enough Encyclopedias.
So now you have an idea of what I’m trying to do, let’s get on with it.
Download Winape
Head over to http://www.winape.net/ and download the latest version of the software. Extract the zip file somewhere useful.
Download Disced
Download Disced (which is what I will be using to disassemble) from here.
Now that you’ve got what you need, start Winape by clicking on the winape.exe file.
When the program loads, click on File, select Drive A: then selct Insert Disc Image…
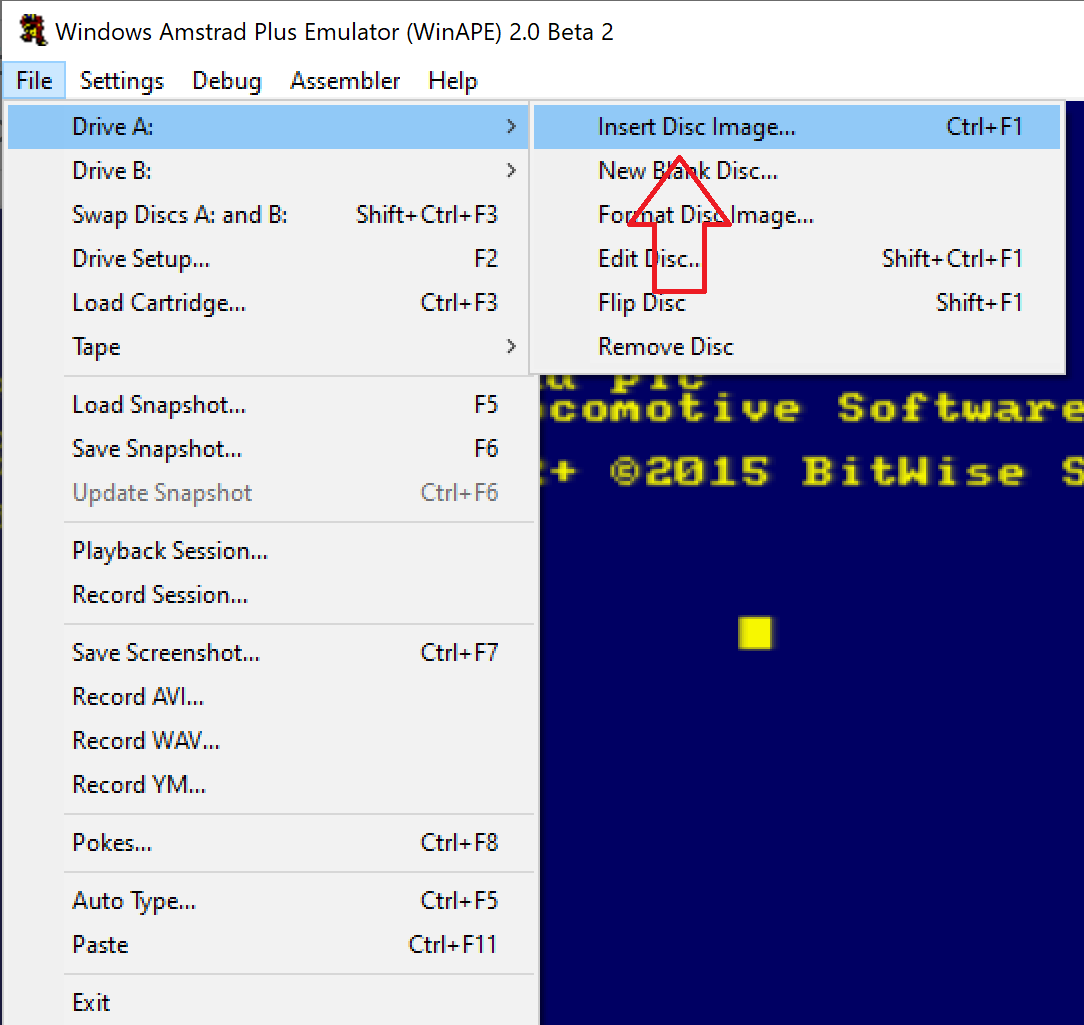
Point it to a disk image file (file.dsk) such as my disc called niall.dsk
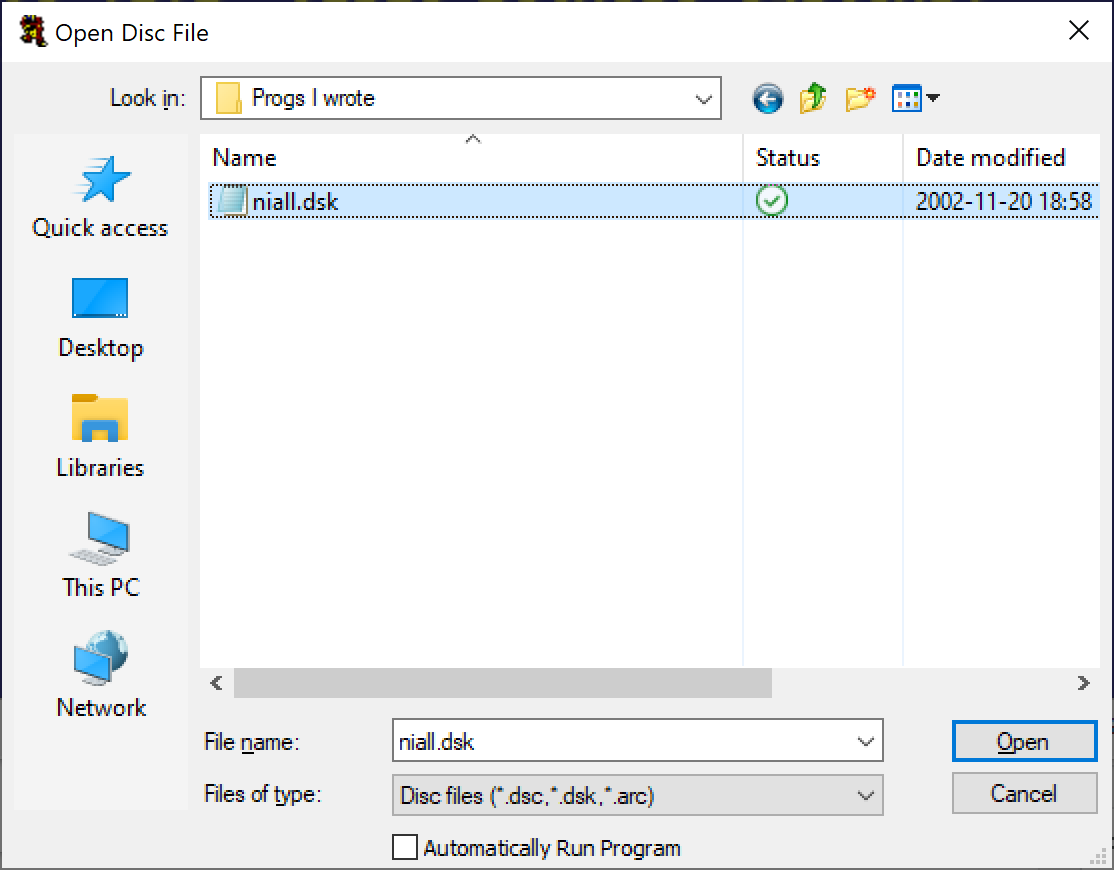
Click Open. In Winape type the following
|a
and then press
Enter
Next, type
cat
and then press
Enter
Here’s the output.
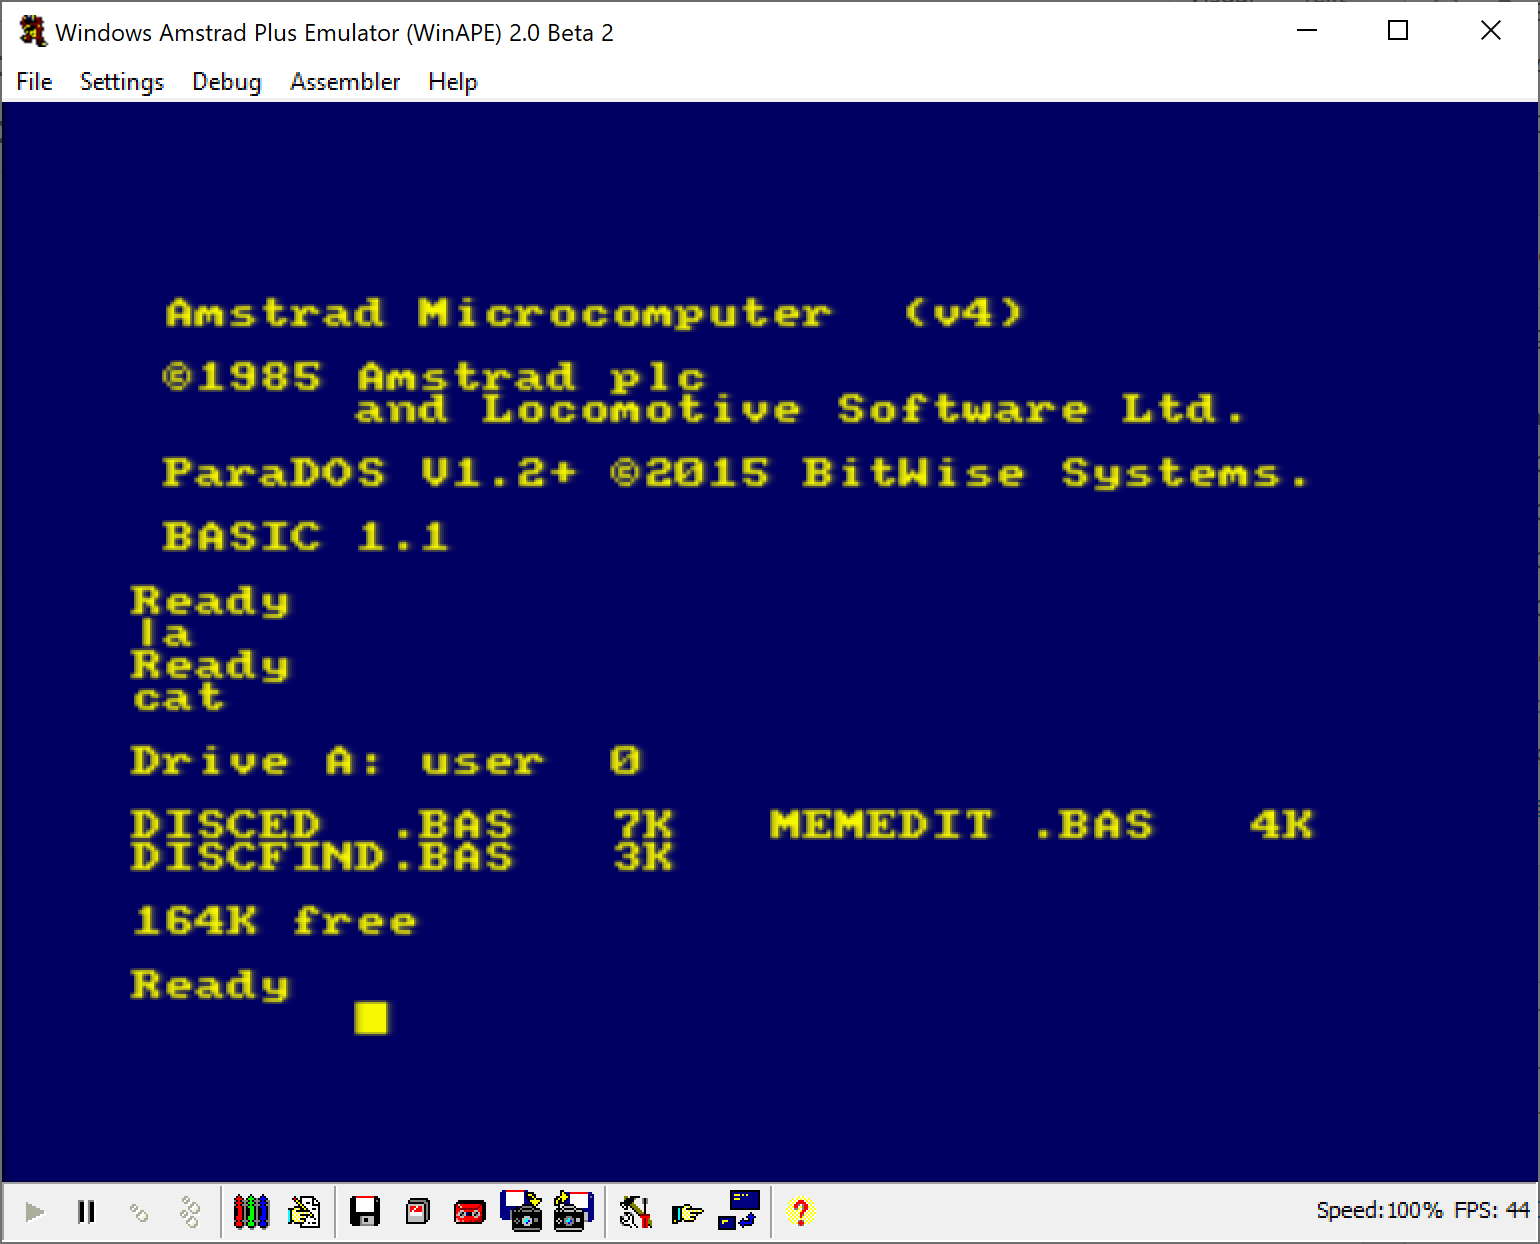
So those are 3 programs I wrote back in 1988 and my intention is to disassemble all 3 and re-write (with comments) the source code. But how do we do that ? First of all, you could load one of the applications and then run it, they are three basic listings which poke in the machine code into RAM.
To see what those basic programs look like, let’s load disced.bas and then change the mode of the screen to 2 and then type list.
Type
load "disced.bas
then
mode 2
then
list
This will show all of the text in the basic listing.
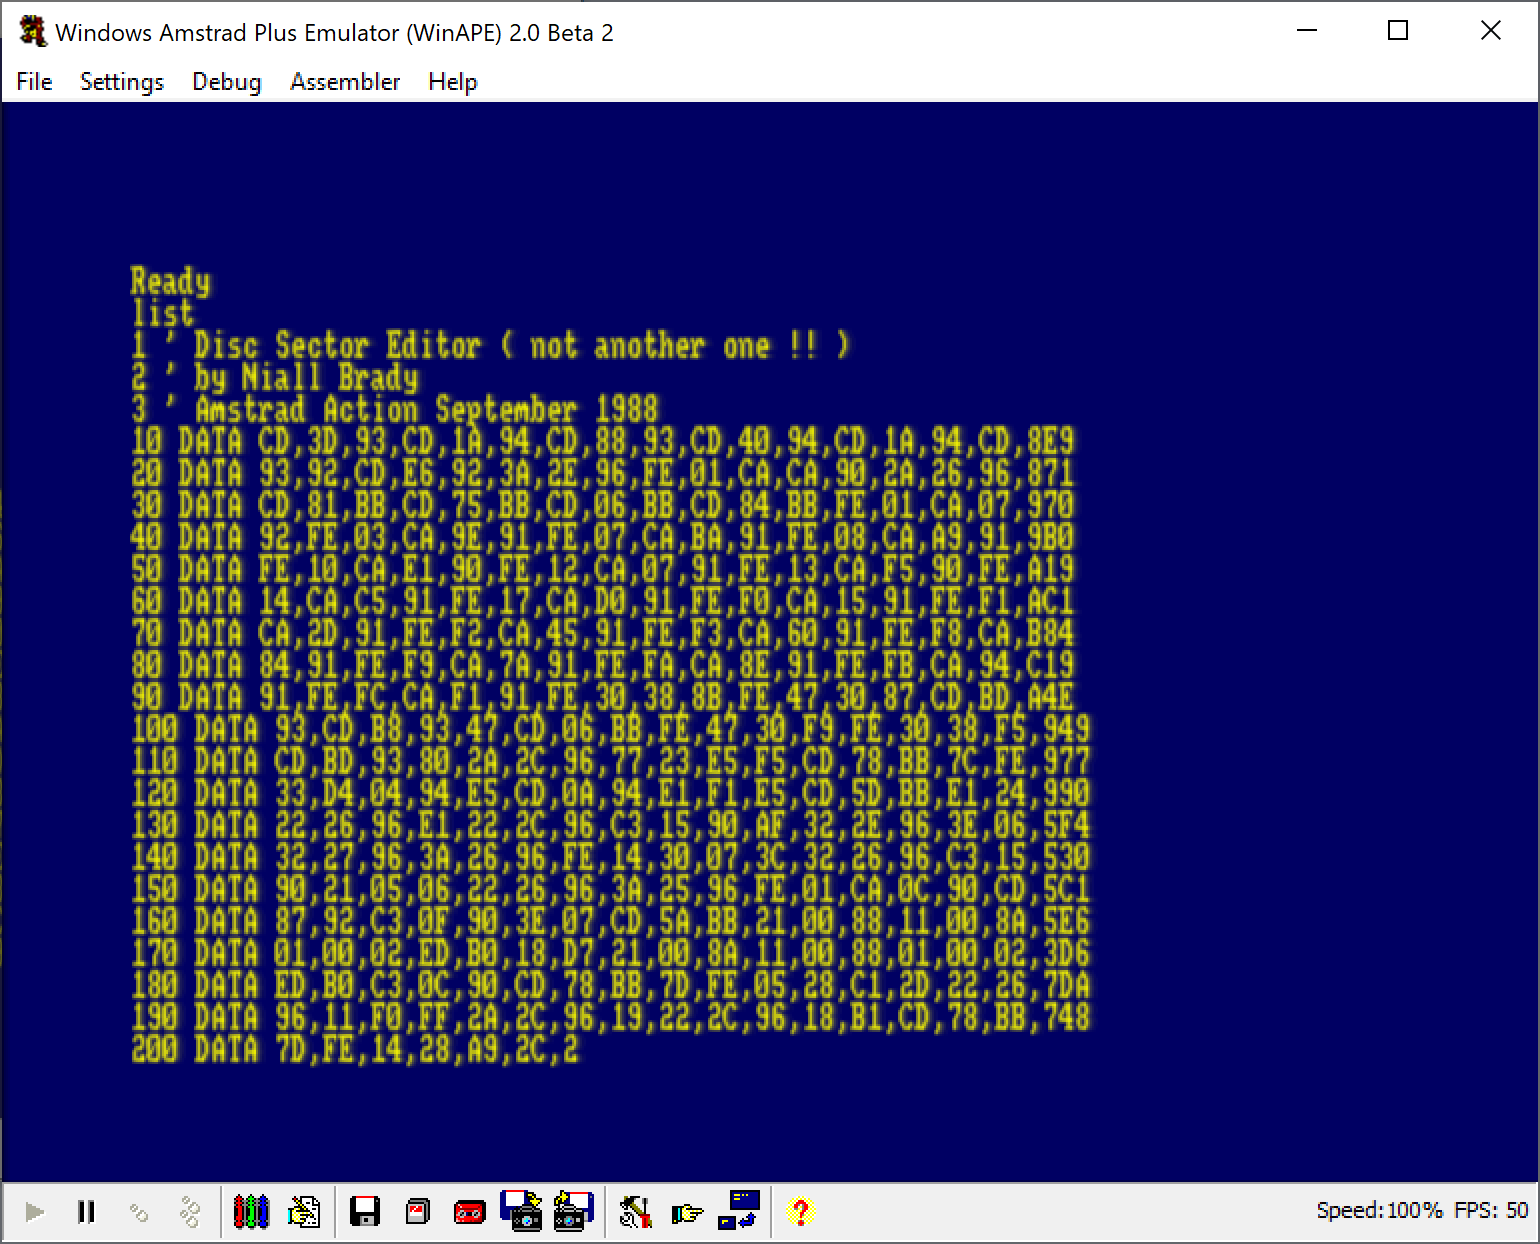
If you look at the listing in detail you’ll see it’s pokes the machine code instructions into address memory &9000.
Ok, now that we have the data loaded, let’s run the program.
Type
run
then press
Enter
You should see Disced load.

Disassembling the code
Ok, now that we’ve got a program up on screen, how do we disassemble it. Well I know that my code is loaded into the CPC ram at the following address &9000, so we need to disassemble from that address onwards to see the actual Z80 machine code. To bring up the disassembler built into Winape, press F7.
A little disassembler window should appear like below.
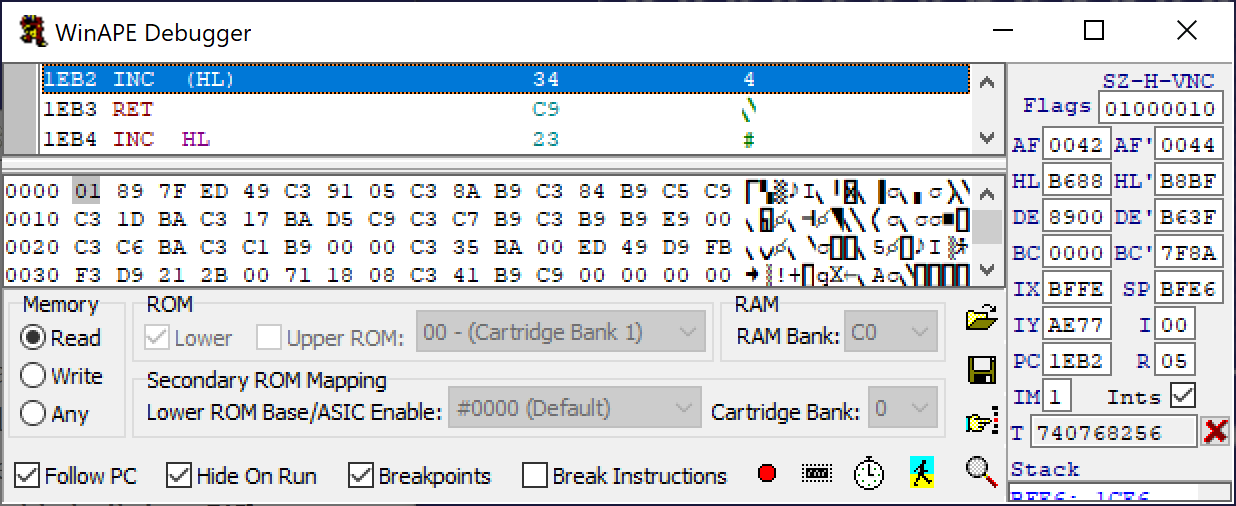
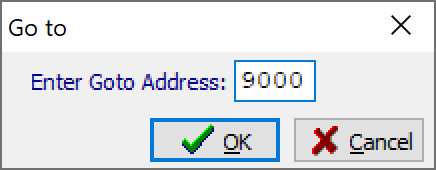
Maximize the window and click on the hand icon to enter an address, enter 9000 and press enter.
The code will be revealed
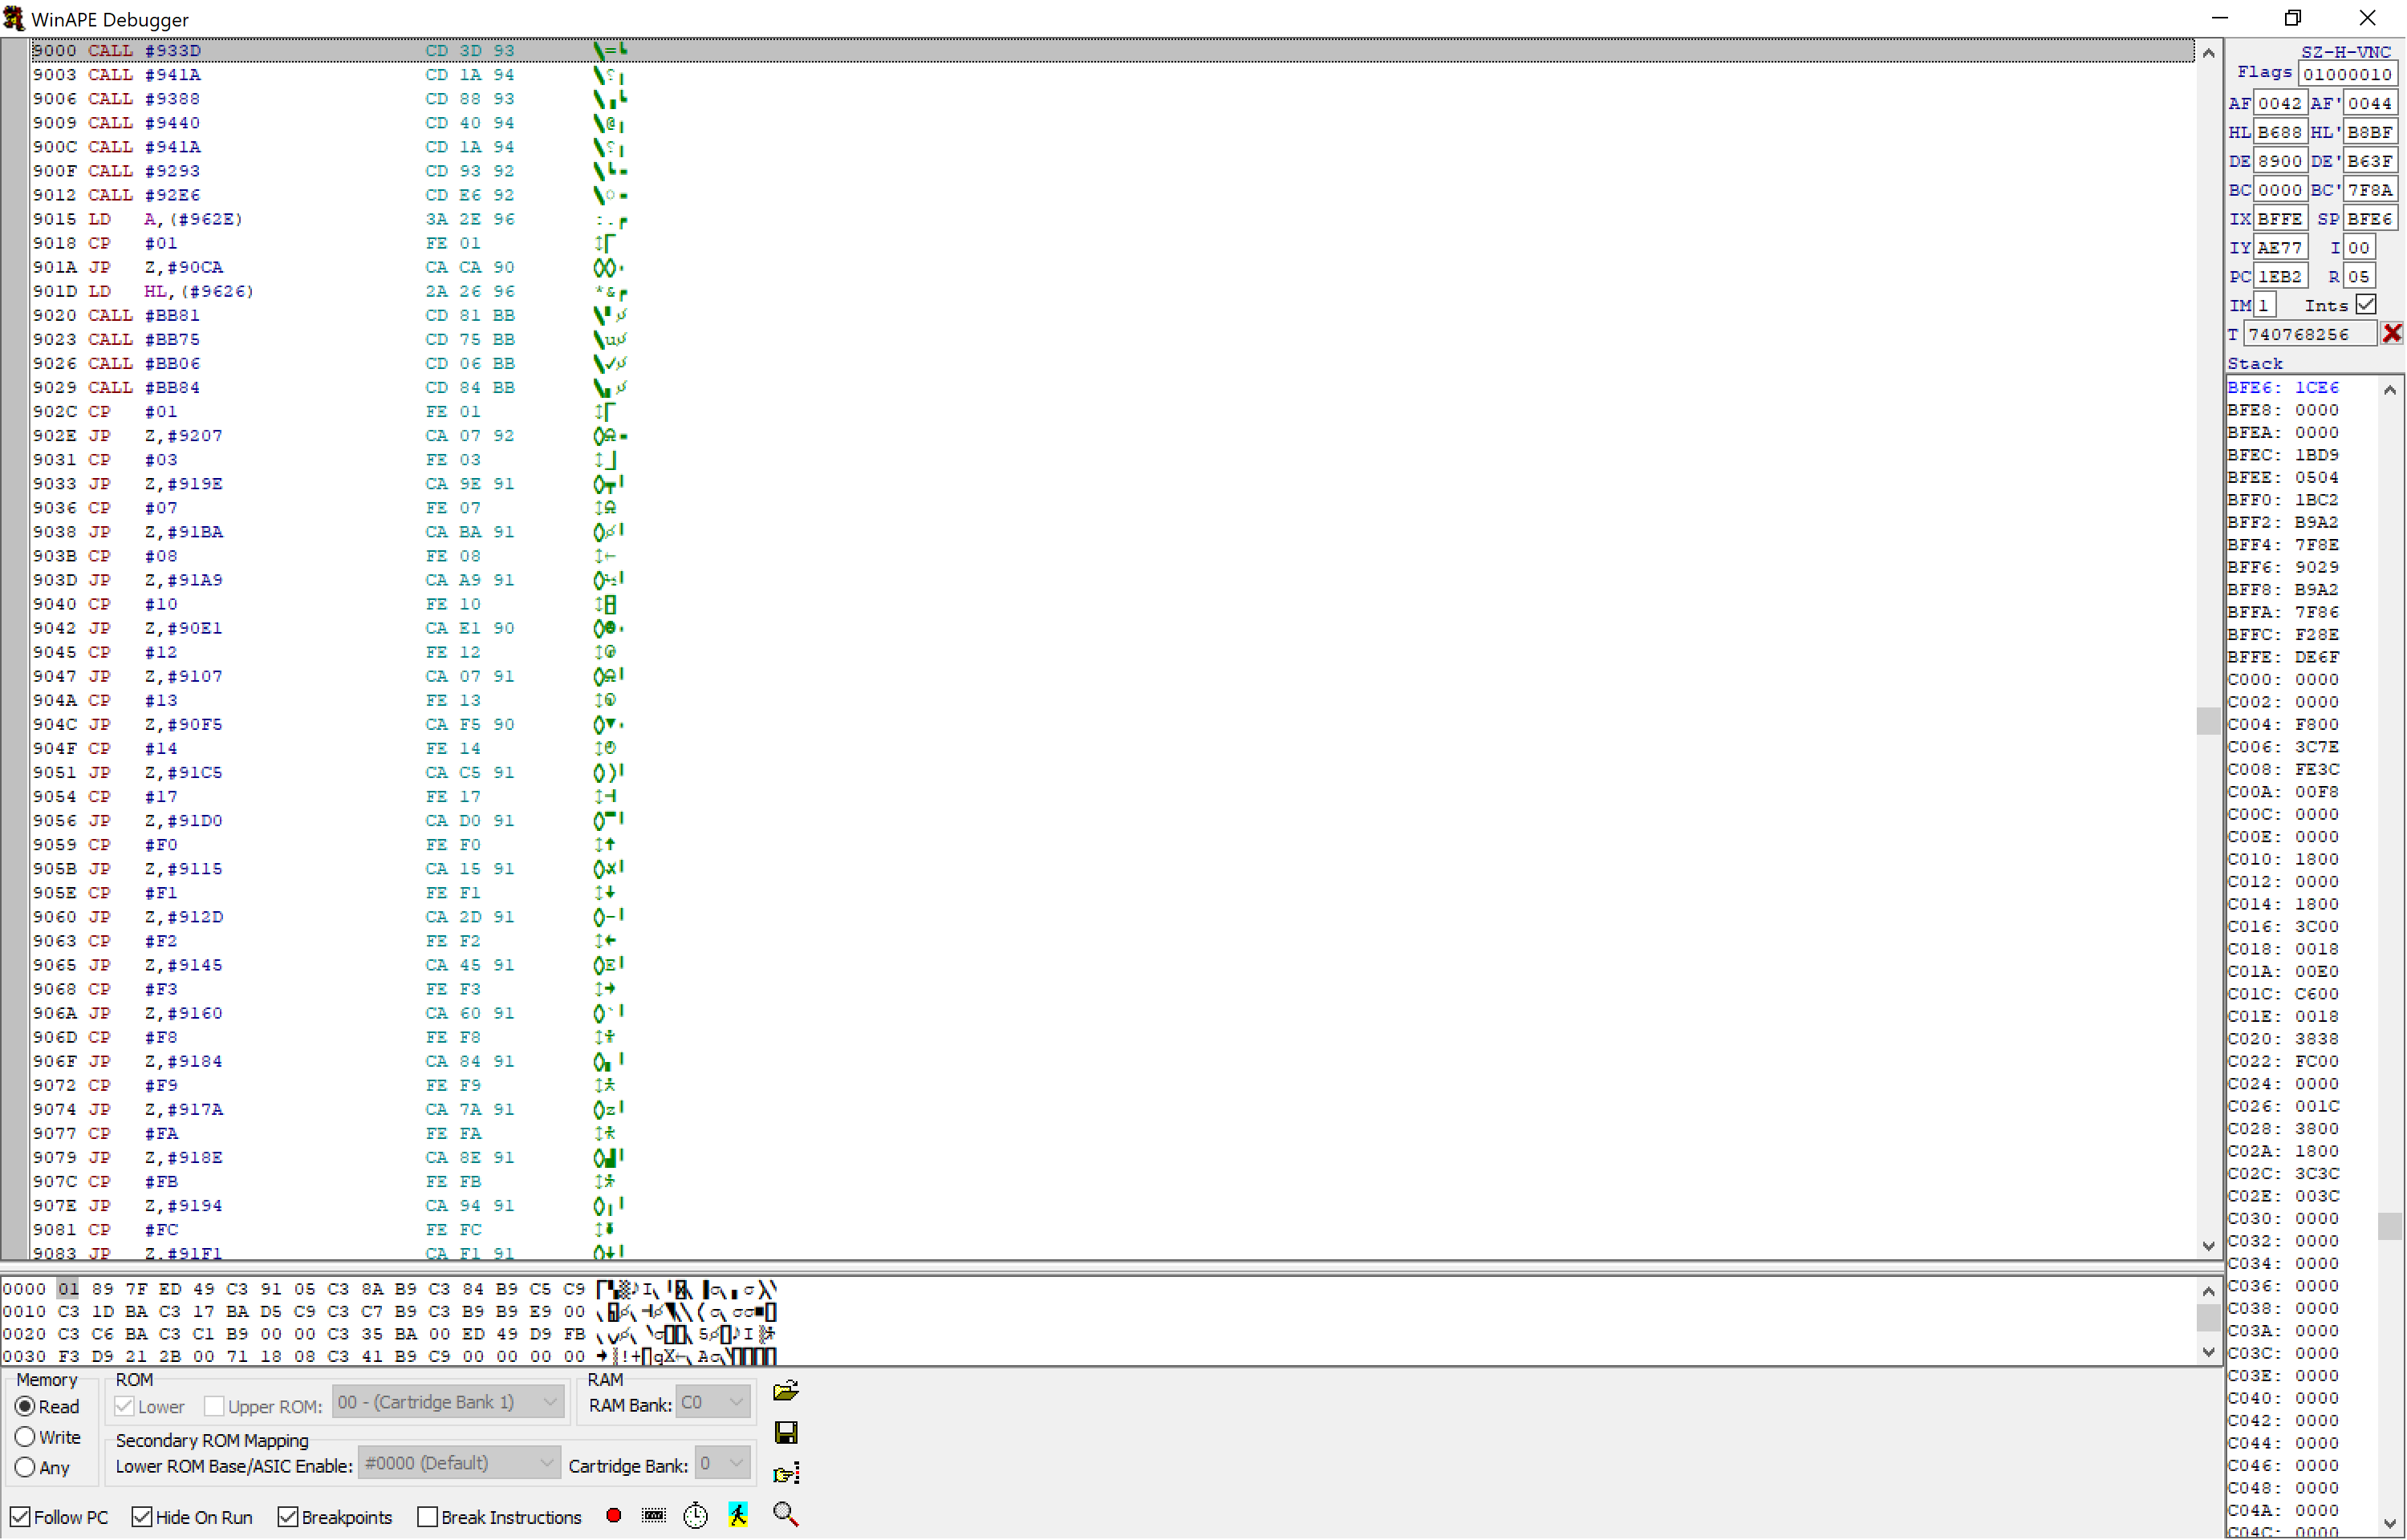
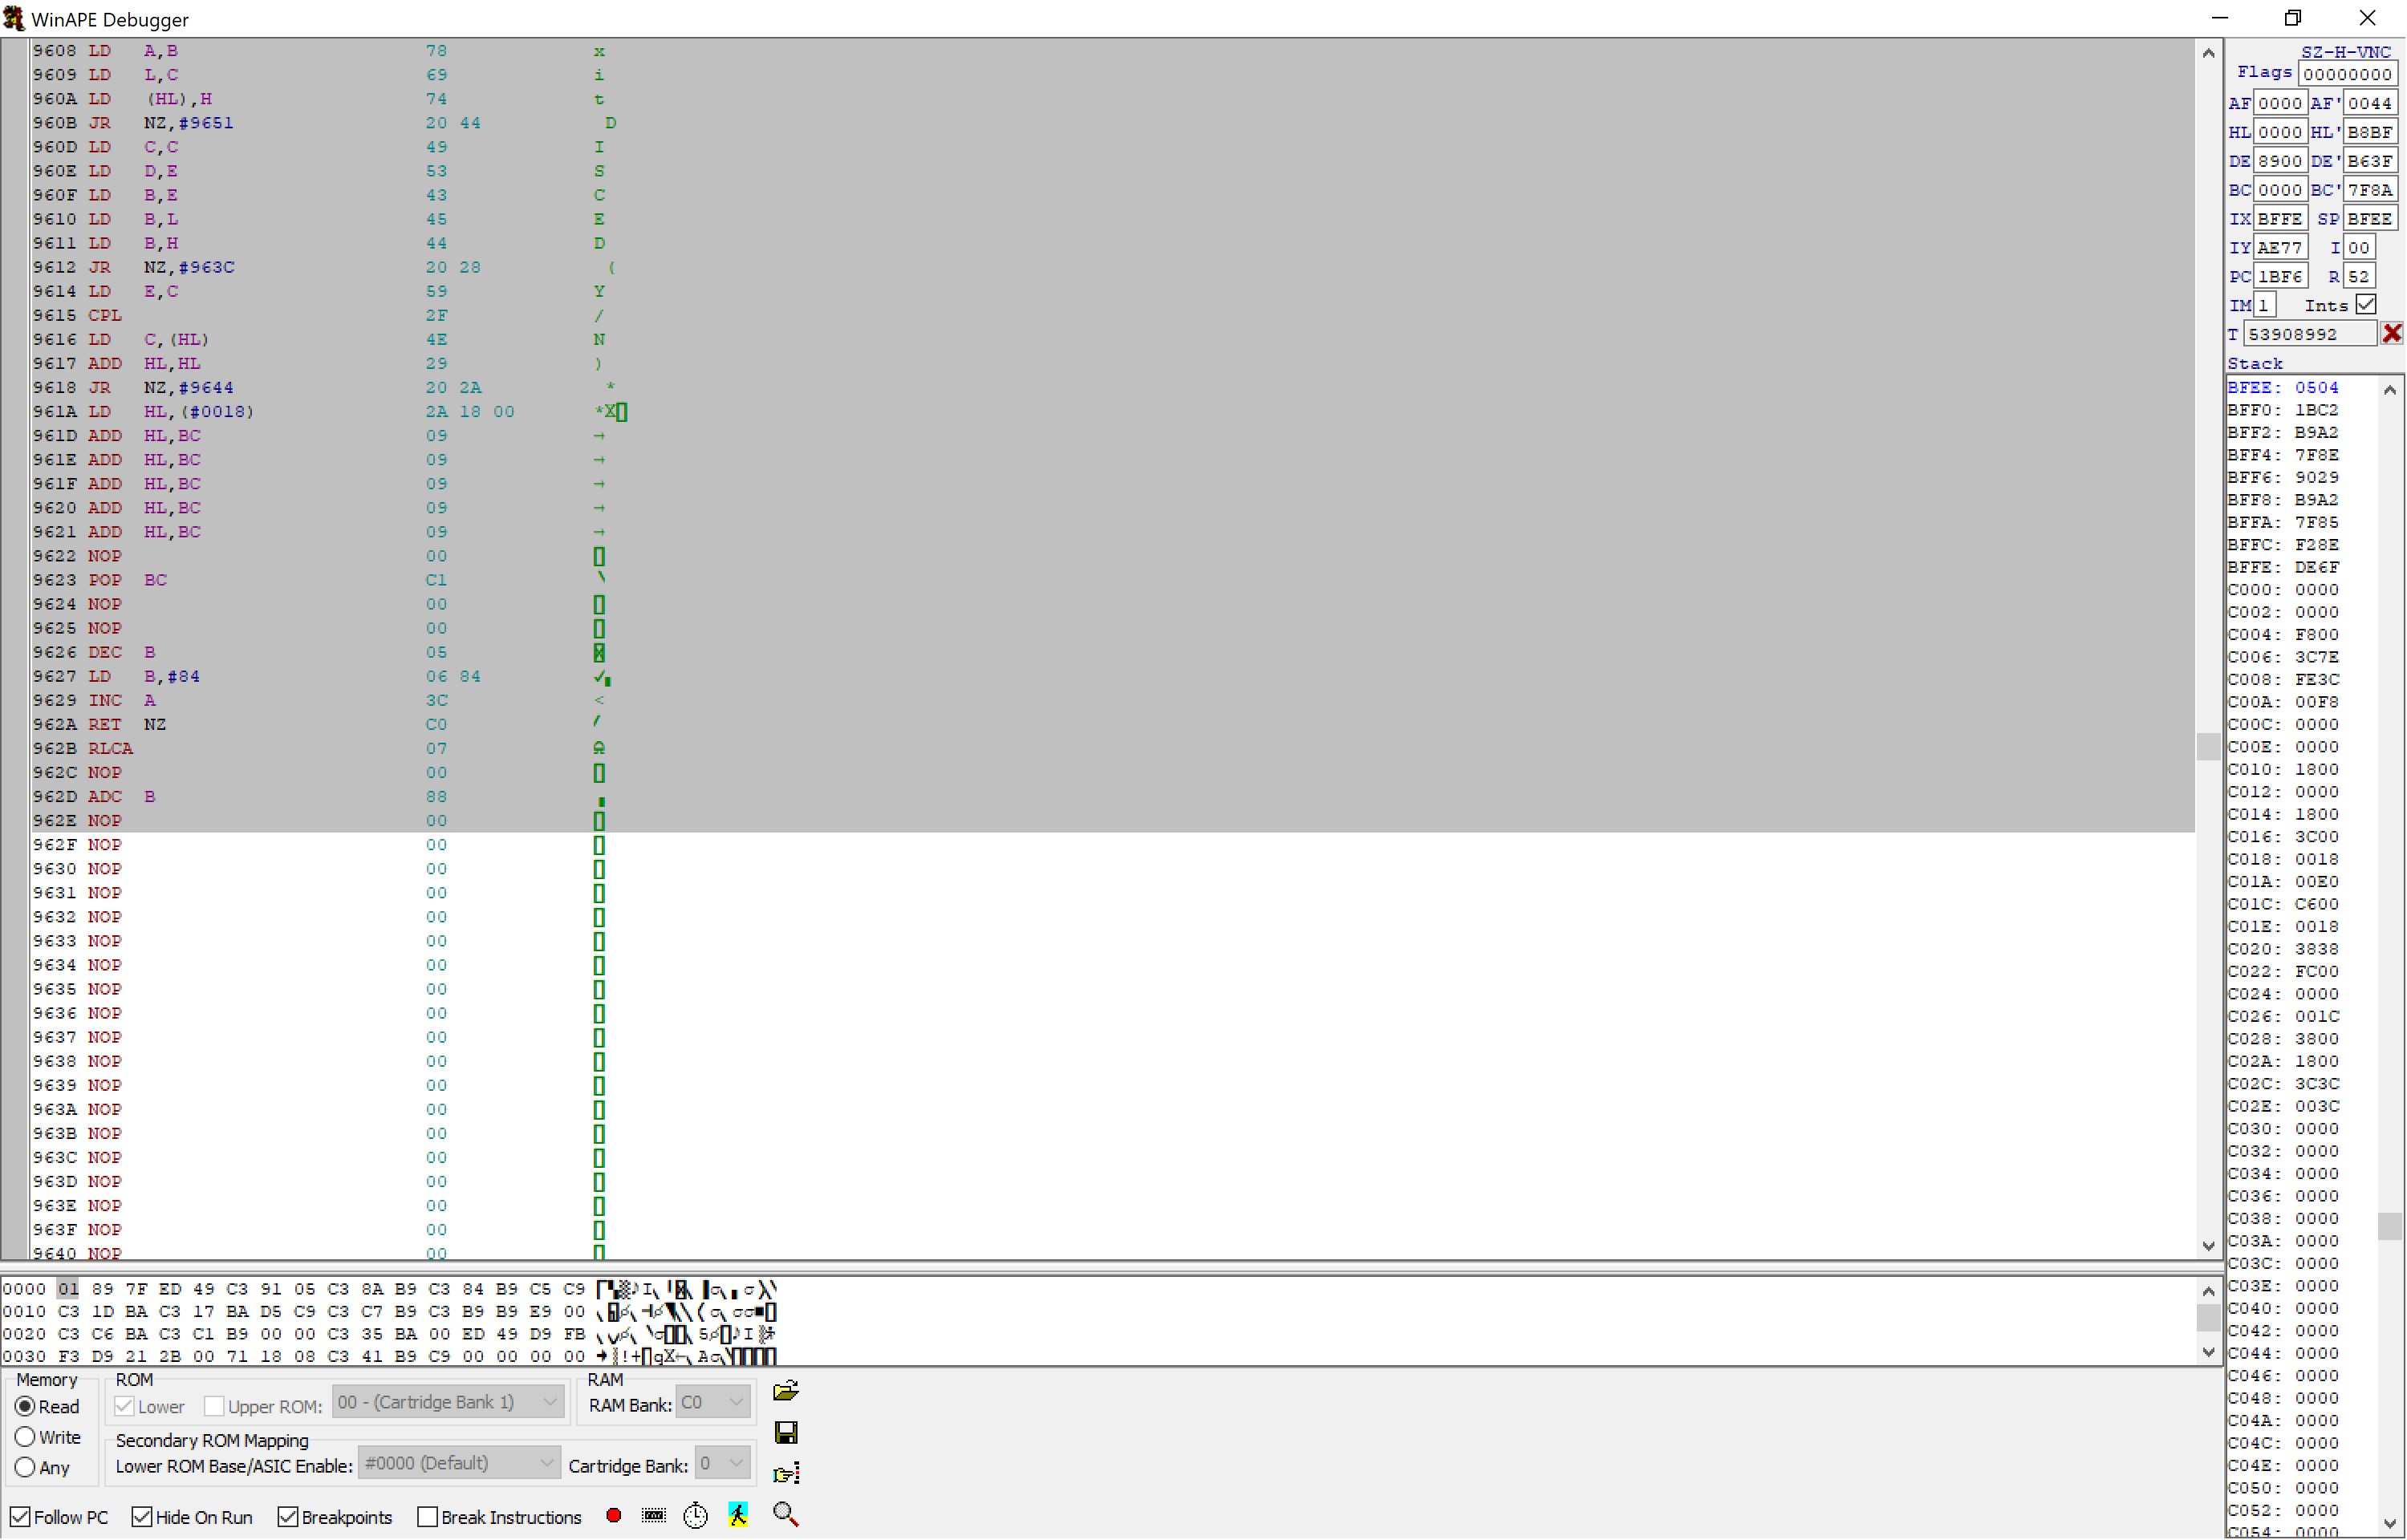
Select the first line (line &9000) and scroll down to where the code ends (at &962e)
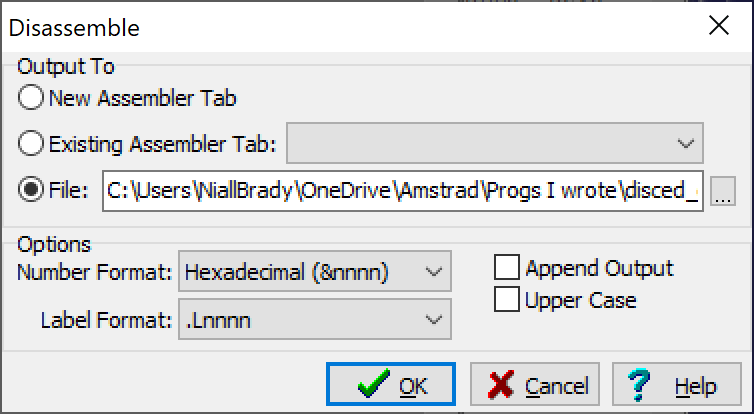
Exporting Z80 code to file
Now that you’ve marked the code, let’s export it to a file. Right click on the marked code and choose Disassemble from the options.

And next select the output location to File, and change the Number format as well if you wish
Once done, open the exported .asm file with Notepad++
Here’s the resulting output and I’ve started adding comments to my code. The first ORG &9000 tells the assembler to load the code at that address
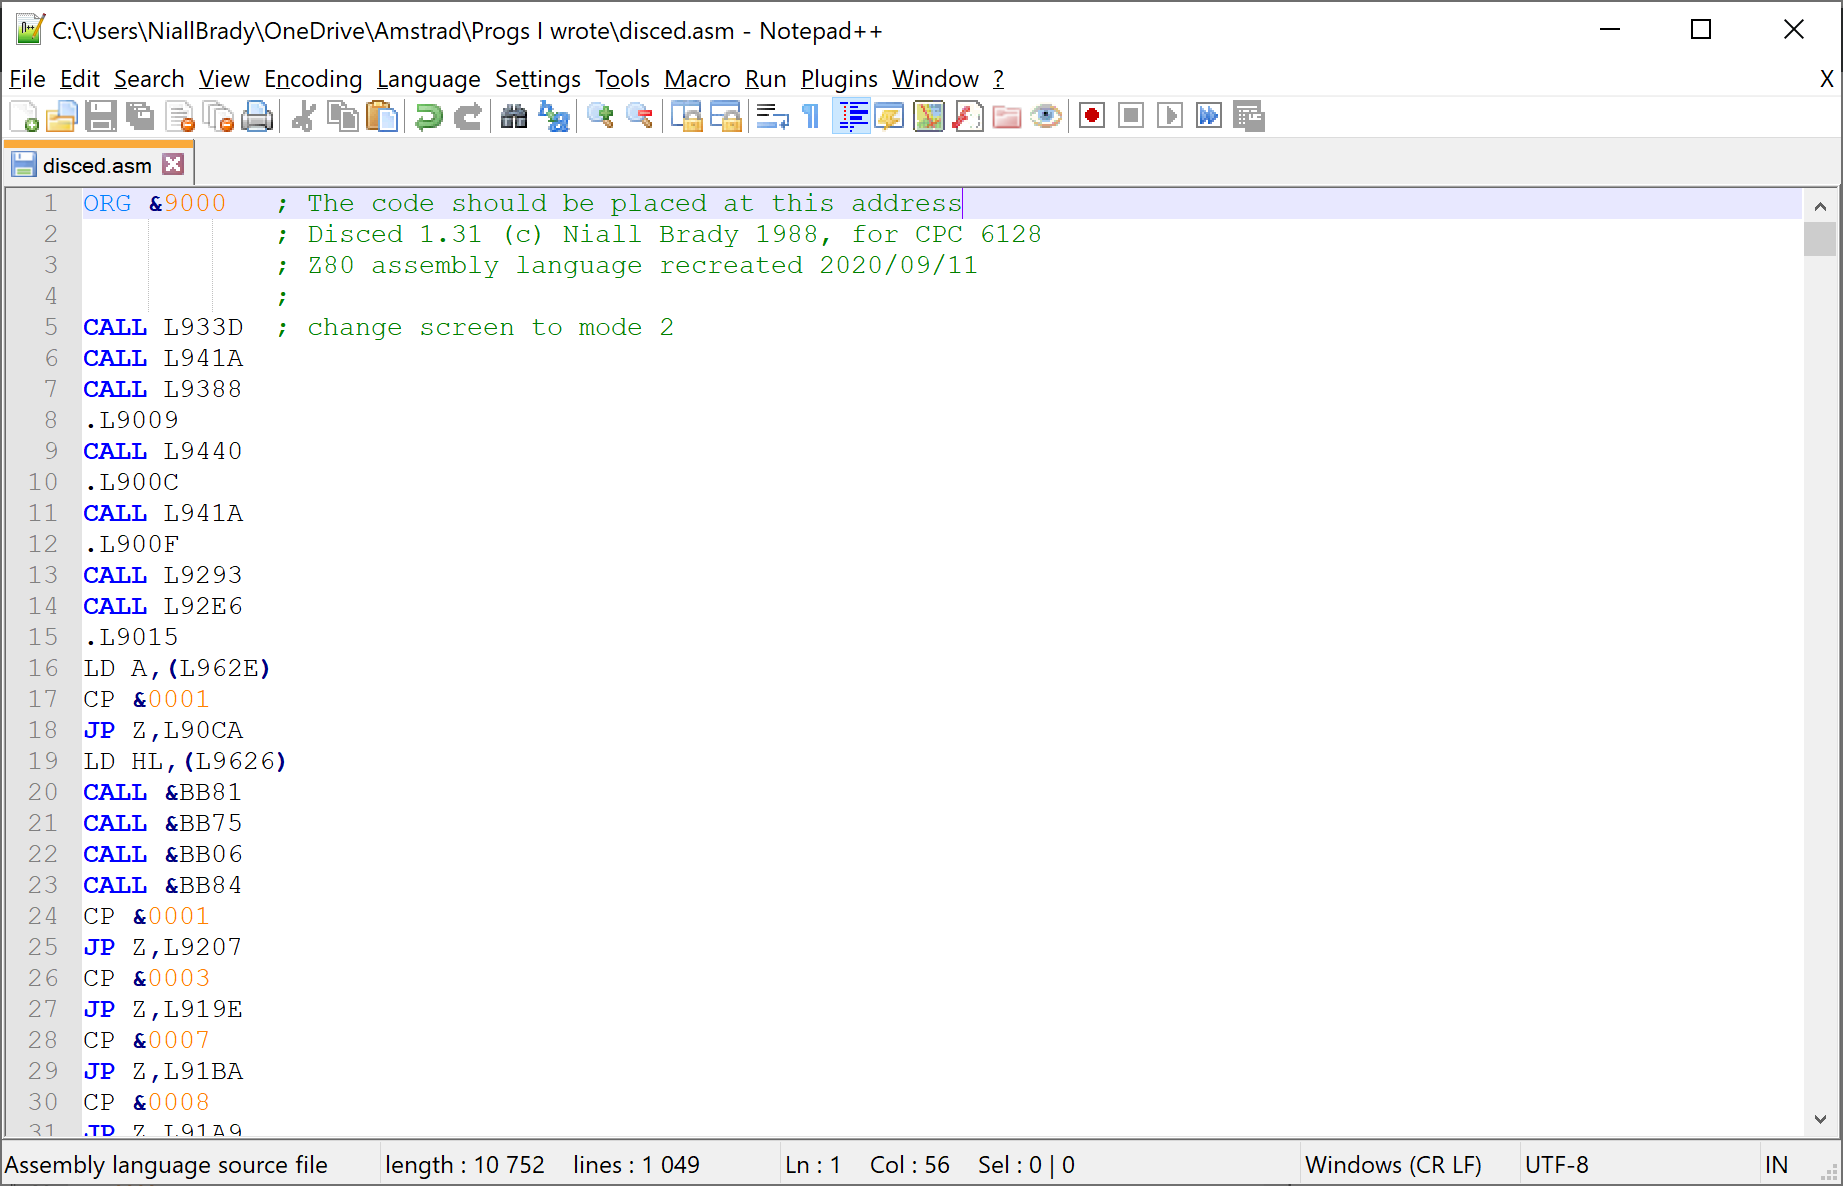
and the first call is to a block of code which loads the A register with a value of &0002 and then calls an Amstrad Firmware Jumpblock which does a mode change, let’s look at that little block of code at L933D
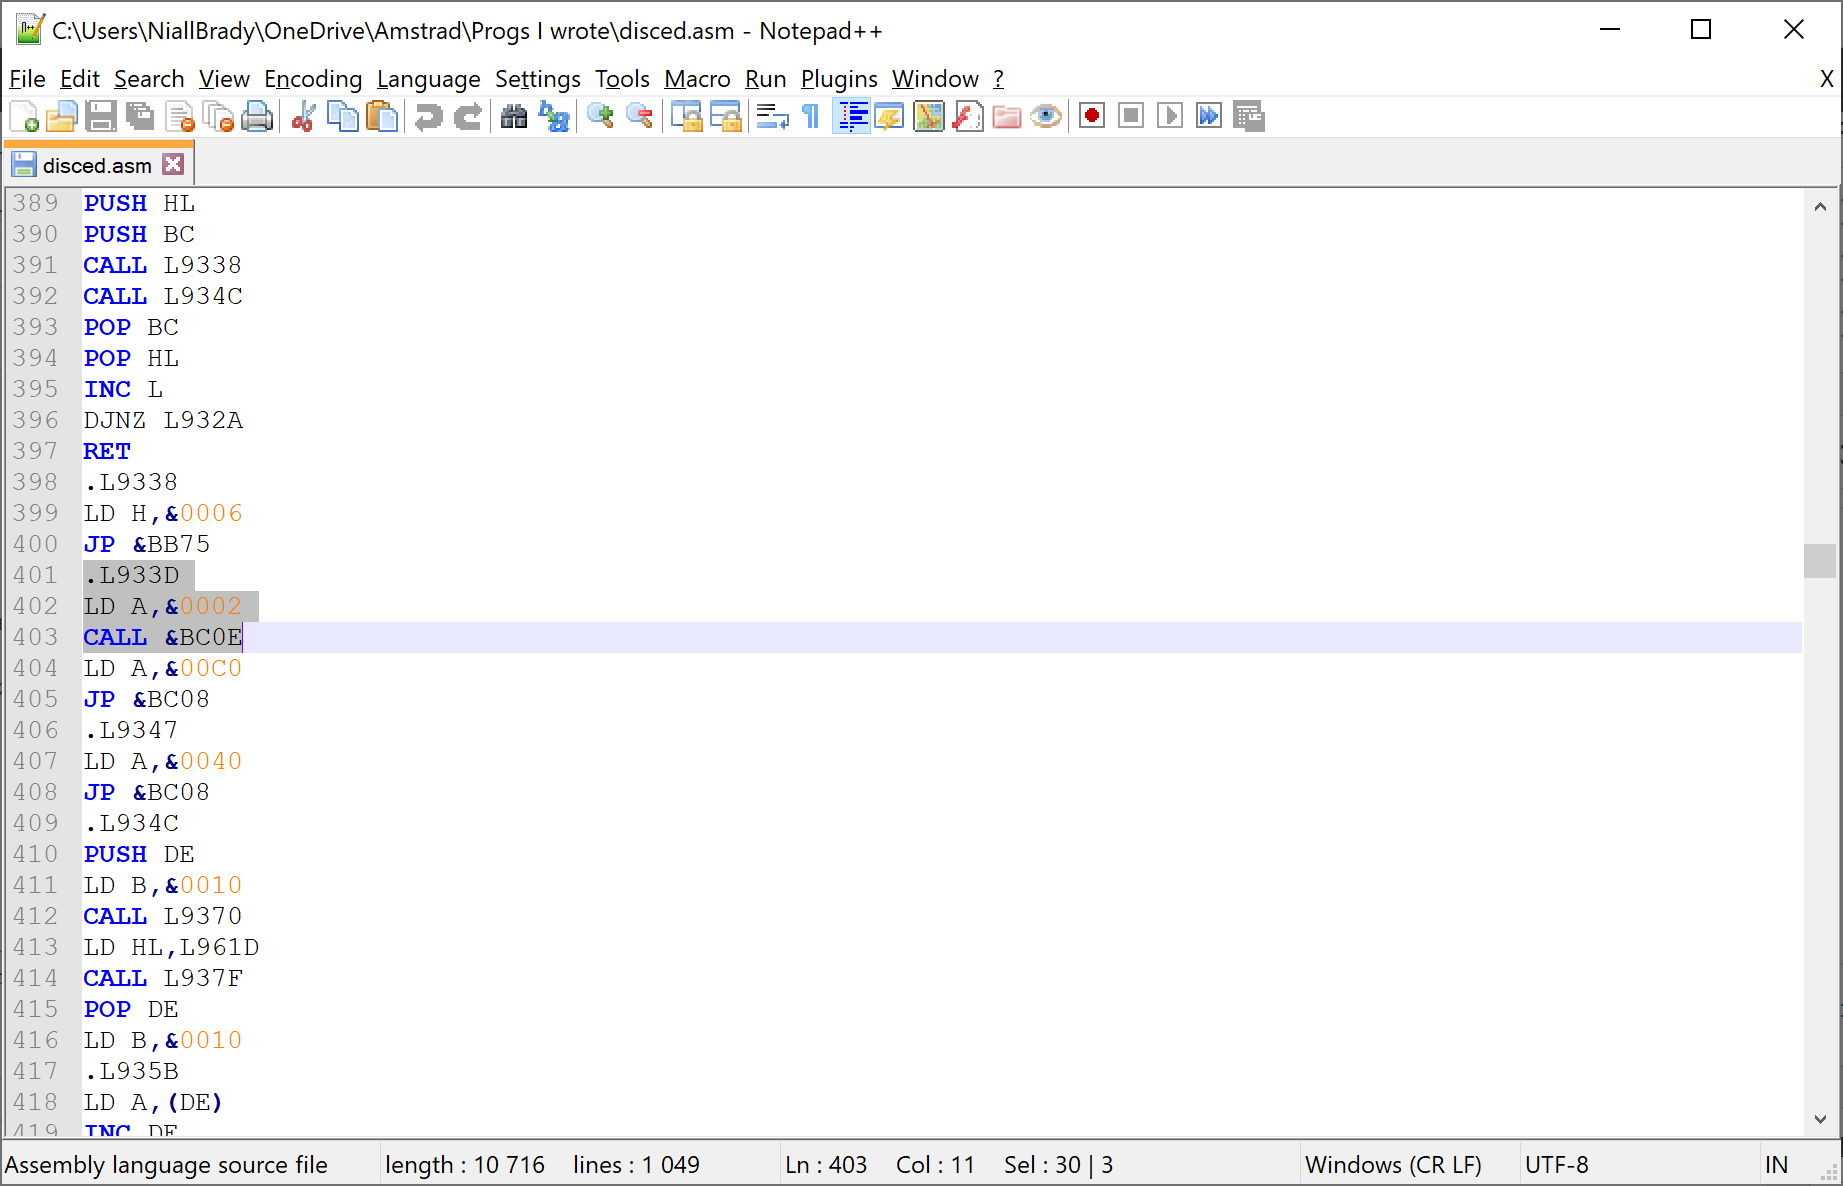
how do I know, because I looked up the codes here.
90 #BC0E SCR SET MODE Set screen into new mode.
So that’s it ! this is the end of Part 1 of this new mini-series, please continue on to Part 2.
Resources
- Learn Z80 programming – https://www.chibiakumas.com/z80/
- Maxam ROM instructions – http://www.cpcwiki.eu/imgs/e/e2/Maxam_Manual.pdf
- Amstrad Firmware Jumpblocks – http://www.cpcwiki.eu/imgs/7/73/S968se14.pdf
- Notepad ++ – https://notepad-plus-plus.org/downloads/
Cheers
Niall
Pingback: Disassembling my old code from 1988 – Part 2 | Amstrad noob
Pingback: Disassembling my old code from 1988 – part 3 | Amstrad noob
Pingback: Disassembling my old code from 1988 – part 4 | Amstrad noob
Pingback: Disassembling my old code from 1988 – part 5 | Amstrad noob
Hälsningar från Linköping!
I was doing some Amstrad-related nostalgia-browsing last night and for some reason Disced popped into my head. So I was amazed when this blog popped up as the first search result.
I got copy of Disced from you back in the day, on cassette (if I remember right), after reading about it in one of the magazines. It was just the thing for exploring disc formats and patching games. It’s interesting to read about you reverse-engineering your own old code.
My old CPC 6128 disappeared, while I was working in Antarctica. My parents decided it was just a waste of space in their attic.
I’ve ended up working with the modern-day equivalent of Z80 assembly programming: embedded C on microcontrollers (although with the relative luxury of megabytes of flash and hundreds of K of RAM).
hi Kevin,
how cool is that ! I’m happy to hear your story, and I hope to continue working on this and release the end-result as soon as i can, stay tuned 🙂 och Hälsningar från Helsingborg !