Introduction
In Part 1 of this series of blog posts I showed you how I started disassembling one of my old programs that I wrote in Z80 Machine code way back in 1988, my end goal is to not only have the source code all clearly laid out and readable, but once it’s done, I want to edit it and re-release it with a 2020 date stamp (assuming I get it finished this year).
Other parts of this series, including this one are listed below.
- Disassembling my old code part 1 – Getting started with WinAPE
- Disassembling my old code part 2 – Setting screen mode & Soft 968 <—- you are here
- Disassembling my old code part 3 – Text operations
- Disassembling my old code part 4 – Set cursor position & disc cache
- Disassembling my old code part 5 – Get Shift key and set translate
- Disassembling my old code part 6 – Processing disc activities
- Disassembling my old code part 7 – Drawing rectangles
- Disassembling my old code part 8 – Processing HEX in the left pane
But it’s harder than I thought, just looking through the code I realize that in order to properly label things in the source code I’ll need to re-learn about Z80 Machine code and how assemblers (like MAXAM which is what I will use to compile it) deal with it, so I’ve started doing that.
For example, I needed to know that the Assembler can use directives in the source code to decide what to do with various data. So how did I find out about that, well there’s a great website called https://archive.org and in there you can search for many things, I searched for Amstrad Assembly
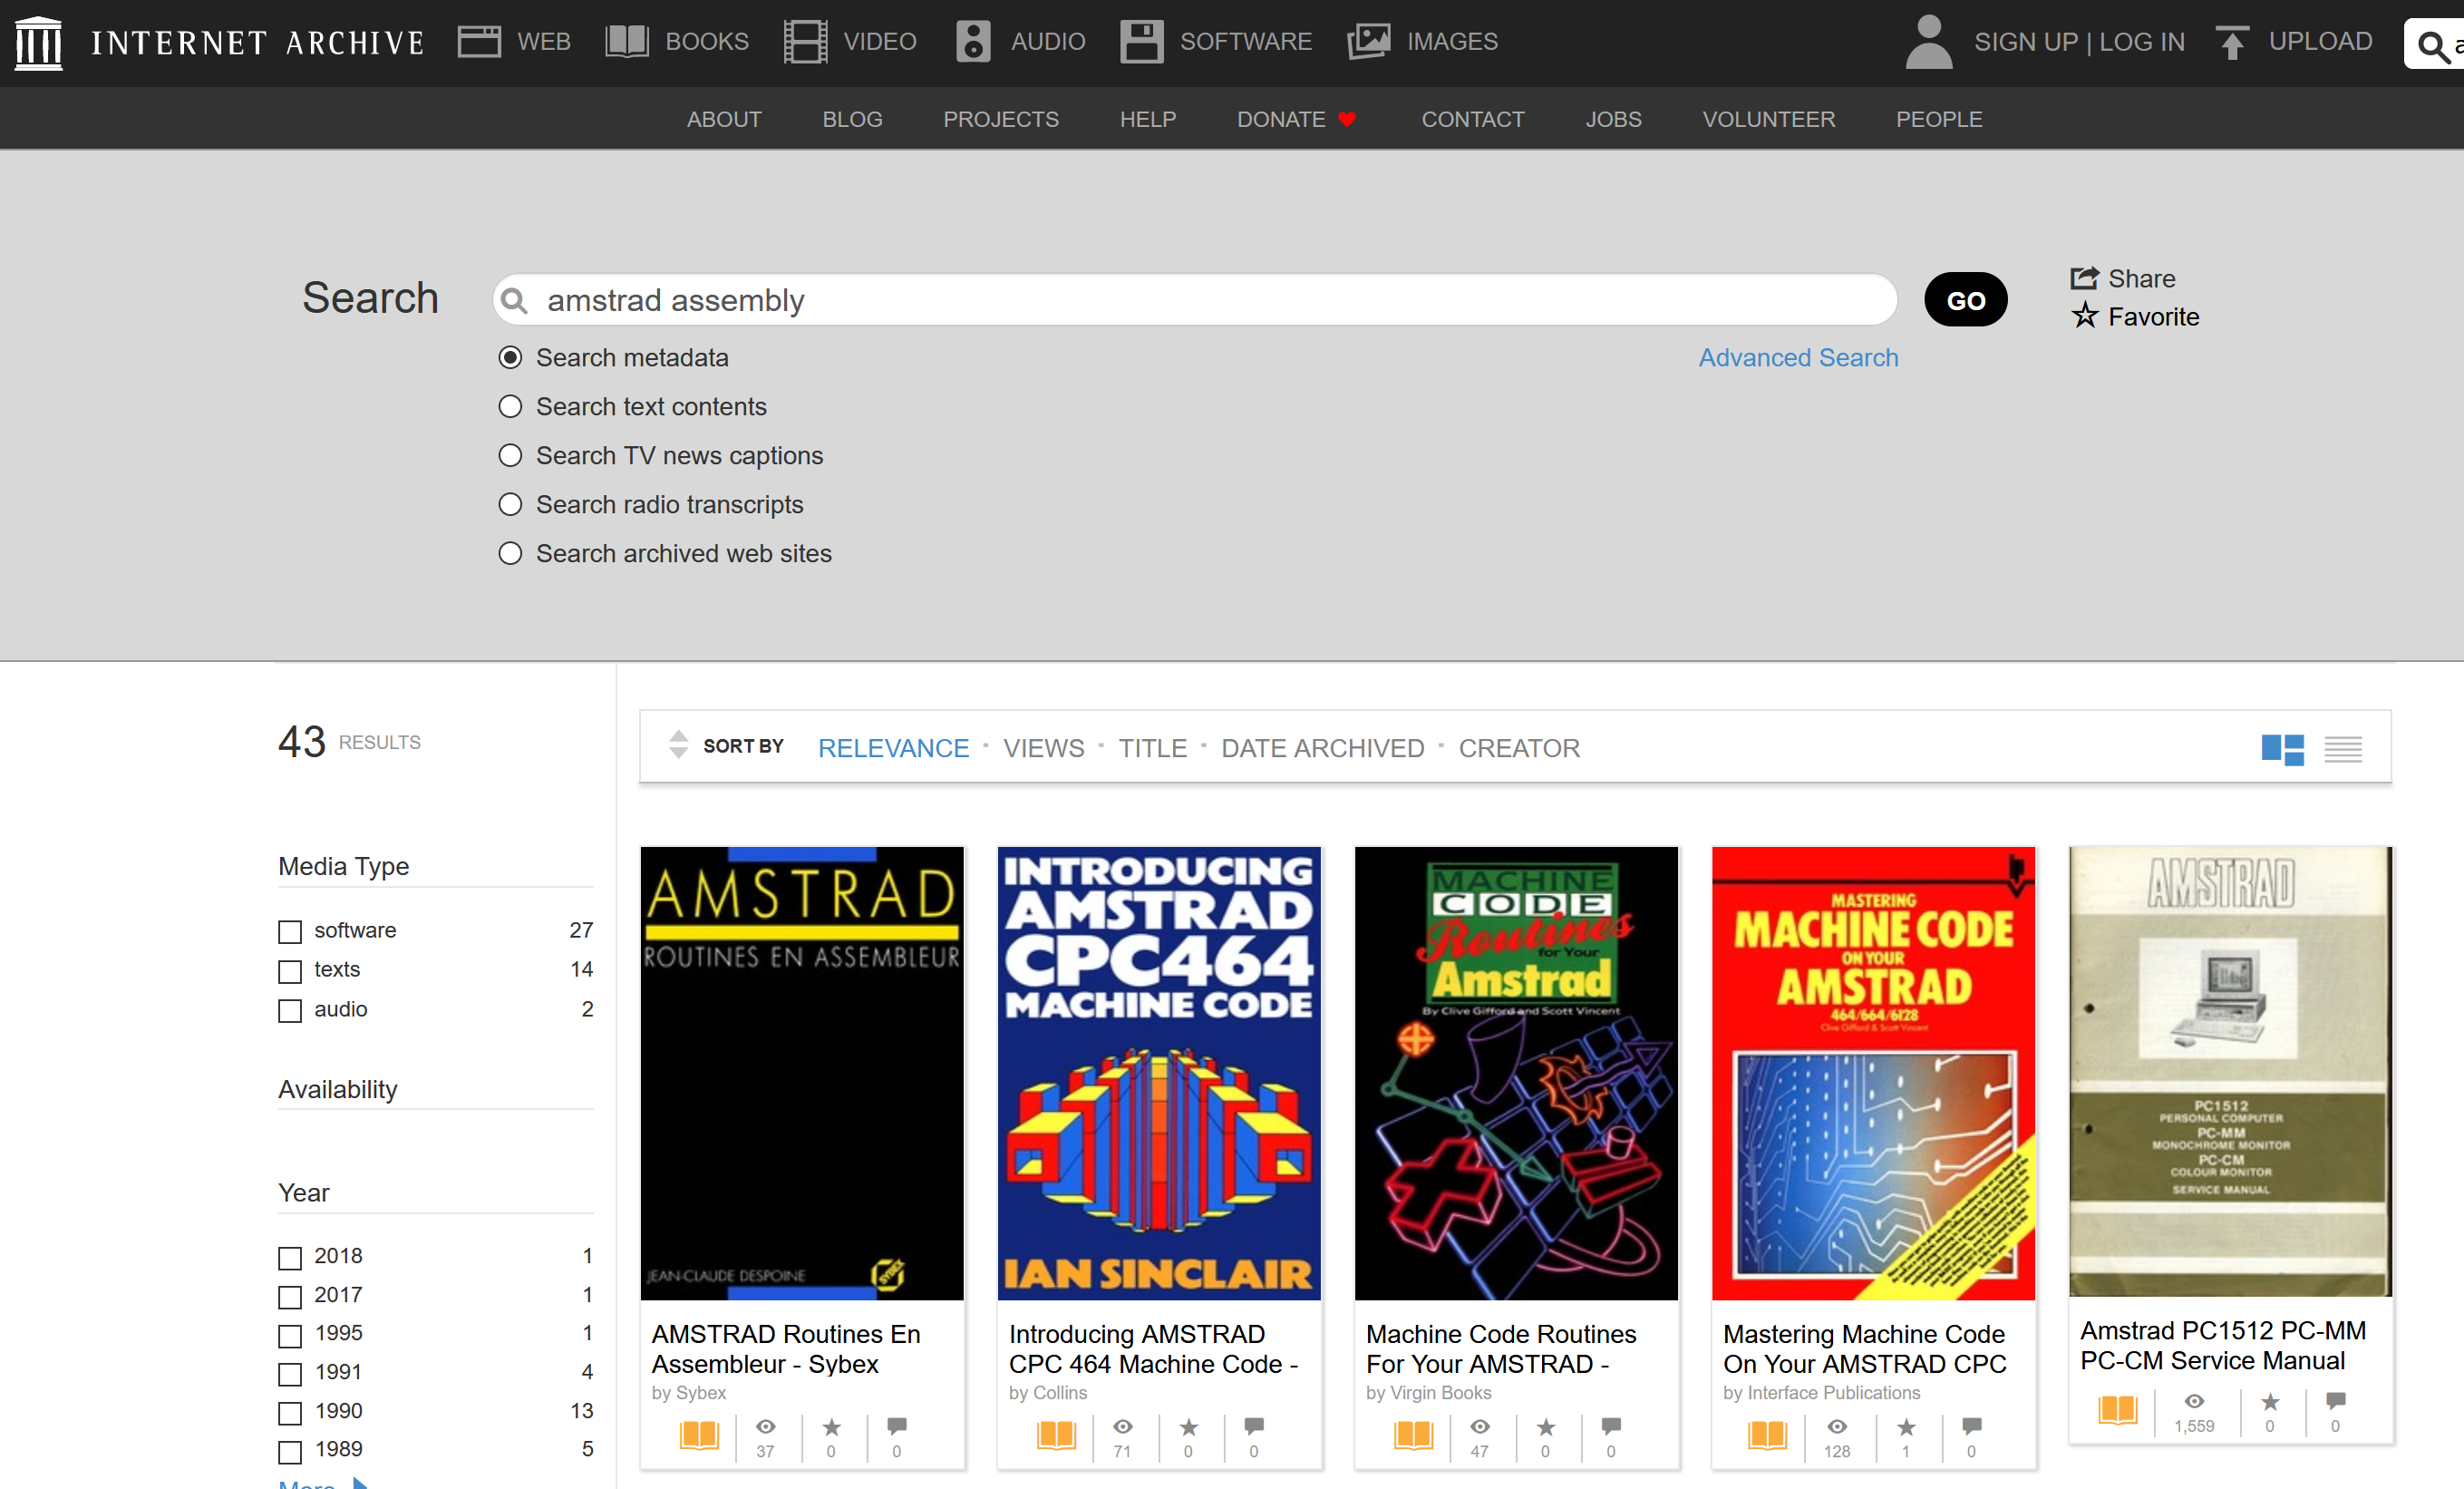
and that revealed quite a few hits, I selected a few of the books listed and found the following page *after searching for DEFB* in a book called Mastering Machine Code on your Amstrad 464 664 6128.

Armed with that knowledge I continued reviewing the disassembled code side by side with the source code and started filling in some data.
Such as the following block of code used for changing the mode to 2 and then setting the ram memory address to &C000.
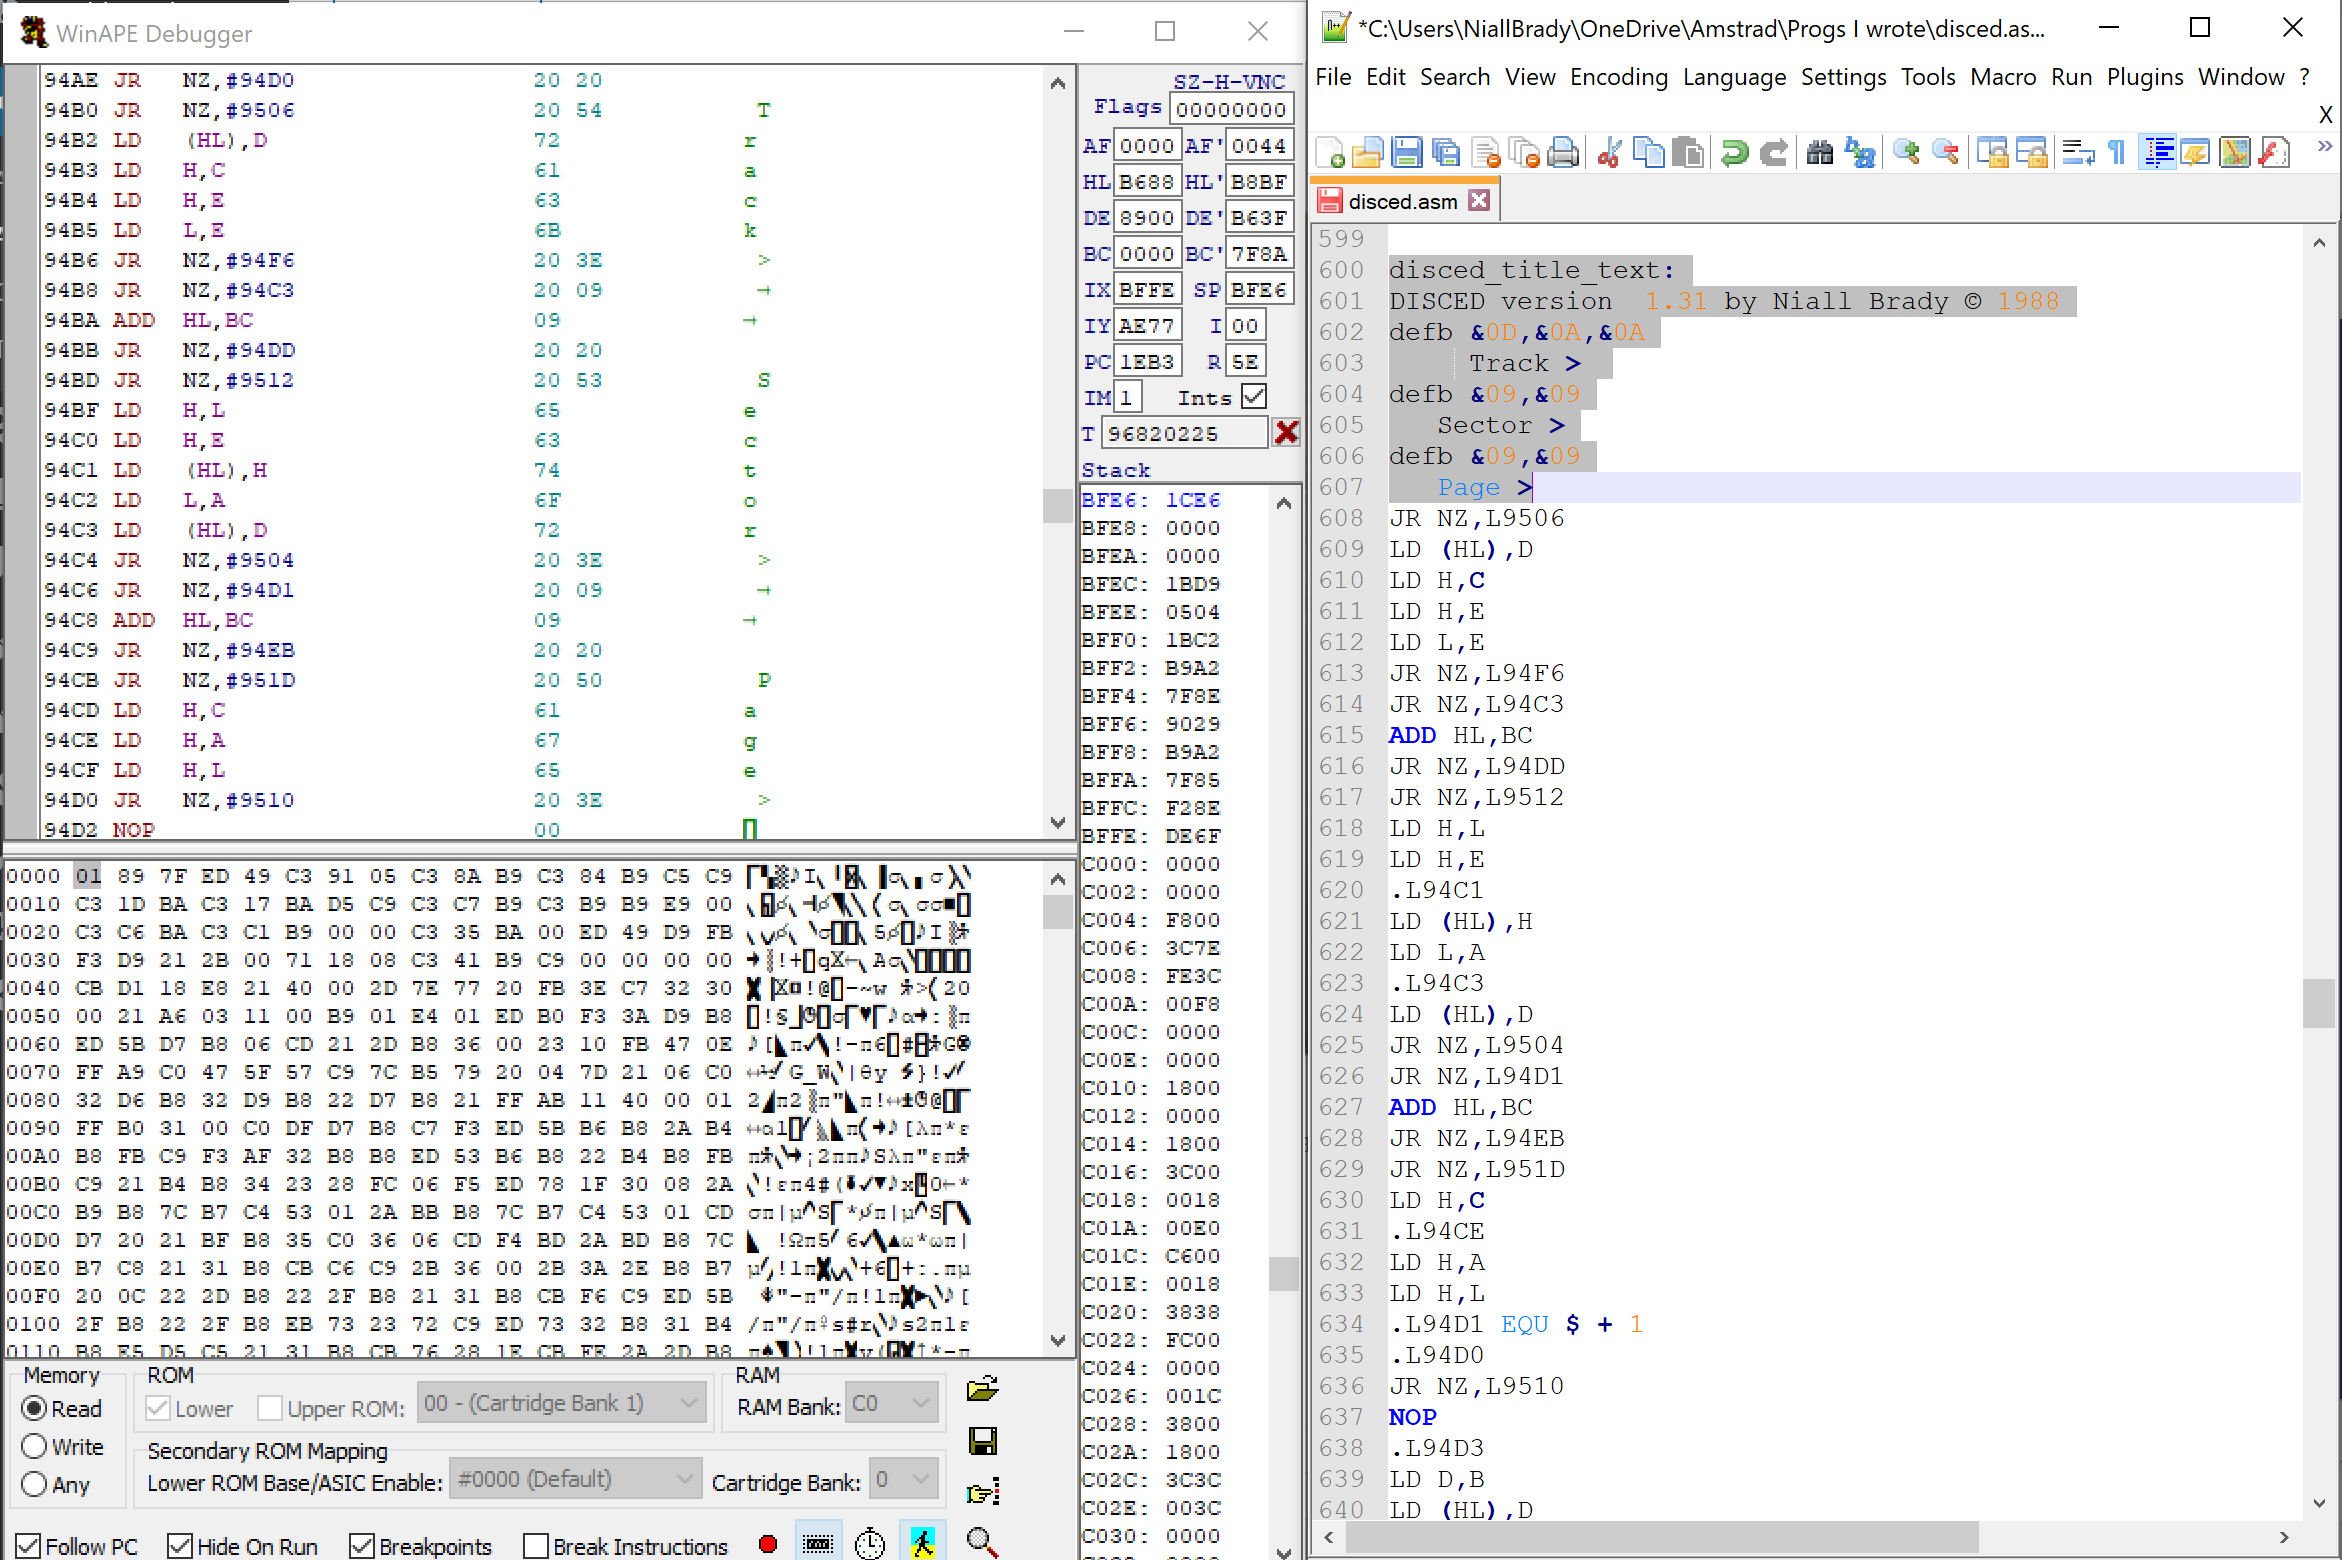
In the screenshot below you can see the WinAPE debugger showing the block of code i’m interested in, and to the right you have the source code opened in the excellent notepad++ which I’m manually editing to add clarity.
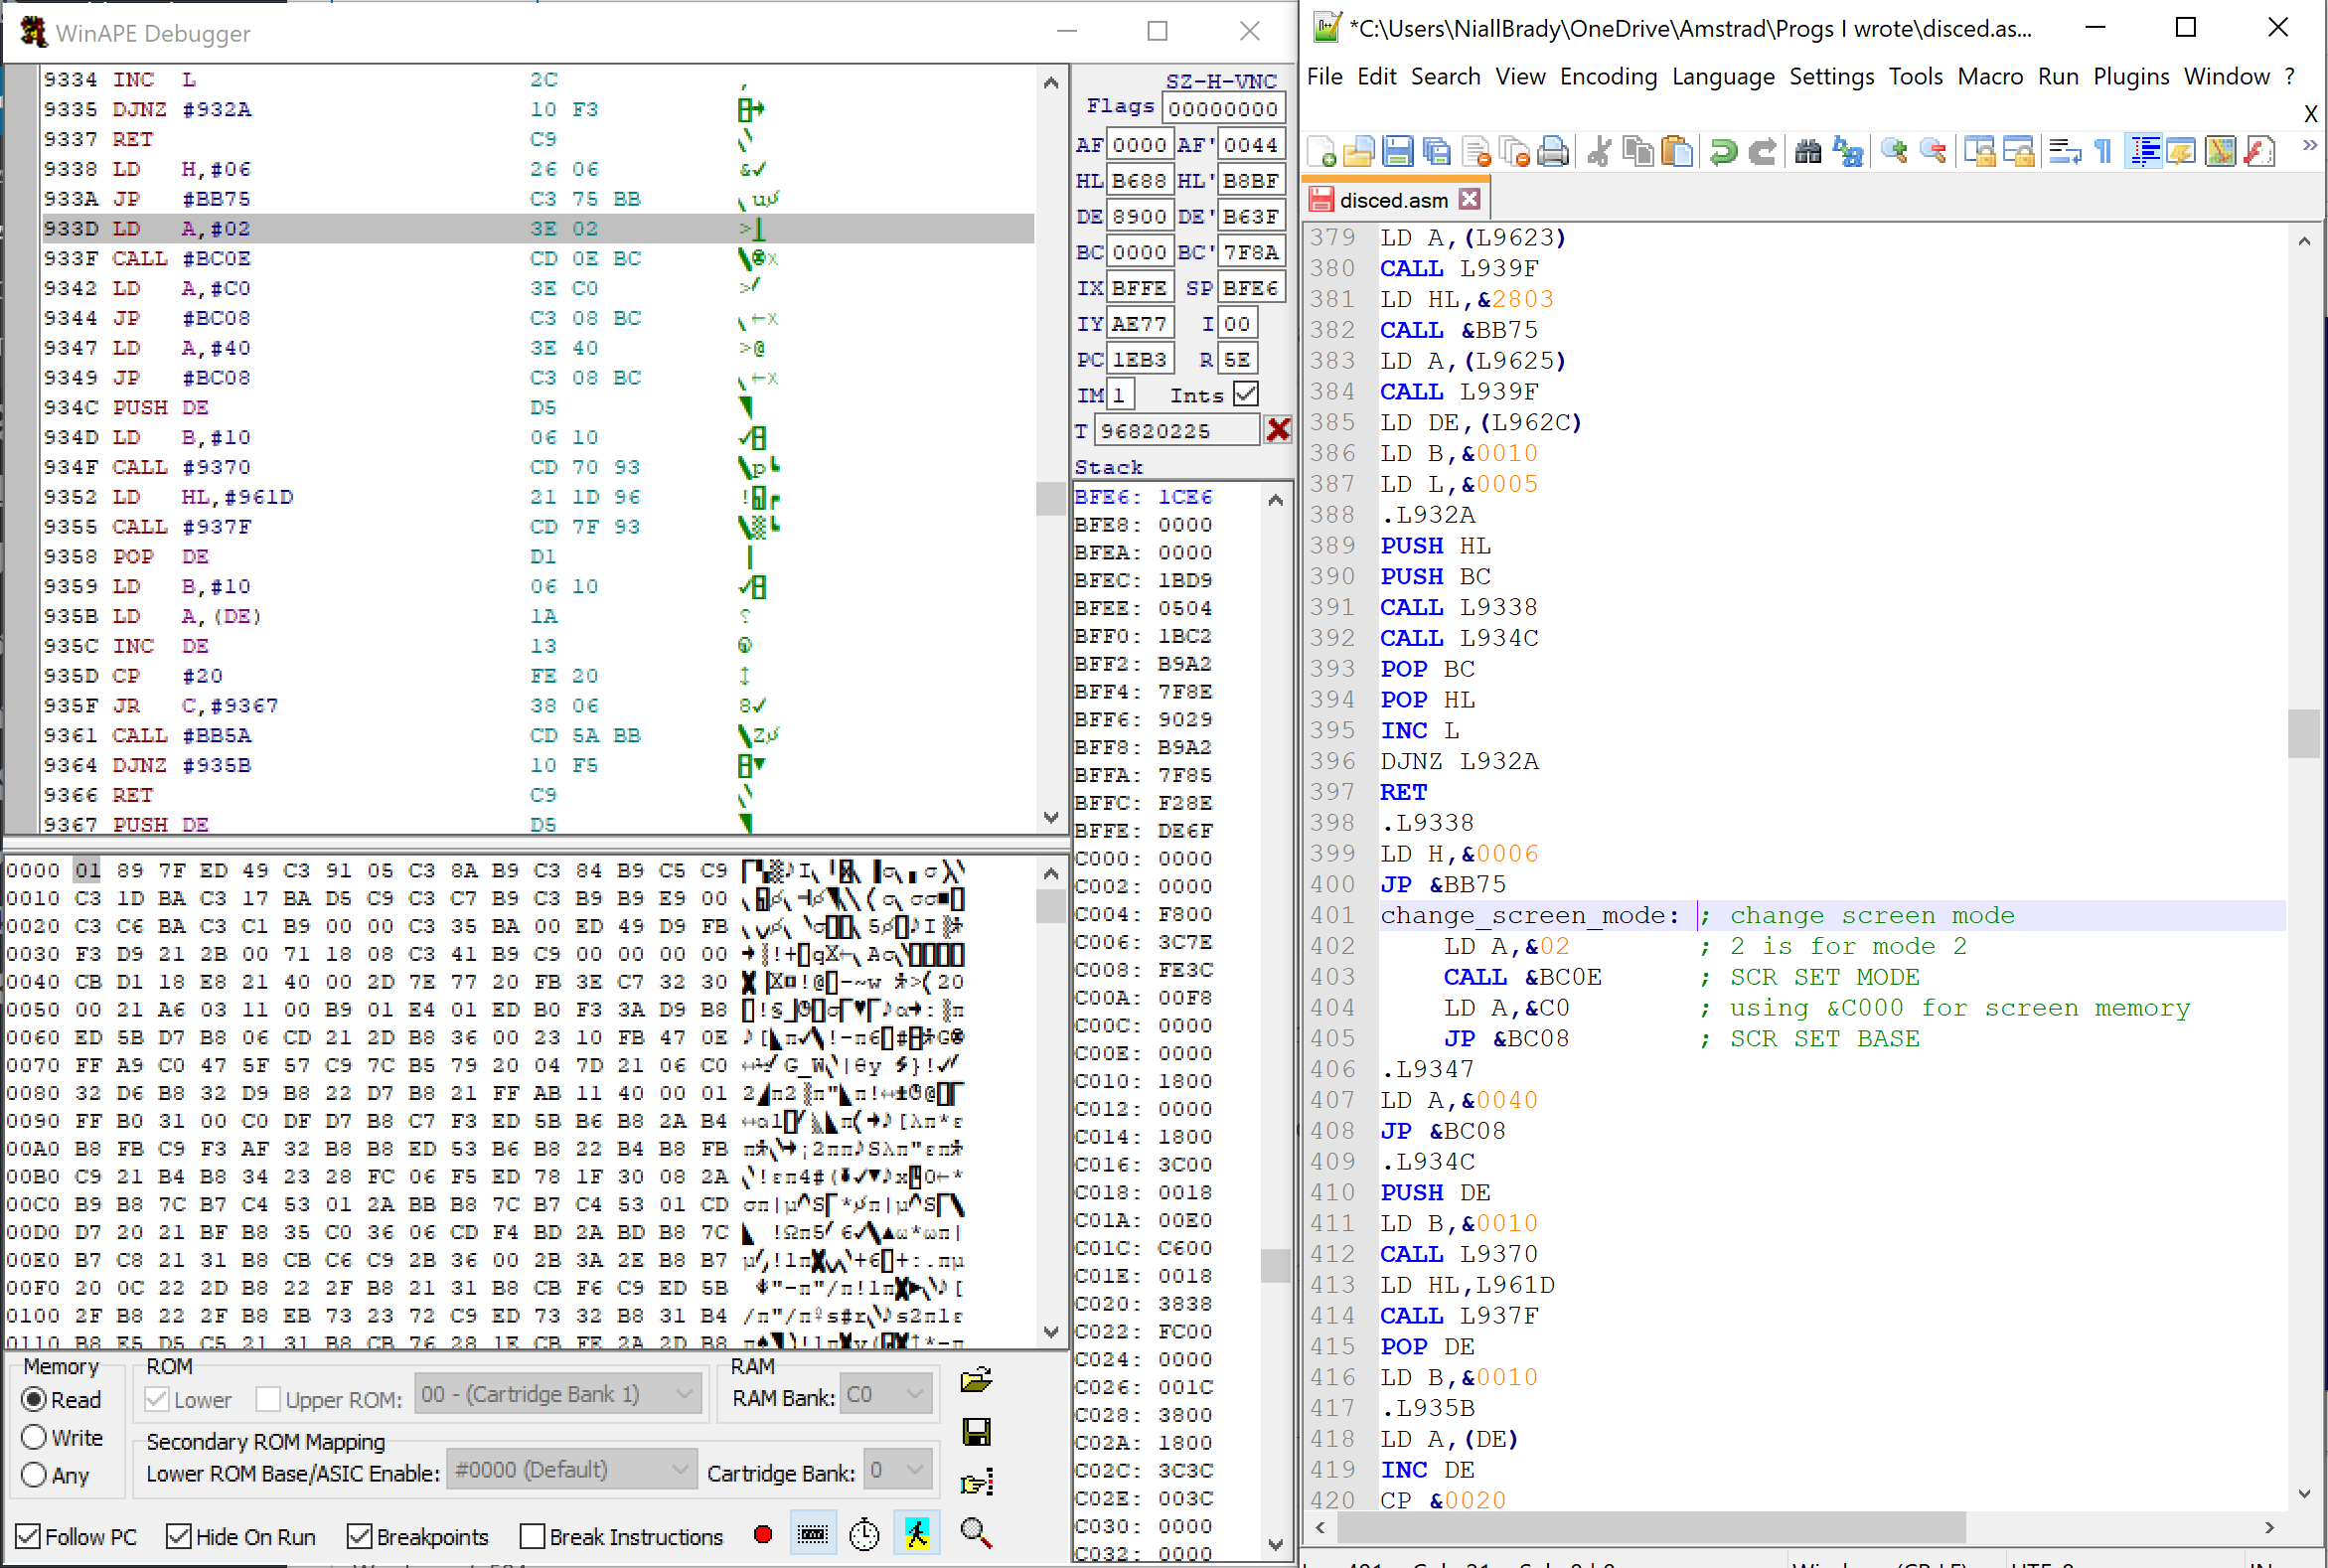
In this very small block of code a few things are happening. First of all the block of code (I’m not sure what we call that yet) is marked with a label which contains some descriptive text and has a colon appended to the label name “:” e.g.
change_screen_mode:
directly after that label, you’ll see I’ve used a semi-colon “;” to allow me to type in clear text and add notes about what each line is doing.
change_screen_mode: ; change screen mode
These are comments to make it clear to me what is happening in certain areas of code.
The label allows you to add labels to blocks of code in your source code and the assembler will rewrite those labels as hard coded addresses when you compile the source code.
As I’m re-learning Z80 machine code and assembly language I need to also understand exactly what each block of code is doing in this program, it’s going to take a lot of time but I think it’ll be worth it (for me at least).
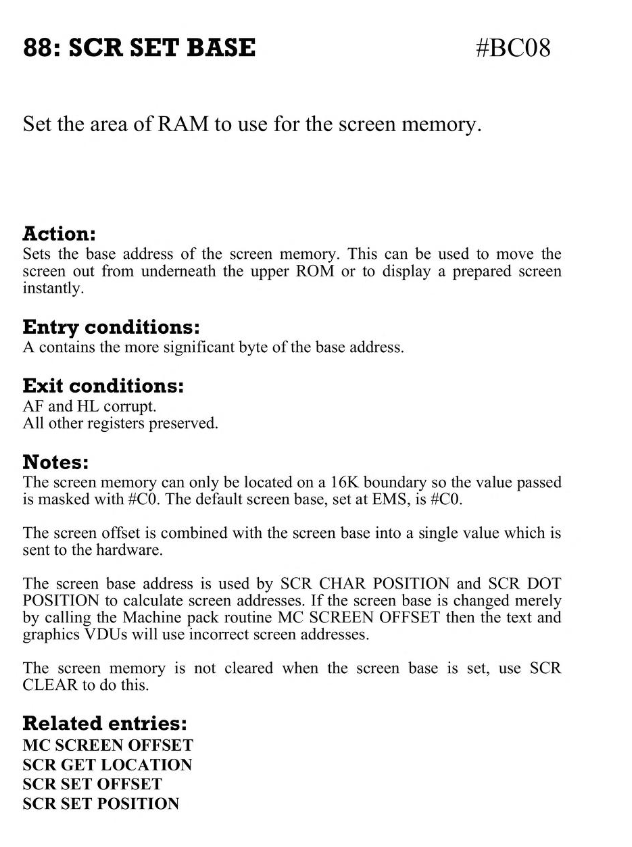
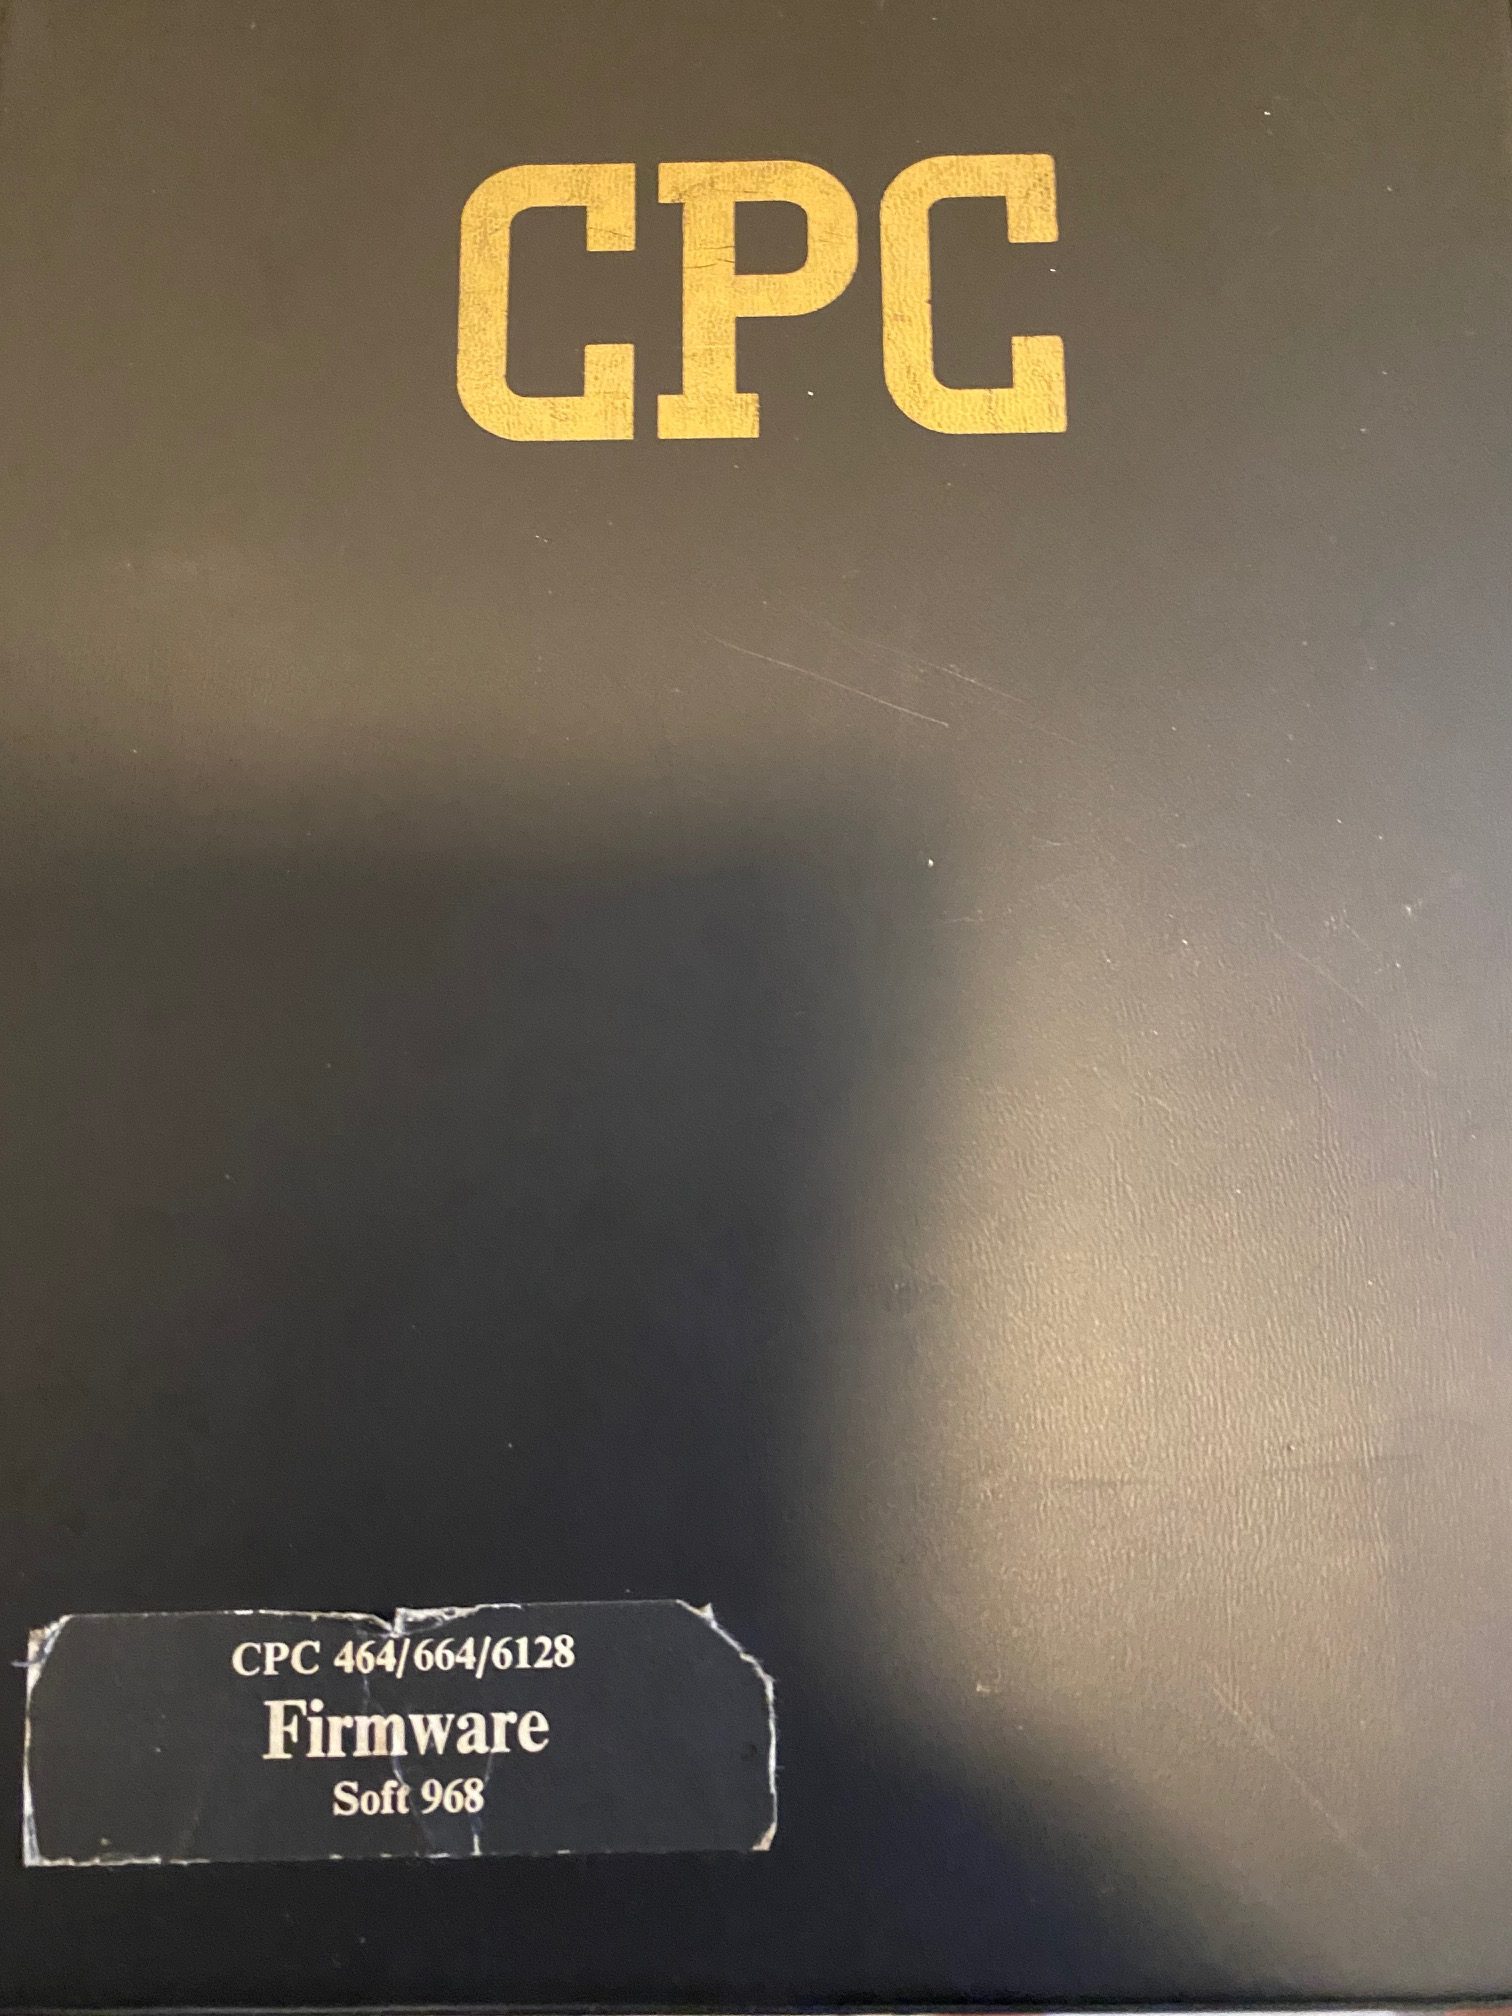
If I look at Soft 968 which describes the innards of the Amstrad Firmware (you can see that book here) you’ll see exactly what the firmware address &BC0e does and what it needs to carry out the function.
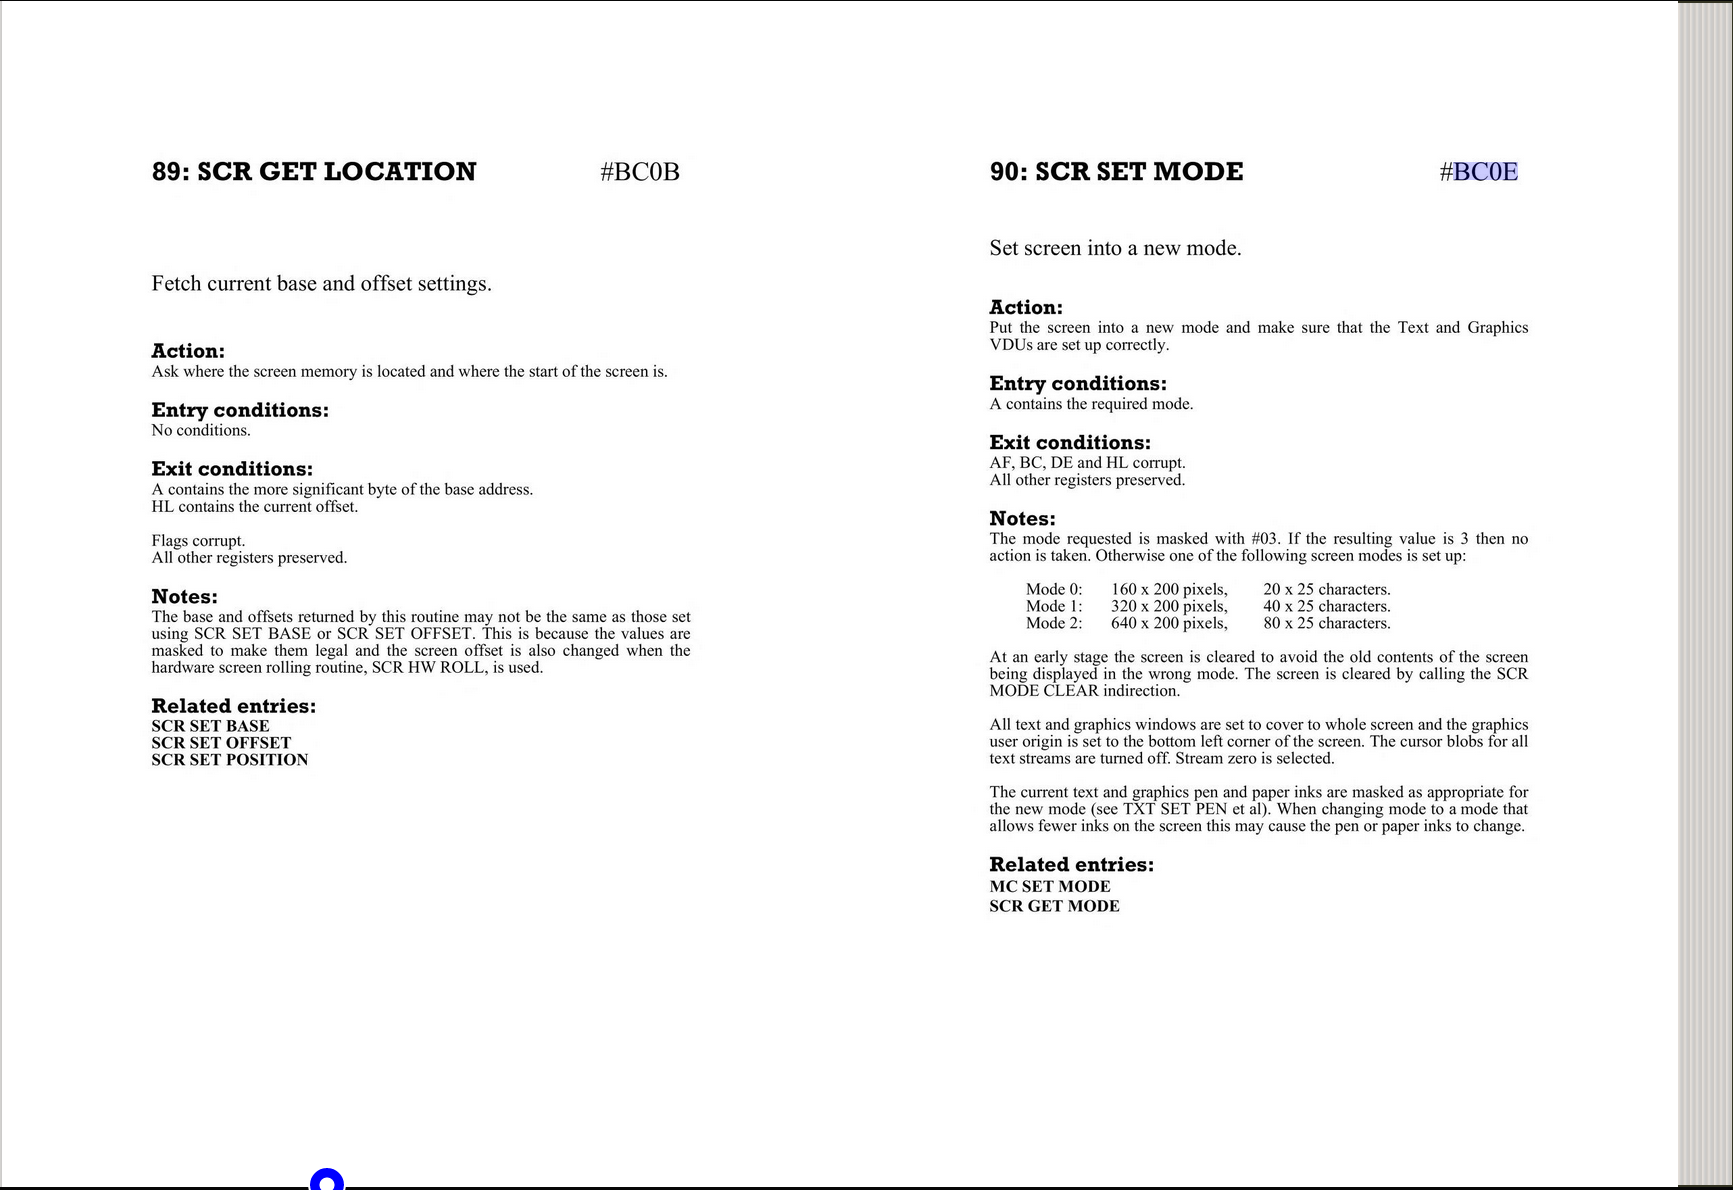
So we can see what this firmware address does. What about the remaining instructions, well I can see that I’m loading the register A with a value of &C0, and then I jump (rather than call) to an address of &BC08.
Here’s what Soft 968 tells us about that firmware call.
How do I actually call my block of code ? It actually happens at the start of the program using a call label format.
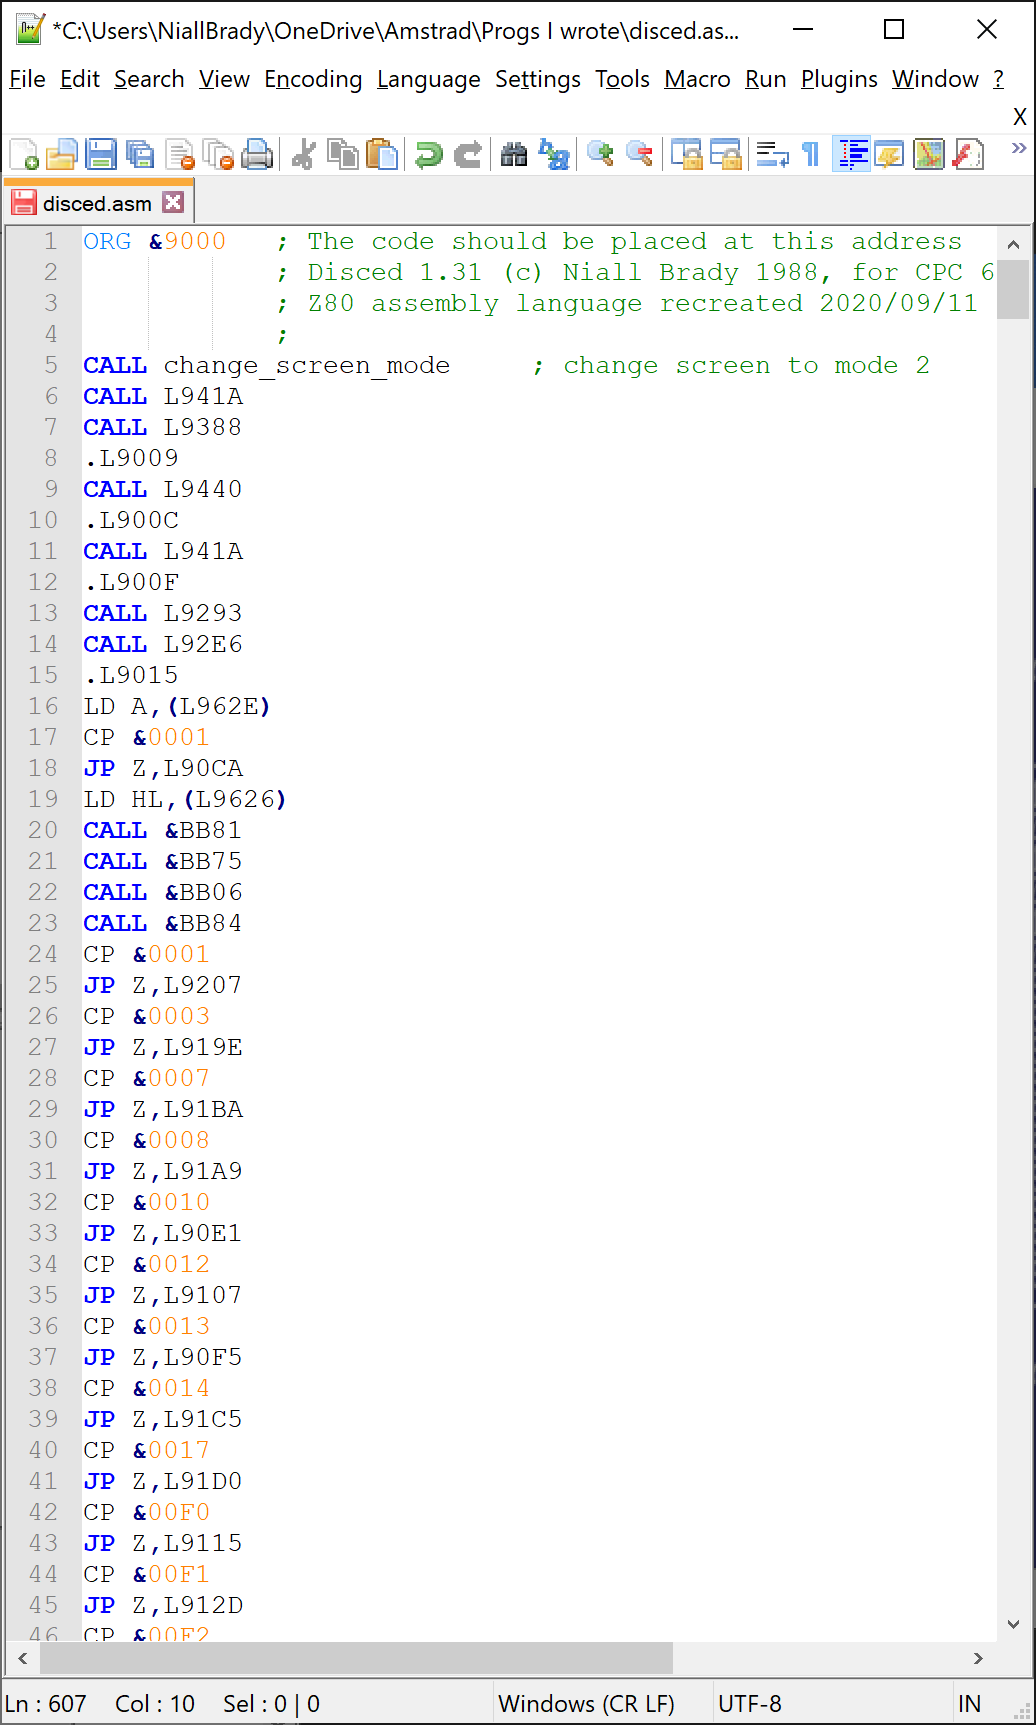
Actually, the change_screen_mode: block of code has me confused as I don’t see how it’s returning back to the source call, there’s no RET statement, but maybe after changing to mode 2 and setting the memory address to C000 the jp doesn’t need a RET.
The data available online for Amstrad is truly impressive and I’m really enjoying re-learning about how this all works. So much so that I purchased an original Soft 968 from Jason Brooks (member of the Amstrad CPC 464 facebook group).
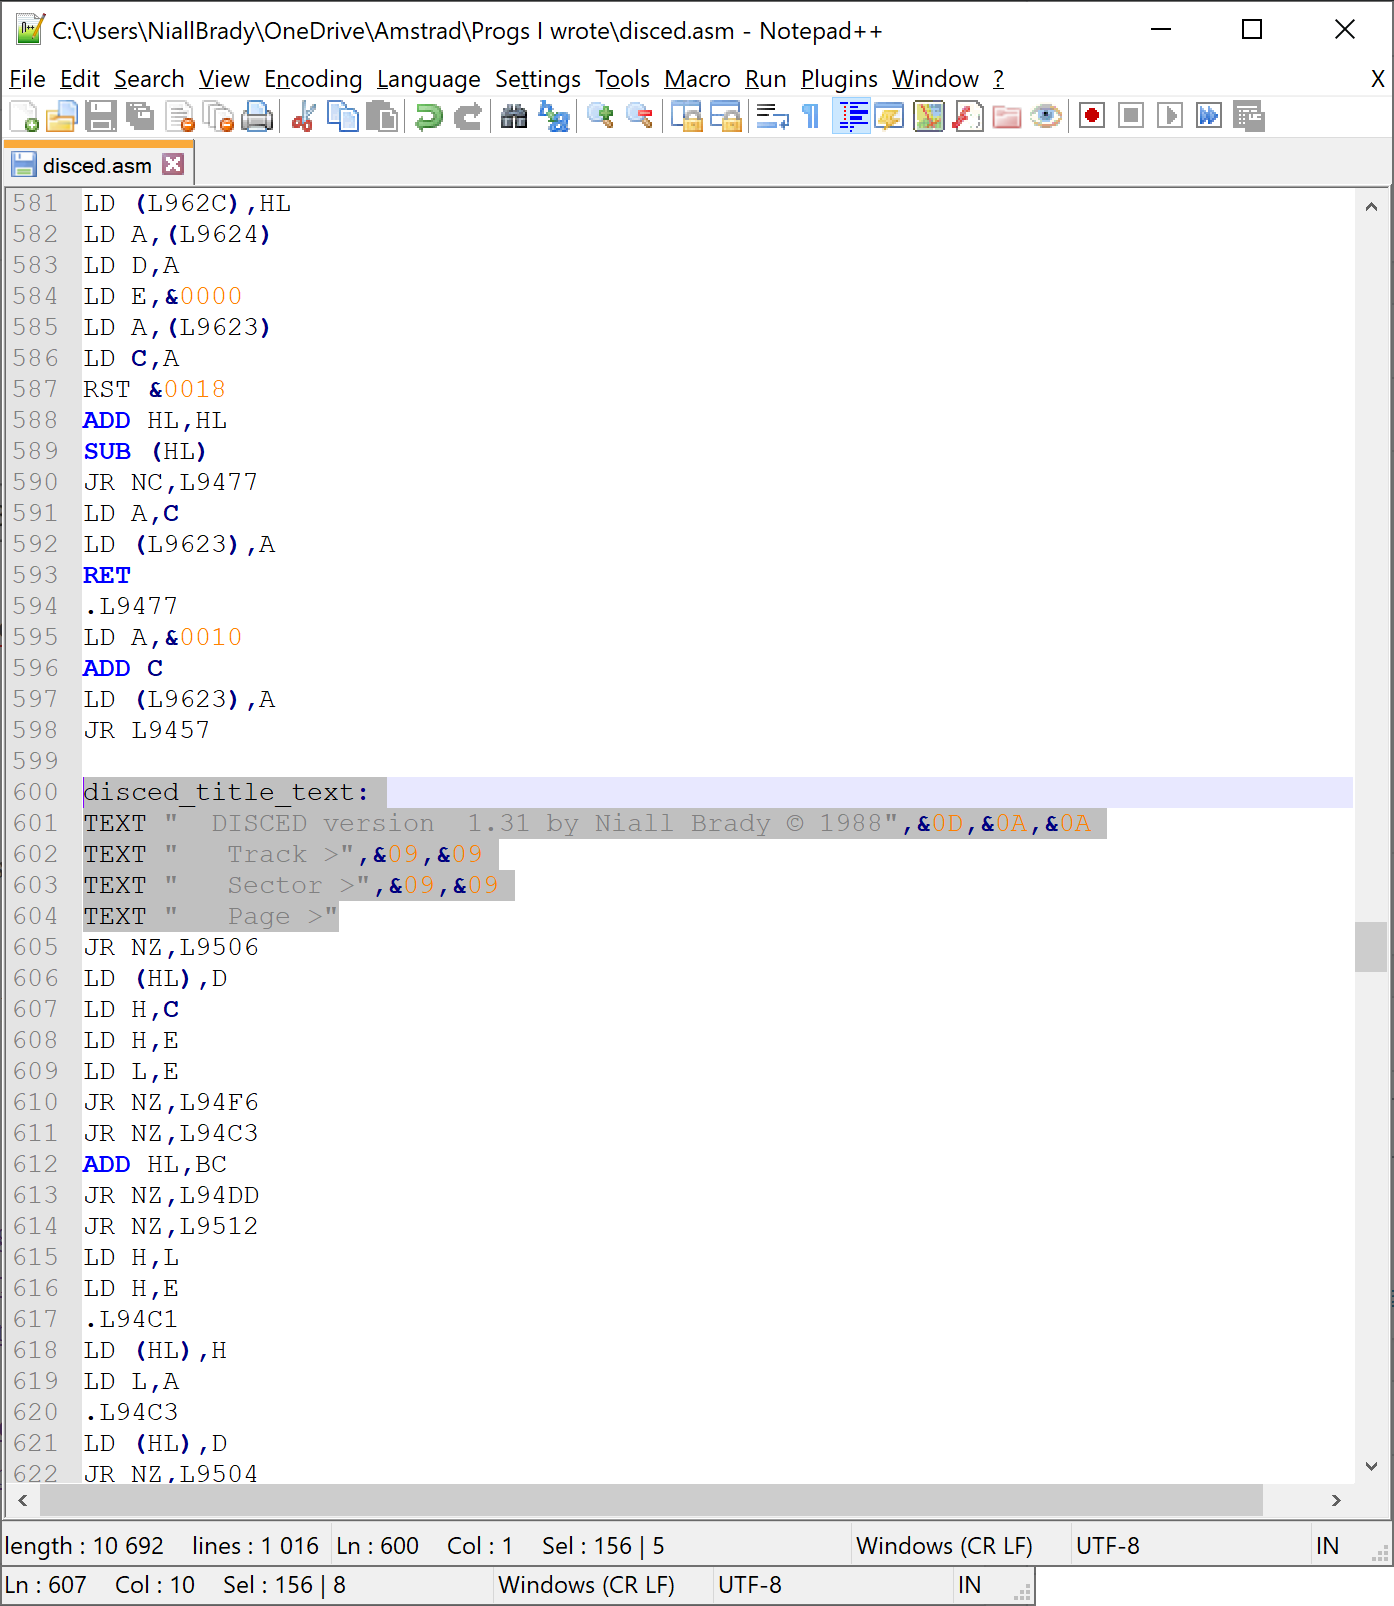
Next I moved on to starting to modify some of the text in the code, as you can see here.
And after chatting with Jason Brooks and Chris Perver in that facebook group, it seems I need to edit this section so it looks something like this, I do recall TEXT being used in Maxam so maybe this is how I did it originally. I won’t really know until I try to compile it later.
So as you can see the progress is slow but I have to relearn all of this while I’m doing it, and I want to be sure I understand everything.
Well that’s it for part 2, please join me in the part 3 and we’ll see how far I’m getting.
Recommended reading
- Mastering Machine Code – https://archive.org/details/mastering-machine-code-on-your-amstrad-cpc-464-664-6128-clive-gifford-scott-vincent-signedacme/mode/2up
- Introducing Amstrad CPC 464 machine code – https://archive.org/details/introducing-amstrad-cpc-464-machine-code-ian-sinclairacme/mode/2up
- Machine code routines for your Amstrad – https://archive.org/details/machine-code-routines-for-your-amstrad-clive-gifford-scott-vincent-signedacme
Pingback: Disassembling my old code from 1988 – part 3 | Amstrad noob
Pingback: Disassembling my old code from 1988 – part 4 | Amstrad noob
Pingback: Disassembling my old code from 1988 – part 5 | Amstrad noob
Pingback: Disassembling my old code part 7 – Drawing rectangles | Amstrad noob
I know this writeup is pretty old right now, but I would love to leave a small hint on why the change_screen_mode function returns to your main code without a RET command.
The reason is, that the RET command POPs the last two bytes from stack and put it into the PC register (ProgramCounter). So if you call a function, PC is pushed to the stack and RET will recall it into PC.
In your example. the calling program is calling change_screen_mode and and the PC was pointing to #1CE6 (the value in the top most stack item, you can see it in the debugger).
Then you first CALL #BC0E to set the screen mode to 2, and then afterwards you JMP into the BC08 function.
At the end of that function is a RET instruction, and as the top most stack address is #1CE6 this RET will actually return to the main code, where you called the change_screen_mode function.
So that is a very common version of doing the combination of CALL + RET directly after the CALL. It is just saving you the one byte of RET instruction and also on RET execution time.
ah yeah that makes sense, thanks Christoph for adding that information, it’s now all coming back to me.
cheers
niall